

Recently I had a need to do some automation against a group of IOS-XE routers and decided I’d like to take another look at using the RESTCONF API that is offered by the devices. In this post, I’ll show how Cisco YANG Suite can help reduce the development effort when working with YANG models and RESTCONF.
Translating YANG Models to RESTCONF
One of the main challenges for me with using RESTCONF in the past has been figuring out the required URL and payload for the requests. For example, a RESTCONF URL to retrieve the configuration of interface GigabitEthernet1 on a router looks like this: /data/ietf-interfaces:interfaces/interface=GigabitEthernet1, but how are the components of that URL built? Cisco’s Hank Preston wrote a very thorough and helpful blog post that explains how the YANG tree is mapped into a URL, and it is a great reference to gain further understanding.
Even with an understanding of how the URL and payloads are built from the YANG models, the process of figuring them out involves downloading, examining, and interpreting manually the YANG model file(s) for the particular feature you are trying to work with on the router. For me there was always a painful and usually time-consuming process of inspecting YANG model(s) in a text editor, and then going through trial and error until I finally managed to build the correct URL and payload to configure a feature. I thought, if only the router had a Swagger API documentation page that provided the URL and required payload like other APIs I have worked with, things would be so much easier!
Cisco YANG Suite is a tool that can provide that functionality and more! In this post, I’ll first explain how to get up and running quickly with Cisco YANG Suite. Then I’ll walk through an example scenario of using YANG Suite to automatically generate the appropriate RESTCONF calls, eliminating the need to open and interpret any YANG model files in a text editor.
Installing YANG Suite
Cisco YANG Suite can be run as a Docker container locally on your machine, which requires that you have Docker Desktop installed. For other installation options, please see the YANG Suite documentation. The first step is downloading the code to your machine from the GitHub repository. The best way to do that is with the Git command line utility, using the command:
git clone https://github.com/CiscoDevNet/yangsuite/
You will now have a yangsuite directory. Change to the directory yangsuite/docker. Here you will find the setup script start_yang_suite.sh. Execute the script to begin setup.
$ ./start_yang_suite.sh

Hello, please setup YANG Suite admin user.
username: admin
password:
confirm password:
email: matt.mullen@networktocode.com
The script prompts for definition of superuser credentials and asks whether you want to generate “test” certificates. Test certificates are self-signed certificates that are used for SSL and are automatically generated by the script. Since we are only using YANG Suite on the local machine, self-signed certificates will be fine here.
Setup test certificates? (y/n): y

################################################################
## Generating self-signed certificates...                    ##
##                                                            ##
## WARNING: Obtain certificates from a trusted authority!     ##
##                                                            ##
## NOTE: Some browsers may still reject these certificates!!  ##
################################################################

Generating a 2048 bit RSA private key
......................................................+++
.......+++
writing new private key to 'nginx/nginx-self-signed.key'
-----
You are about to be asked to enter information that will be incorporated
into your certificate request.
What you are about to enter is what is called a Distinguished Name or a DN.
There are quite a few fields but you can leave some blank
For some fields there will be a default value,
If you enter '.', the field will be left blank.
-----
Country Name (2 letter code) []:US
State or Province Name (full name) []:NC
Locality Name (eg, city) []:Raleigh
Organization Name (eg, company) []:Network to Code
Organizational Unit Name (eg, section) []:
Common Name (eg, fully qualified host name) []:
Email Address []:
Certificates generated...
Building docker containers...
Once you enter the certificate details, the containers begin launching. The containers will be running interactively in your terminal, so you must leave the terminal window where you ran the script open. Once the activity in the terminal has stopped scrolling, the containers should be running and YANG Suite will be available at the URL: https://localhost:8443.
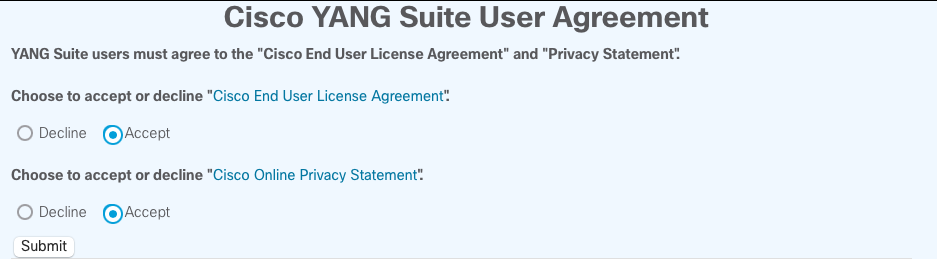
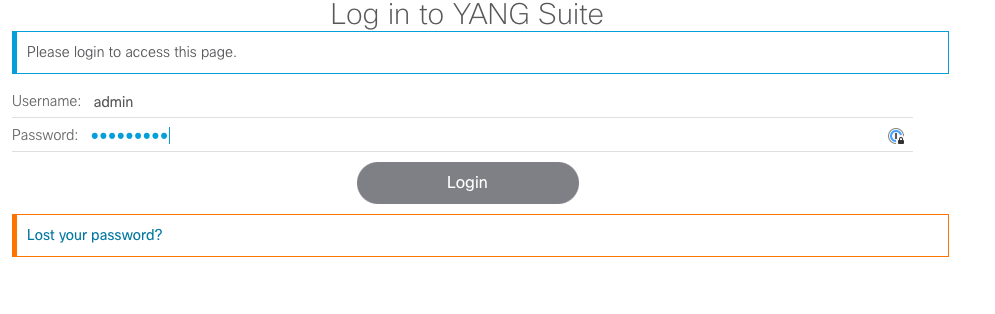
Upon accessing the above URL for the first time, you will be prompted to accept the YANG Suite License and Privacy statement. Assuming you agree to the legal mumbo jumbo, click Accept and log in with the superuser credentials you defined during the setup script.
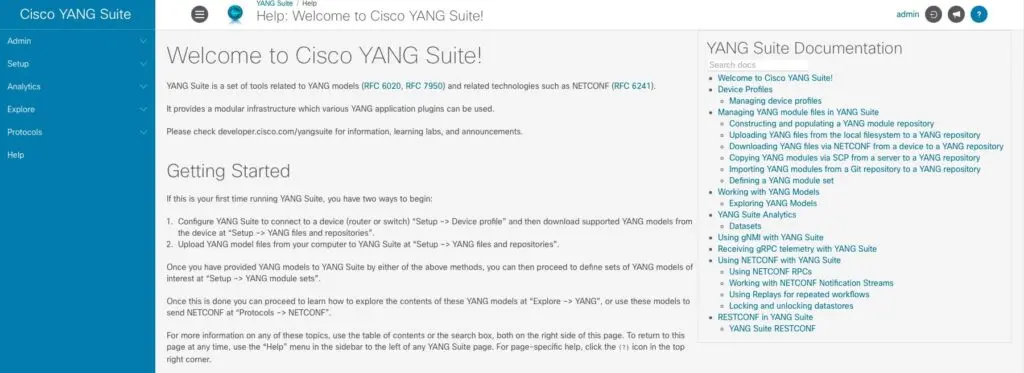
Upon successful login, you will be at the Welcome screen.
YANG Suite Initial Setup
There are a few one-time setup tasks that we must do in order to begin using YANG Suite:
- Define a Device Profile
- Create a YANG Module Repository
- Create a YANG Module Set
The examples in this post are using the IOS-XE Always-On sandbox, which consists of a CSR1000V router with programmability features such as
NETCONFandRESTCONFenabled and ready for use. You can find the credentials and other related information in the IOS-XE Always-On DevNet Sandbox.
Device Profile
The first thing we need to do is download YANG models to work with. This can be accomplished by either uploading the YANG models from your system, or by downloading them from an existing device on the network. We’ll go ahead and download the models from the router in the IOS-XE Always-On sandbox (https://sandbox-iosxe-latest-1.cisco.com). To do that, we will create a Device Profile.
Click on Setup > Device Profiles and then Create New Device. Then enter the details for the IOS XE sandbox:
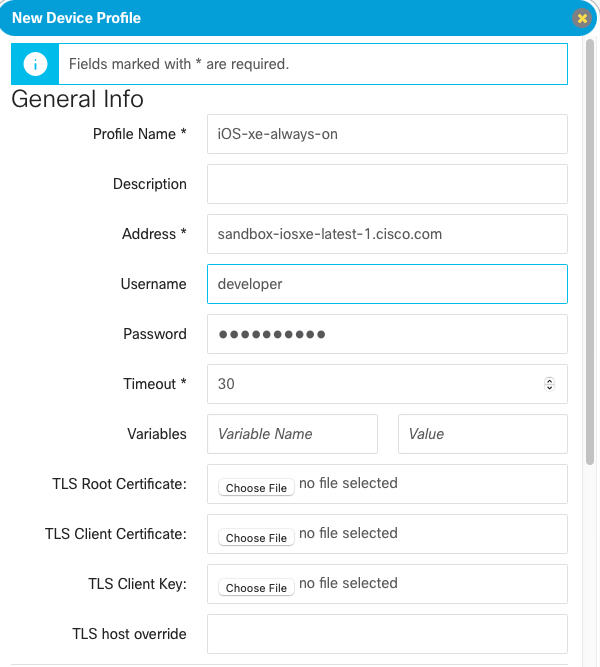
Ignore the “Invalid IP Address” error when entering the hostname into the Address field. This appears to be a bug.
It is also necessary to scroll down and enable the NETCONF and RESTCONF protocols. Make sure to check the Skip SSH key validation for this device checkbox under the NETCONF section. Once complete, click Create Profile.

YANG Module Repository
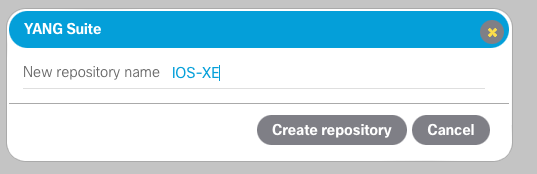
Next we must set up a YANG module repository to store the models. Click on Setup > YANG files and repositories. Then click New repository.

We’ll give this repo the name “IOS-XE”.
On the next screen, select NETCONF and then select the device profile that we just created. Then click Get schema list.

We could filter and select various models if desired, which would save time, but we’ll go ahead and download them all. Click on Select all and then Download selected schemas. This will take a few minutes. As the modules are downloading, you can see the logs on the terminal where we launched the containers. It won’t be necessary to redo this if you shut down the containers or need to reboot your machine because the files are stored inside a Docker volume.
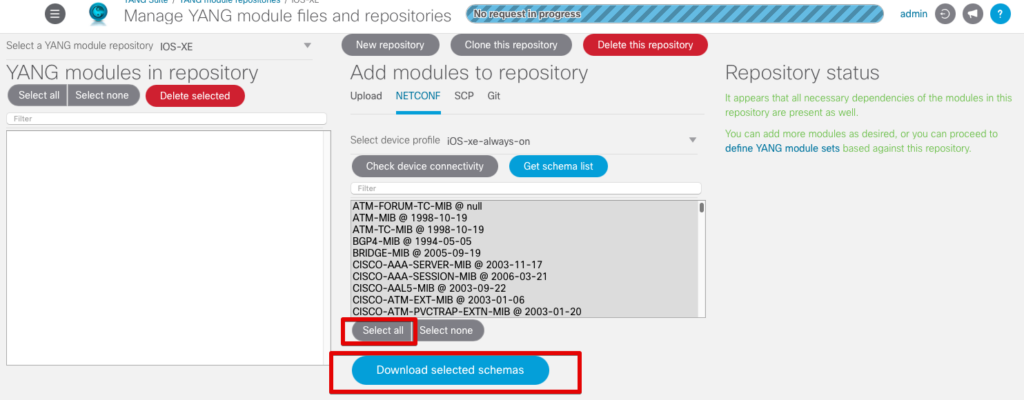
When complete, you should see a dialogue indicating the number of modules added, and all of the modules listed in the YANG modules in repository section, as shown below.

YANG Module Set
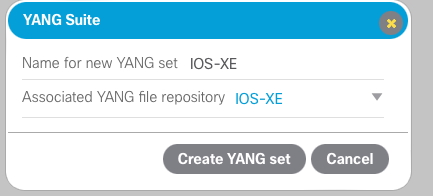
Click on Setup > YANG module sets and click New YANG set. Then give the YANG set a descriptive name.
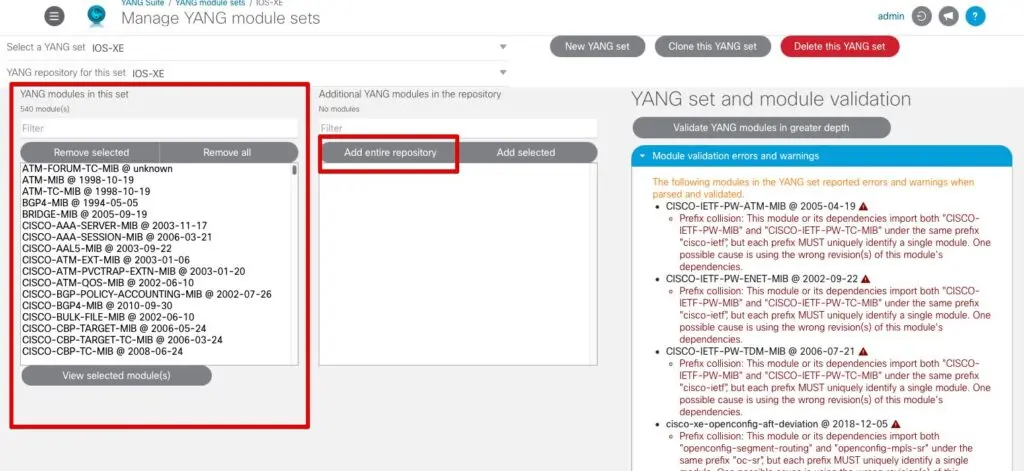
Next, click Add entire repository to add all modules to this YANG set. The modules should all be moved to the left-hand pane under YANG modules in this set. We won’t be needing any of the models referenced in the warnings panel on the right, so the warnings can be safely ignored.
Scenario: Configure a TACACS Key
With the initial setup out of the way, let’s look at how we can determine the appropriate API calls to configure a TACACS key on a router using RESTCONF. To do that, first we need to determine what YANG model to use. In YANG Suite, click on Explore and select YANG. From the dropdown, select our YANG set that we just created.

Here is where we get into a little bit of guesswork to determine which YANG model has the configuration parameters needed, but this would be the same if we were not using YANG Suite and had to manually inspect the YANG modules. Since we’re looking to change the TACACS key, it’s a good bet this has something to do with AAA; so under “Select YANG modules(s)” we’ll filter for AAA. I’ve had success with the IOS native modules; so select the Cisco-IOS-XE-aaa module and then hit Load module(s).

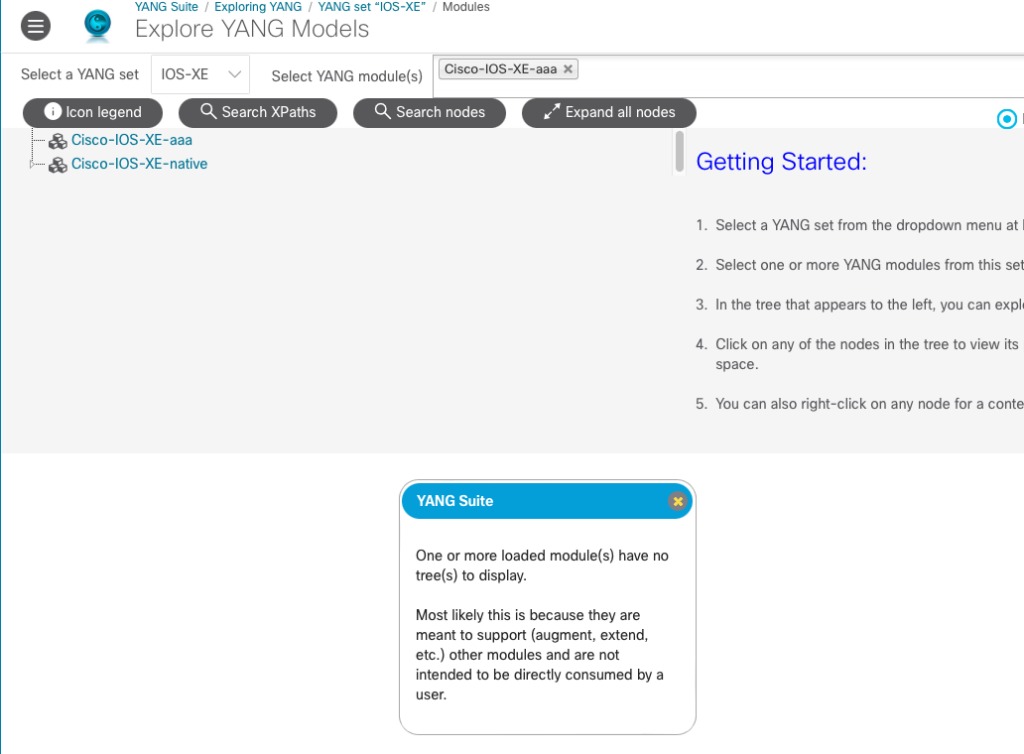
When a module completes loading you may get a dialogue like the one shown below indicating that one or more of the modules have no tree(s) to display. This is because the Cisco-IOS-XE-aaa module doesn’t provide its own YANG data tree, but instead augments the data in the Cisco-IOS-XE-native module. In the case where a module extends or augments another, we need to work with the augmented module, in this case the Cisco-IOS-XE-native module.
Notice the triangle to the left of Cisco-IOS-XE-native in the tree listing above. This can be expanded to show the leaves of the tree. Since we are looking for TACACS configuration, we can expand the tree and use the web browser search function to find anything related to “tacacs”.
Using the web browser search function works well for this use case because there are containers (represented by folder icons in the tree) that contain the word “tacacs”. In some cases you may be looking for a configuration parameter that is not a container, but exists deeper within the YANG tree. In this case, you could use the Search XPaths and/or Search nodes buttons to help locate the correct leaf node.

By expanding the tree and then searching for “tacacs” in the browser, we can see there are two nodes for configuration of TACACS. Looking at the first “tacacs” node, I see the key (denoted by the red key icon) ios-aaa:name, indicating that this would be for a named TACACS server configuration. We could use a named TACACS configuration, but we would first have to create the named TACACS server configuration before we can create a TACACS key. To keep things simple, we’ll use the ios-aaa:tacacs-server node which doesn’t require a named TACACS server configuration. Expanding that out, we can see there is an ios-aaa:key leaf which looks promising. Now that we have located a candidate to configure the TACACS key, we can generate the RESTCONF API calls.
In YANG Suite, navigate to Protocols > RESTCONF. Select the IOS-XE YANG set we created previously, the iOS-xe-always-on device profile, and enter the Cisco-IOS-XE-native YANG module which we determined previously. You can set the depth of the leaves to be loaded to reduce the level that the tool will traverse into the tree, but I typically just set this to No limit to ensure I am seeing everything. Click Load modules(s). This will take a minute or so as it loads the nodes of the tree.

Once loaded, we can then expand the tree and once again use the web browser search function to find the leaves related to “tacacs” and expand the tacacs-server node.
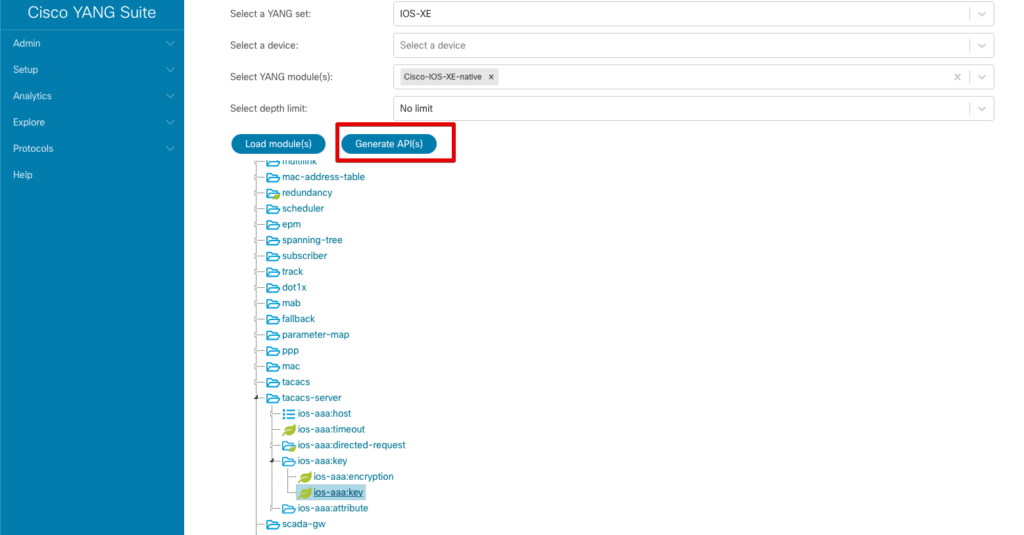
Notice the Generate API(s) button that has now appeared. Select the leaf ios-aaa:key, and then click the Generate API(s) button. When complete, a new Show API(s) button should appear.

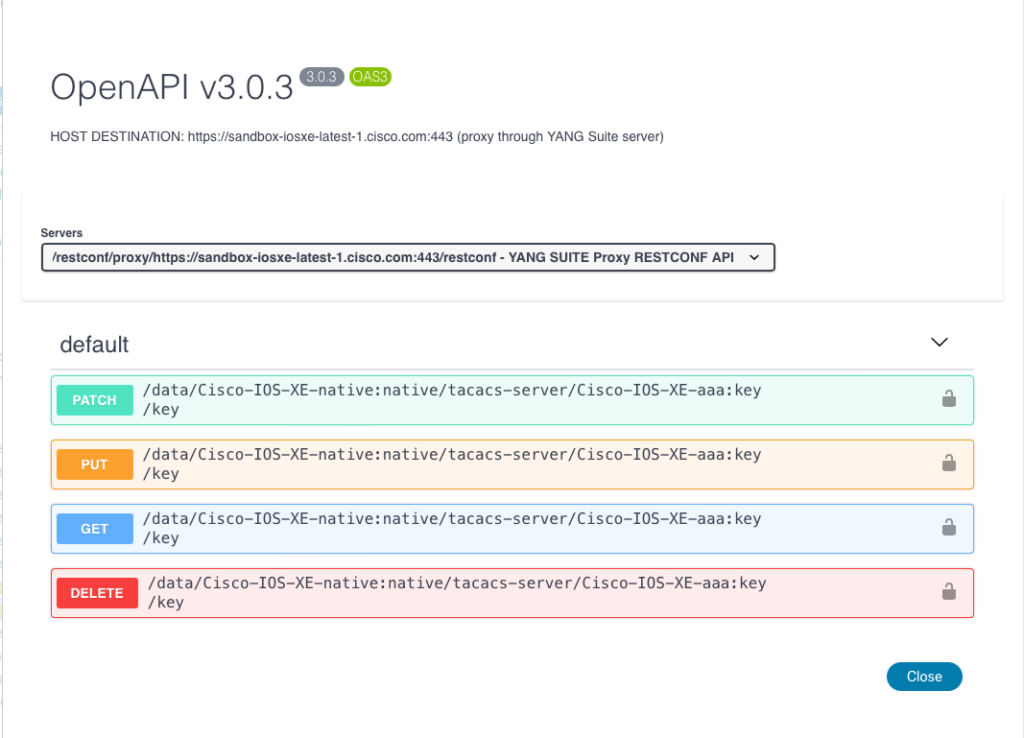
Highlight the ios-aaa:key leaf and click the Show API(s) button. This gives us the API call URLs and payload to retrieve (GET), create (PUT), update (PATCH), or remove (DELETE) the TACACS key on the router in an easy to consume format!
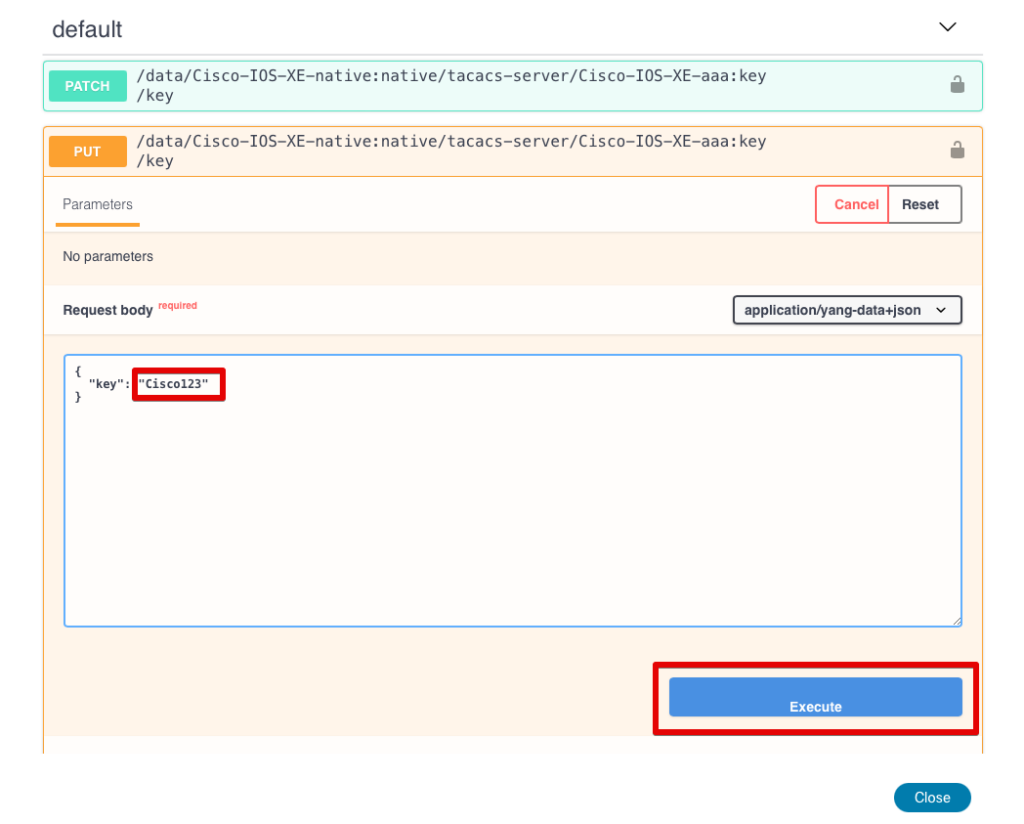
Click to expand the PUT request, which is used for creation of a new TACACS key. This displays the URL to use, as well as the request body indicating the JSON payload that should be included. In addition, note the value that would need to be set in the “Content-Type” header: application/yang-data+json.
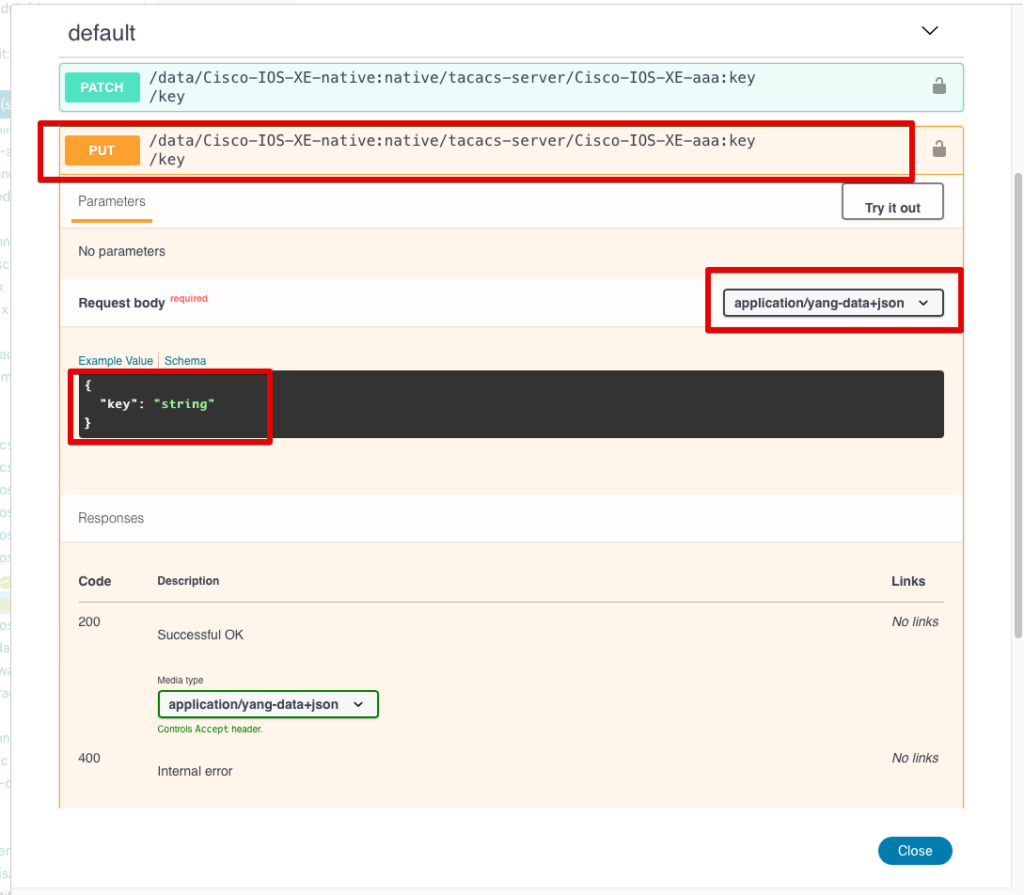
This is all the info we should need to form the request using Python or other tools! For example you could use the Python requests module to automate making the RESTCONF calls. However, we can see if it performs as expected right here from the browser by clicking the Try it out button. Here you can replace “string” in the payload with the desired TACACS key value. Then click Execute to run the command on the device.
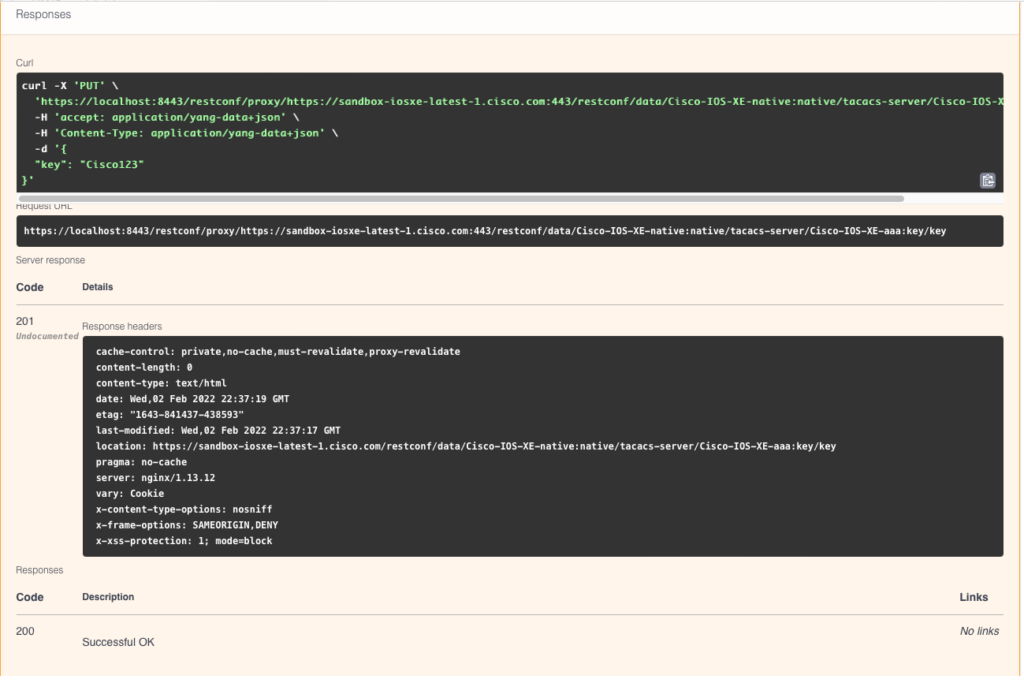
Once executed, it shows you the curl command that can be used to make the request along with the response code. The HTTP response code of 201 indicates that the TACACS key was created successfully on the remote device.
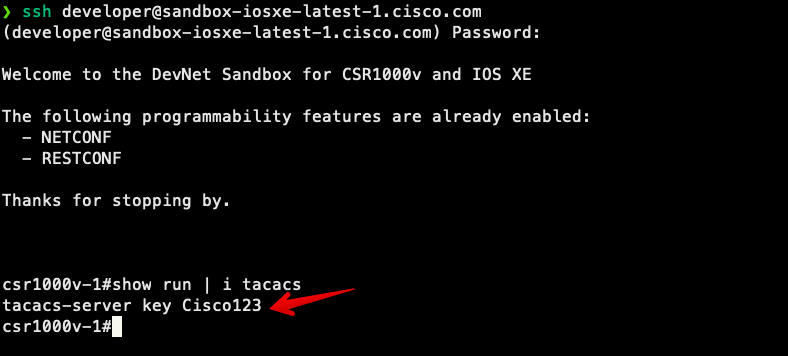
Let’s check the device to see whether the CLI reflects what we just configured. To accomplish this, we will SSH directly to the CSR1000V router in the IOS-XE sandbox (sandbox-iosxe-latest-1.cisco.com).
Conclusion
As I hope the demonstration above proved, YANG Suite makes it a lot easier to work with network devices using RESTCONF. Kudos to Cisco and the makers of YANG Suite for providing such a useful tool!
-Matt
Tags :
Does this all sound amazing? Want to know more about how Network to Code can help you do this, reach out to our sales team. If you want to help make this a reality for our clients, check out our careers page.
Share :


Contact Us to Learn More
Share details about yourself & someone from our team will reach out to you ASAP!