

Latest Features
It has been quite some time since Nautobot’s Floor Plan application was first introduced, and over the past year we’ve worked closely with large, sophisticated customers on major data center development initiatives that demanded advanced floor plan capabilities. These collaborations provided invaluable insights that have shaped our latest updates, greatly enhancing the application’s planning and visualization features. Building upon the foundational functionality highlighted in our original blog post (https://networktocode.com/blog/nautobot-floor-plan-app/), this release delivers a powerful suite of features designed to meet the evolving needs of our users.
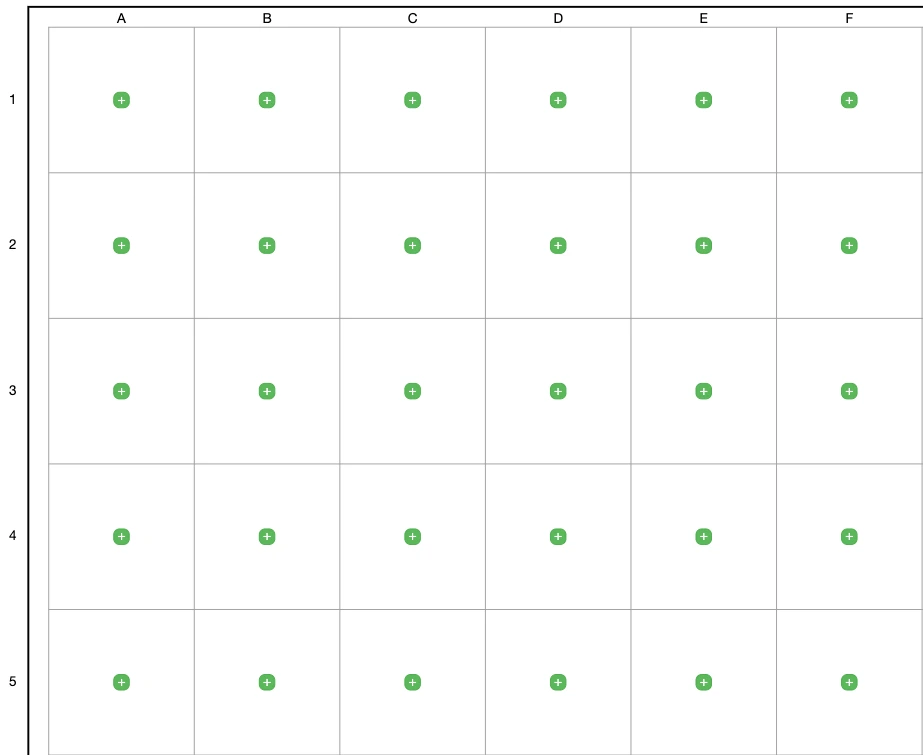
Letters and Number Grid Labeling
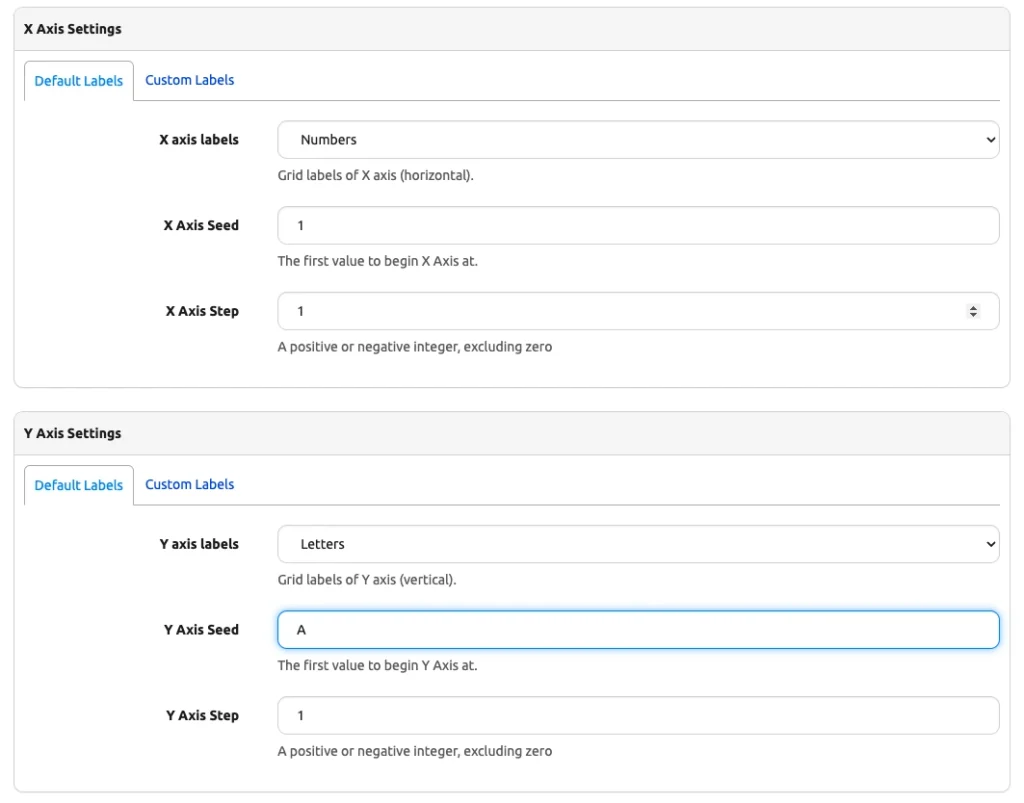
Among the key enhancements is the improved labeling functionality for Floor Plan grids. Users now have the flexibility to use either letters or numbers as default labels for the X and/or Y axes, enabling greater customization and adaptability for a wide range of use cases.
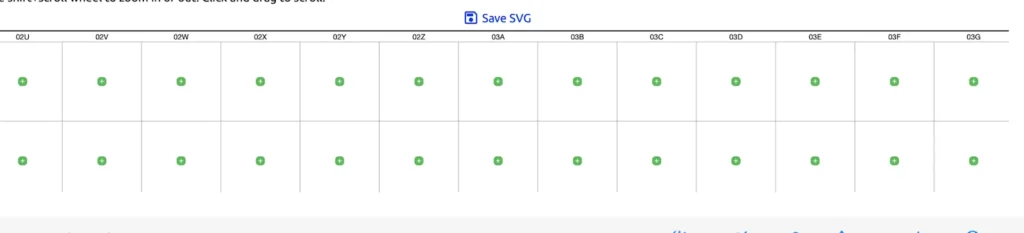
Additionally, users managing very large Floor Plans will appreciate the new shift-zoom feature. This enhancement allows you to hold the Shift key while hovering your mouse over the Floor Plan to zoom in and out using the mouse wheel. Releasing the Shift key restores the previous functionality, allowing you to scroll vertically through the Floor Plan as before.
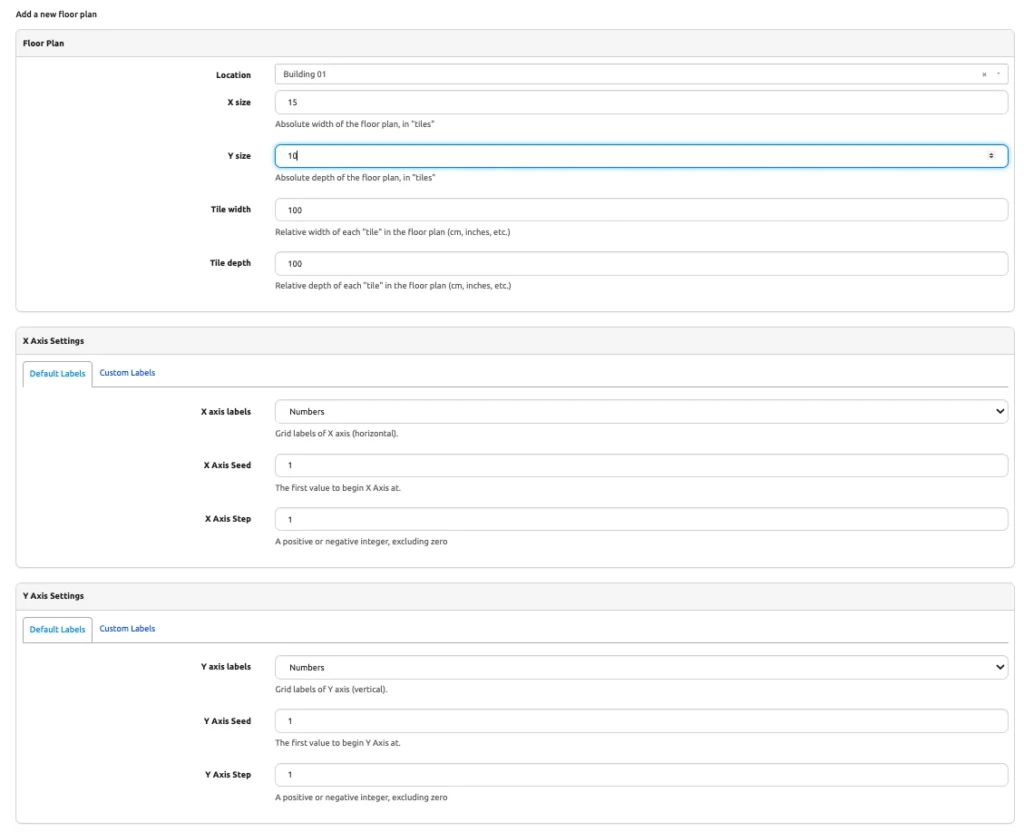
Seeds and Steps
Further enhancements now allow you to specify an initial Seed value. This flexibility enables you to define where the grid labeling process begins. You are no longer limited to starting at the number 1 or the letter A. Instead, you can choose any starting point, whether it’s a letter (e.g., Z or AA) or a positive or negative integer (e.g., 0 or -10).
Along with the Seed value, a Step value was introduced. The Step value is a positive or negative integer that determines the interval between labels. This allows you to skip values in a sequence or count in reverse. The use of Zero (0) as a step value is not allowed. For example:
- With a starting Seed of 0 and a Step of 2, your labels would increment by twos:
0, 2, 4, 6, 8. - With a Step of -2, your labels would count backward by twos:
0, -2, -4, -6. - With a starting Seed of
30and a Step of-2, your labels would decrease as:30, 28, 26, 24, and so on
Seeds and Steps are configurable in the Floor Plan create and edit form as seen in the image below. This feature was released in steps between version 2.3 and 2.4.
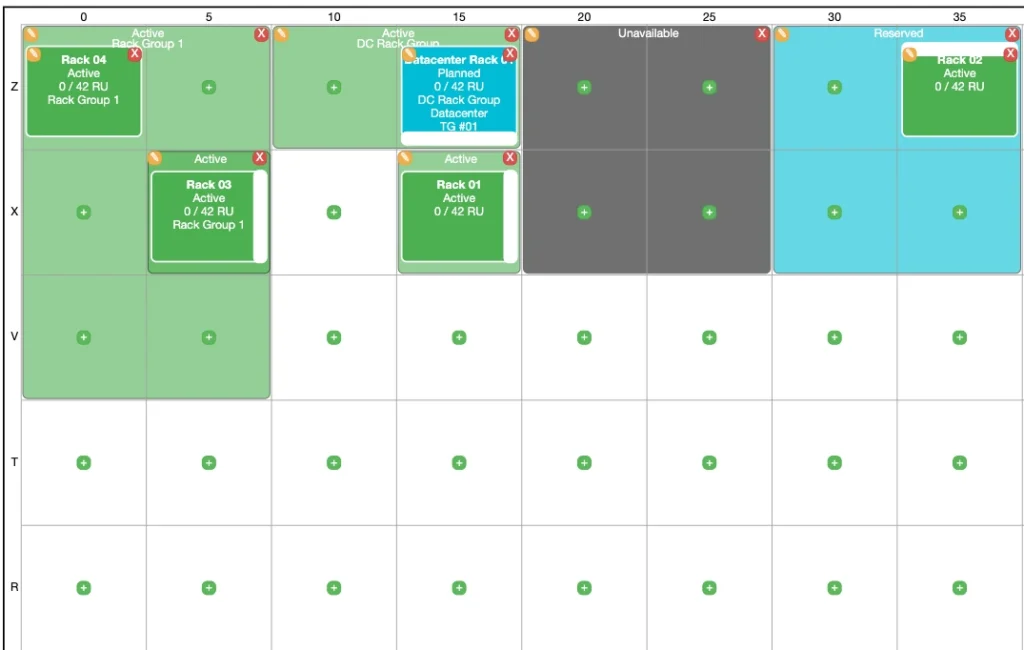
Rack Group and Status Tile Grouping
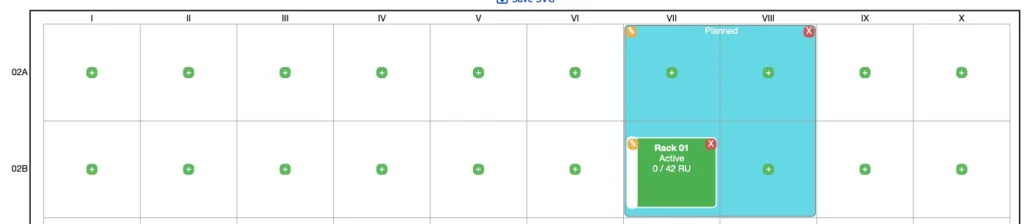
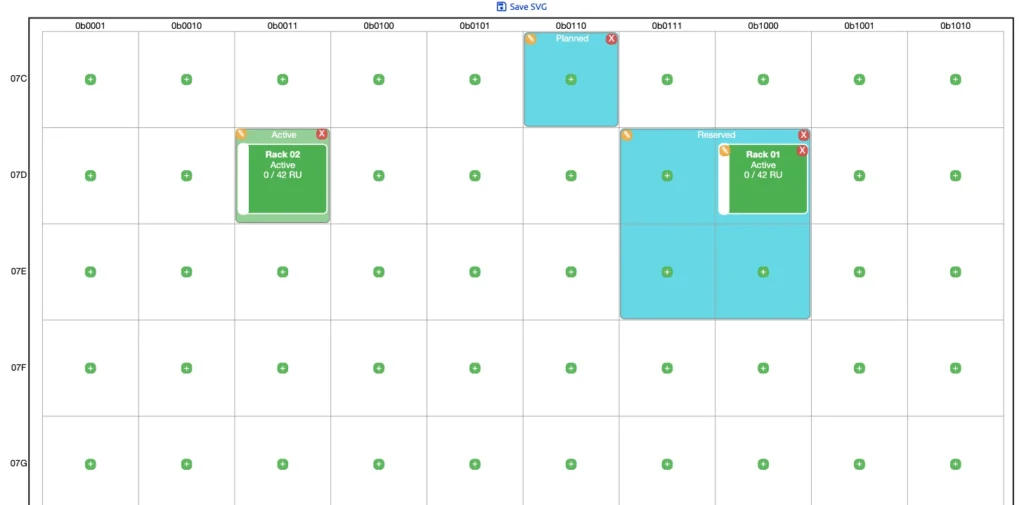
There have also been several updates to the placement of racks and tiles within the Floor Plan. Previously, you could place a rack on the Floor Plan, allowing it to occupy one or multiple tiles. However, grouping racks within specific sections of tiles wasn’t possible. With the latest enhancements:
- Rack Grouping: You can now section off areas of tiles designated for racks belonging to a specific rack group. This feature enables better organization and management of rack placements within defined sections.
- Status-Based Sections: Additionally, you can create sections of tiles with a designated status and then install racks on top of these sections. This capability allows you to reserve space within the Floor Plan.
These improvements facilitate the reservation of space in the Floor Plan and enable you to visualize the installation and activation of racks over time, enhancing both planning and operational workflows.
Default Statuses
While on the topic of statuses, the application now comes with default statuses preconfigured for immediate use. These default statuses—Active, Reserved, Decommissioning, Unavailable, and Planned—are available for use right after the application is installed.
While small, this update provides a quality-of-life enhancement for users, as it eliminates the need to configure these statuses manually before using the application. Furthermore, the default statuses can be customized in the Nautobot configuration file to better align with your specific workflows and requirements. The snippet below provides an example of how to override default statuses. Specifics detailing the configuration of the application can be found in the configuration section of the documentation: (https://docs.nautobot.com/projects/floor-plan/en/latest/admin/install/#step-2-configure-the-app)
# In your nautobot_config.py
PLUGINS = ["nautobot_floor_plan"]

# Optionally you can override default settings for config items to make grid labels like a chessboard (as seen in this example)
PLUGINS_CONFIG = {
    "nautobot_floor_plan": {
        "default_x_axis_labels": "letters",
        "default_statuses": {
            "FloorPlanTile": [
                {"name": "Active", "color": "4caf50"},
            ],
        },
        "x_size_limit": 100,
        "y_size_limit": 100,
    }
}
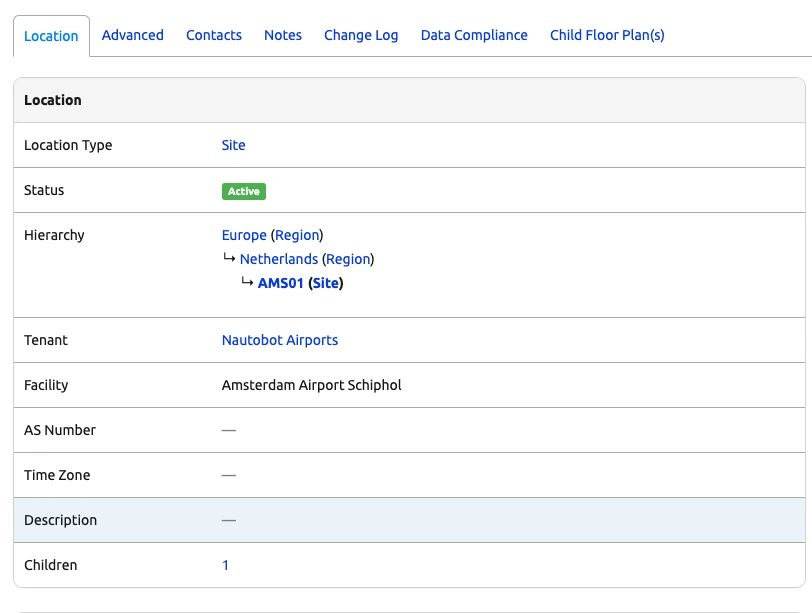
Child Floor Plan Tab
An additional tab has been added to the location view, providing quick access to child locations with a configured Floor Plan. Child locations are displayed in a list format, complete with URL links, allowing you to seamlessly navigate to their respective Floor Plans directly from the parent location view.

Custom Labels and Ranges
The most recent update to the Floor Plan application introduces grid labeling customization, offering users greater flexibility in how Floor Plan grid labels are created and displayed. Currently, custom labels can be generated using the following supported patterns:
- NumAlpha
- Alphanumeric
- Numbers
- Letters
- Roman numerals
- Greek letters
- Binary
- Hexadecimal
In addition to custom labels, users can define custom ranges, enabling advanced and flexible labeling patterns. For example, with a Floor Plan size of 10, the following are now possible:
- 1 – 5, 21 – 25
- 02A – 02E, 03A – 03E
- A1 – E1, A1 – A5
- I – V, XI – XV
- C – G, Q – U
The Floor Plan create and edit form has been modified to better visualize the distinction between defining the Floor Plan dimensions and labels.
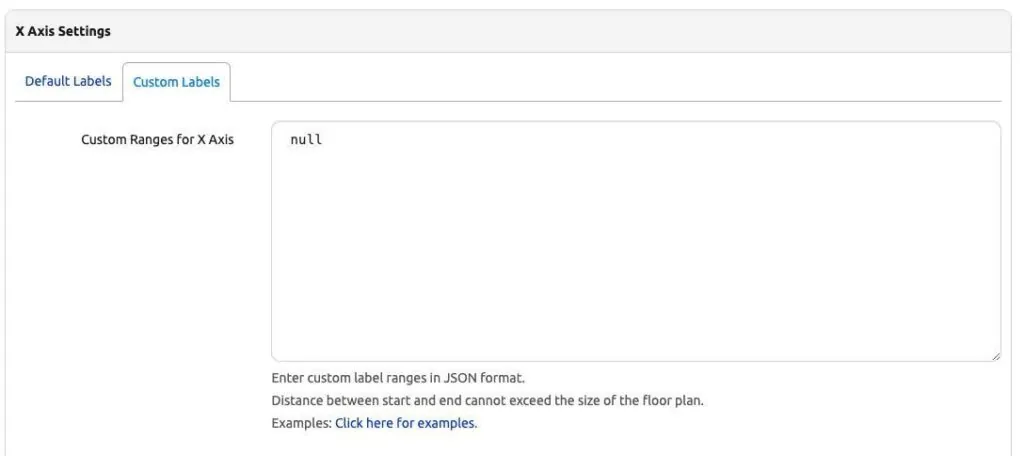
Customization is done via the Floor Plan form under the new Custom Labels tab, where configurations are applied using a list of JSON dictionaries
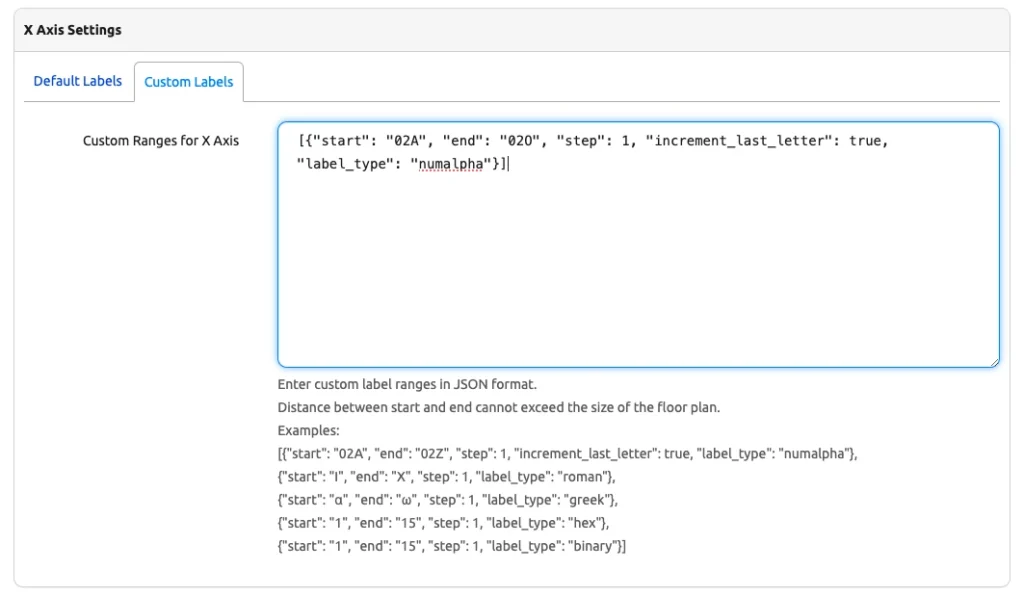
For guidance, users can view working examples by clicking the Click here for examples link, which opens a pop-up with sample configurations and instructions.
Once clicked, the pop-up displays the following working examples.
{"start": "02A", "end": "02Z", "step": 1, "increment_letter": true, "label_type": "numalpha"}][{"start": "A", "end": "Z", "step": 1, "increment_letter": true, "label_type": "letters"}][{"start": "A01", "end": "A15", "step": 1, "label_type": "alphanumeric"}][{"start": "01", "end": "05", "step": 1, "label_type": "numbers"}, {"start": "11", "end": "15", "step": 1, "label_type": "numbers"}][{"start": "I", "end": "X", "step": 1, "label_type": "roman"}][{"start": "α", "end": "ω", "step": 1, "label_type": "greek"}][{"start": "1", "end": "15", "step": 1, "label_type": "hex"}][{"start": "1", "end": "15", "step": 1, "label_type": "binary"}]Here are some examples of what is now in the realm of possible when using custom ranges and labels. Custom labels are available starting with Floor Plan version 2.6.
Conclusion
The recent updates to the Nautobot Floor Plan application represent a major leap forward in customization, visualization, and usability. Enhanced grid labeling options, including support for custom patterns and ranges, empower users to tailor Floor Plans to their specific needs. Features like Seeds and Steps, Shift-Zoom, and rack grouping provide greater flexibility and precision in managing and visualizing spaces. Preconfigured default statuses and streamlined configuration tools further enhance the user experience, making the application more accessible and efficient. These improvements position the Floor Plan app as an indispensable tool for network planning and operations.
Additional Resources
Floor Plan Documentation (https://docs.nautobot.com/projects/floor-plan/en/latest/)
Floor Plan Feature Requests (https://github.com/nautobot/nautobot-app-floor-plan/issues)
Tags :
Does this all sound amazing? Want to know more about how Network to Code can help you do this, reach out to our sales team. If you want to help make this a reality for our clients, check out our careers page.


