Nautobot 1.0 is here! With the release of Nautobot 1.0, we thought it’d be appropriate to post an article that walks a user through the entire Nautobot installation process.
This post is intended for those who may be new to Nautobot, those who may be installing it for the first time, those who may not have a lot of experience with Unix, those for whom it’s helpful to see the same information in a slightly different format to assist learning, or any combination of those.
This article follows and expands upon the Nautobot installation documentation. For example, this post will not just tell you which specific commands to run. It will also explain why you are running the command and what the command is doing, hopefully giving you a better understanding of the mechanics of the installation. Since this article is written for those of basic to intermediate knowledge with Unix and Nautobot installation, more advanced users may prefer the installation docs instead of this article.
This post will cover a basic installation, with all of Nautobot’s processes running on a single server running Ubuntu 20.04.2 LTS.
tim@nautobot10:~$ lsb_release -a
No LSB modules are available.
Distributor ID:	Ubuntu
Description:	Ubuntu 20.04.2 LTS
Release:	20.04
Codename:	focal
tim@nautobot10:~$
Each step in this process will show the command to be run, as well as an example of that command, and the resulting output from my actual install.
$ this is a command
nautobot@nautobot10:~$ this is a command<br>This is all the resulting output from the command from my actual install.<br>Showing the terminal commands and output hopefully provides context.<br>Nautobot supports installation on Ubuntu 20.04+, CentOS 8.2+, or Red Hat Enterprise Linux (RHEL) 8.2+. Other POSIX-compliant systems including practically any flavor of Linux, BSD, or even macOS should work, but are not officially supported.
Again, this article will document the install on a single server running Ubuntu 20.04.2.
Note: This article will feature several CLI snippets showing the actual installation. Any CLI action with the
timuser will signify a user withrootaccess. Any CLI action with thenautobotuser will signify the user specific to the Nautobot environment.
Nautobot has the following minimum version requirements for its dependencies:
Nautobot can operate without the following optional packages, but will not be suitable for use in most production environments without them:
Nautobot’s installation process was designed to be simple. It has the following four main sections:
The next four sections will cover each of those areas in detail.
Nautobot must have the required packages along with an installed database infrastructure. This section will cover setting up that environment.
First, update the package sources list:
$ sudo apt update -y
tim@nautobot10:~$ sudo apt update -y
[sudo] password for tim:
Hit:1 http://us.archive.ubuntu.com/ubuntu focal InRelease
Hit:2 http://us.archive.ubuntu.com/ubuntu focal-updates InRelease
Hit:3 http://us.archive.ubuntu.com/ubuntu focal-backports InRelease
Hit:4 http://us.archive.ubuntu.com/ubuntu focal-security InRelease
Reading package lists... Done
Building dependency tree
Reading state information... Done
57 packages can be upgraded. Run 'apt list --upgradable' to see them.
tim@nautobot10:~$
The following command will install the dependencies:
$ sudo apt install -y git python3 python3-pip python3-venv python3-dev postgresql redis-server
tim@nautobot10:~$ sudo apt install -y git python3 python3-pip python3-venv python3-dev postgresql redis-server
Reading package lists... Done
Building dependency tree
Reading state information... Done
python3 is already the newest version (3.8.2-0ubuntu2).
python3 set to manually installed.
git is already the newest version (1:2.25.1-1ubuntu3.1).
git set to manually installed.
The following additional packages will be installed:
  binutils binutils-common binutils-x86-64-linux-gnu build-essential cpp cpp-9 dpkg-dev fakeroot g++ g++-9 gcc gcc-9 gcc-9-base libalgorithm-diff-perl
  libalgorithm-diff-xs-perl libalgorithm-merge-perl libasan5 libatomic1 libbinutils libc-dev-bin libc6 libc6-dev libcc1-0 libcrypt-dev libctf-nobfd0 libctf0 libdpkg-perl
 libexpat1-dev libfakeroot libfile-fcntllock-perl libgcc-9-dev
 . . .
< --- snip --- >
 . . .
Processing triggers for man-db (2.9.1-1) ...
Processing triggers for libc-bin (2.31-0ubuntu9.2) ...
tim@nautobot10:~$
Nautobot 1.0.0 supports the PostgreSQL database. MySQL support is on the road map.
The following steps demonstrate how to create Nautobot’s database (named nautobot), create a user named nautobot, and then assign the nautobot user permissions to the nautobot database.
Sudo to the postgres user (the Postgres installation creates this user) and get to the postgres prompt: $ sudo -u postgres psql
tim@nautobot10:~$ sudo -u postgres psql
psql (12.6 (Ubuntu 12.6-0ubuntu0.20.04.1))
Type "help" for help.

postgres=#
Create the nautobot database:
CREATE DATABASE nautobot;
postgres=# CREATE DATABASE nautobot;
CREATE DATABASE
postgres=#
Create the nautobot user and assign a password:
CREATE USER nautobot WITH PASSWORD '<--don't use this password-->';
postgres=# CREATE USER nautobot WITH PASSWORD 'gipsy_danger_S45T%23}>@T2[?';
CREATE ROLE
postgres=#
WARNING: Don’t use the passwords from the examples.
Grant privileges for the nautobot user in the nautobot database:
postgres=# GRANT ALL PRIVILEGES ON DATABASE nautobot to nautobot;
GRANT
postgres=#
Exit Postgres:
postgres=# \q
tim@nautobot10:~$
Follow the example below to test database user nautobot’s authentication and connection to the nautobot database:
$ psql --username nautobot --password --host localhost nautobot
tim@nautobot10:~$ psql --username nautobot --password --host localhost nautobot
Password:
psql (12.6 (Ubuntu 12.6-0ubuntu0.20.04.1))
SSL connection (protocol: TLSv1.3, cipher: TLS_AES_256_GCM_SHA384, bits: 256, compression: off)
Type "help" for help.

nautobot=> \conninfo
You are connected to database "nautobot" as user "nautobot" on host "localhost" (address "127.0.0.1") at port "5432".
SSL connection (protocol: TLSv1.3, cipher: TLS_AES_256_GCM_SHA384, bits: 256, compression: off)
nautobot=> \q
tim@nautobot10:~$
TIP: If something goes wrong (such as an authentication problem) with your database, you can easily delete the
nautobotuser and database with the following procedure:tim@nautobot10:~$ sudo -u postgres psql psql (12.6 (Ubuntu 12.6-0ubuntu0.20.04.1)) Type "help" for help. postgres=# DROP DATABASE nautobot; DROP DATABASE postgres=# DROP USER nautobot; DROP ROLE postgres=# \q tim@nautobot10:~$You can then recreate it using the steps outlined in the Create the Nautobot Database section above.
Redis was already installed in the prior apt install action. Verify that it’s working:
$ redis-cli ping
tim@nautobot10:~$ redis-cli ping
PONG
tim@nautobot10:~$
NAUTOBOT_ROOT Directory and Create the nautobot System UserNAUTOBOT_ROOT is the directory where all Nautobot-related items will be installed.
NOTE: This install will use
/opt/nautobotasNAUTOBOT_ROOT, but you may choose any directory you wish.
The following command:
nautobot userNAUTOBOT_ROOT directoryNAUTOBOT_ROOT as nautobot’s home directory$ sudo useradd --system --shell /bin/bash --create-home --home-dir /opt/nautobot nautobot
tim@nautobot10:~$ sudo useradd --system --shell /bin/bash --create-home --home-dir /opt/nautobot nautobot
[sudo] password for tim:
tim@nautobot10:~$
The following command creates the Python virtual environment (venv) for the nautobot user in NAUTOBOT_ROOT (/opt/nautobot in this example):
$ sudo -u nautobot python3 -m venv /opt/nautobot
tim@nautobot10:~$ sudo -u nautobot python3 -m venv /opt/nautobot
tim@nautobot10:~$
Up to this point, we’ve not actually set NAUTOBOT_ROOT as a variable referring to a specific directory in the environment. Here is where that actually gets done:
$ echo "export NAUTOBOT_ROOT=/opt/nautobot" | sudo tee -a ~nautobot/.bashrc
tim@nautobot10:~$ echo "export NAUTOBOT_ROOT=/opt/nautobot" | sudo tee -a ~nautobot/.bashrc
export NAUTOBOT_ROOT=/opt/nautobot
tim@nautobot10:~$
The above command updates ~/.bashrc for nautobot so that any time you become nautobot, your NAUTOBOT_ROOT will be set automatically.
If you want you can verify the change in ~/.bashrc:
$ cat /opt/nautobot/.bashrc
tim@nautobot10:~$ cat /opt/nautobot/.bashrc
# ~/.bashrc: executed by bash(1) for non-login shells.
. . .
< ---- BIG snip ---- >
. . .
fi
export NAUTOBOT_ROOT=/opt/nautobot
tim@nautobot10:~$
nautobot and Explore the Virtual EnvironmentNautobot must be installed by the nautobot user to prevent permissions problems.
$ sudo -iu nautobot
tim@nautobot10:~$ sudo -iu nautobot
nautobot@nautobot10:~$
Verify NAUTOBOT_ROOT:
$ echo $NAUTOBOT_ROOT
nautobot@nautobot10:~$ echo $NAUTOBOT_ROOT
/opt/nautobot
nautobot@nautobot10:~$
Explore the virtual environment. Check the $PATH variable:
$ echo $PATH
nautobot@nautobot10:~$ echo $PATH
/opt/nautobot/bin:/usr/local/sbin:/usr/local/bin:/usr/sbin:/usr/bin:/sbin:/bin:/snap/bin
nautobot@nautobot10:~$
Verify your pip3:
$ which pip3
nautobot@nautobot10:~$ which pip3
/opt/nautobot/bin/pip3
nautobot@nautobot10:~$
Earlier, we created the nautobot user’s venv using sudo -u nautobot python3 -m venv /opt/nautobot.
Calling venv for /opt/nautobot/ (NAUTOBOT_ROOT) created a directory structure within /opt/nautobot, including the bin, include, and lib directories therein. The /opt/nautobot/bin directory will hold all the packages for the venv.
NOTE: There are a number of directories within
NAUTOBOT_ROOTthat get created during Nautobot installation, includingstatic,media,git, andjobs.
The nautobot user will automatically access the packages in the venv without need to explicitly initiate it because the first path in nautobot’s $PATH is /opt/nautobot/bin, which has all the packages that Nautobot requires.
Update Pip to the latest version. We also want to install the wheel library, telling Pip to try to install wheel packages when they are available. Installing a package in wheel format can significantly improve the installation time and eliminates some requirements for development libraries.
$ pip3 install --upgrade pip wheel
nautobot@nautobot10:~$ pip3 install --upgrade pip wheel
Collecting pip
  Downloading pip-21.1-py3-none-any.whl (1.5 MB)
     |████████████████████████████████| 1.5 MB 3.1 MB/s
Collecting wheel
  Downloading wheel-0.36.2-py2.py3-none-any.whl (35 kB)
Installing collected packages: pip, wheel
  Attempting uninstall: pip
    Found existing installation: pip 20.0.2
    Uninstalling pip-20.0.2:
      Successfully uninstalled pip-20.0.2
Successfully installed pip-21.1 wheel-0.36.2
nautobot@nautobot10:~$
The time has come! Now install the Nautobot package as the nautobot user:
$ pip3 install nautobot
nautobot@nautobot10:~$ pip3 install nautobot
Collecting nautobot
  Downloading nautobot-1.0.0-py3-none-any.whl (11.1 MB)
     |████████████████████████████████| 11.1 MB 4.5 MB/s
 . . .
< --- snip --- >
Successfully installed Django-3.1.8 . . . nautobot-1.0.0 . . . urllib3-1.26.4
nautobot@nautobot10:~$
The nautobot-server command is your single gateway to all things Nautobot. Use it to verify your version:
$ nautobot-server --version
nautobot@nautobot10:~$ nautobot-server --version
1.0.0
nautobot@nautobot10:~$
Nautobot’s configurations are stored in a file called nautobot_config.py. Running nautobot-server init creates this file by default in $NAUTOBOT_ROOT:
$ nautobot-server init
nautobot@nautobot10:~$ nautobot-server init
Configuration file created at '/opt/nautobot/nautobot_config.py'
nautobot@nautobot10:~$
There are a couple of changes in nautobot_config.py required to get Nautobot working. As the nautobot user, edit the file.
nautobot@nautobot10:~$ vi /opt/nautobot/nautobot_config.py
The first required change is the ALLOWED_HOSTS value. You can set this to ['*'] for a quick start, but that is not suitable for a production environment.
# This is a list of valid fully-qualified domain names (FQDNs) for the Nautobot server. Nautobot will not permit write
# access to the server via any other hostnames. The first FQDN in the list will be treated as the preferred name.
#
# Example: ALLOWED_HOSTS = ['nautobot.example.com', 'nautobot.internal.local']
ALLOWED_HOSTS = ['*']
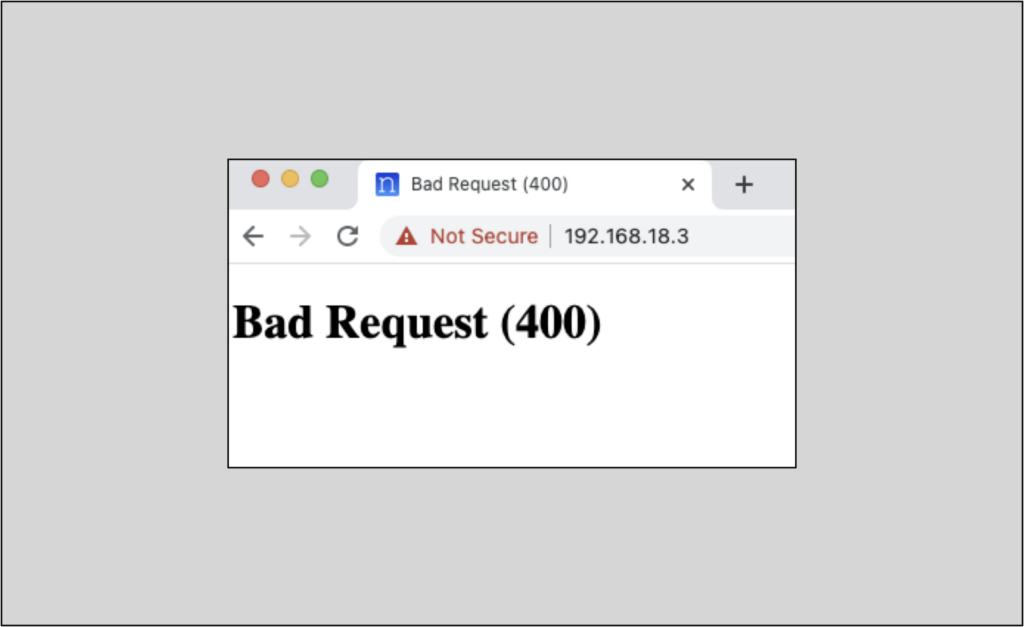
WARNING: Attempting to access Nautobot via the Web UI via a URL not listed here will result in a
Bad Request (400)return. We’ve not made it to the Web UI access part yet, but remember this for context.
You will also need to configure the DATABASES section of nautobot_config.py, updating the NAUTOBOT_USER and NAUTOBOT_PASSWORD settings with the values you defined in the prior psql command sequence. These are the minimum changes needed to run Nautobot on a local server; you can of course make additional changes as suits your particular environment.
# PostgreSQL database configuration. See the Django documentation for a complete list of available parameters:
#   https://docs.djangoproject.com/en/stable/ref/settings/#databases
DATABASES = {
    "default": {
        "NAME": os.getenv("NAUTOBOT_DATABASE", "nautobot"),  # Database name
        "USER": os.getenv("NAUTOBOT_USER", "nautobot"),  # Database username
        "PASSWORD": os.getenv("NAUTOBOT_PASSWORD", "gipsy_danger_S45T%23}>@T2[?"),  # Database password
        "HOST": os.getenv("NAUTOBOT_DB_HOST", "localhost"),  # Database server
        "PORT": os.getenv("NAUTOBOT_DB_PORT", ""),  # Database port (leave blank for default)
        "CONN_MAX_AGE": os.getenv("NAUTOBOT_DB_TIMEOUT", 300),  # Database timeout
        "ENGINE": "django.db.backends.postgresql",  # Database driver (Postgres only supported!)
    }
}
local_requirements.txtAll required Python packages will be installed when running pip3 install nautobot.
Nautobot also supports optional packages that improve its functionality. For example, NAPALM is a powerful automation tool for network elements because it abstracts away the underlying OS, allowing the user to leverage a unified API when interacting with a network element.
NOTE: If you do not need to install any optional packages at this point, you can safely skip this step and proceed to Prepare the Database.
Optional packages should be listed in $NAUTOBOT_ROOT/local_requirements.txt. The example below will specify napalm as a local requirement.
To install NAPALM, add napalm to the local_requirements.txt file for later use.
NOTE:
NAPALM_USERNAMEandNAPALM_PASSWORDmust be configured in the$NAUTOBOT_ROOT/nautobot_config.pyfile for Nautobot to successfully use NAPALM.
$ echo napalm >> $NAUTOBOT_ROOT/local_requirements.txt
nautobot@nautobot10:/opt$ echo napalm >> $NAUTOBOT_ROOT/local_requirements.txt
nautobot@nautobot10:/opt$ cat $NAUTOBOT_ROOT/local_requirements.txt
napalm
nautobot@nautobot10:/opt$
Nautobot’s database must be migrated prior to use. This creates the database tables and relationships:
$ nautobot-server migrate
nautobot@nautobot10:~$ nautobot-server migrate
Wrapping model clean methods for custom validators failed because the ContentType table was not available or populated. This is normal during the execution of the migration command for the first time.
Operations to perform:
  Apply all migrations: admin, auth, circuits, contenttypes, dcim, extras, ipam, sessions, social_django, taggit, tenancy, users, virtualization
Running migrations:
  Applying contenttypes.0001_initial... OK
  Applying contenttypes.0002_remove_content_type_name... OK
  Applying auth.0001_initial... OK
  Applying auth.0002_alter_permission_name_max_length... OK
 . . .
< --- snip --- >
 . . .
   Applying extras.0004_populate_default_status_records...
    Model dcim.Device
      Adding and linking status Offline
      Adding and linking status Active
      Adding and linking status Planned
      Adding and linking status Staged
      Adding and linking status Failed
      Adding and linking status Inventory
      Adding and linking status Decommissioning
 . . .
< --- snip --- >
 . . .
    Model circuits.Circuit
      Linking to existing status Planned
      Adding and linking status Provisioning
      Linking to existing status Active
      Linking to existing status Offline
      Adding and linking status Deprovisioning
      Adding and linking status Decommissioned
 . . .
< --- snip --- >
 . . .
    Added 19, linked 29 status records
  Applying taggit.0003_taggeditem_add_unique_index... OK
nautobot@nautobot10:~$
NOTE: In the above output, notice the multiple database tables being created; a few are shown for context
The next step is to create a Nautobot superuser. This will be the account that you will use to log into the Nautobot Web UI for the first time.
The superuser will be an administrative account that will allow you to create other users, set permissions, create security tokens, etc.
NOTE: The email address field is not required, but be sure to use a very strong password.
$ nautobot-server createsuperuser
nautobot@nautobot10:~$ nautobot-server createsuperuser
Username: tim
Email address:
Password:
Password (again):
Superuser created successfully.
nautobot@nautobot10:~$
Nautobot has several directories within $NAUTOBOT_ROOT (default location) that store static files for operations such as:
git directory)jobs directory)media directory)static directory)Here is a view of all the directories in $NAUTOBOT_ROOT
nautobot@nautobot10:~$ ls -ld $NAUTOBOT_ROOT/*/
drwxrwxr-x  3 nautobot nautobot 4096 Apr 30 19:26 /opt/nautobot/bin/
drwxrwxr-x  2 nautobot nautobot 4096 Apr 28 20:35 /opt/nautobot/git/
drwxrwxr-x  2 nautobot nautobot 4096 Apr 28 19:55 /opt/nautobot/include/
drwxrwxr-x  2 nautobot nautobot 4096 Apr 28 20:35 /opt/nautobot/jobs/
drwxrwxr-x  3 nautobot nautobot 4096 Apr 28 19:55 /opt/nautobot/lib/
drwxrwxr-x  3 nautobot nautobot 4096 Apr 28 19:55 /opt/nautobot/lib64/
drwxrwxr-x  4 nautobot nautobot 4096 Apr 28 20:35 /opt/nautobot/media/
drwxrwxr-x  3 nautobot nautobot 4096 Apr 28 19:55 /opt/nautobot/share/
drwxrwxr-x 19 nautobot nautobot 4096 Apr 28 21:53 /opt/nautobot/static/
nautobot@nautobot10:~$
The collectstatic command will create these directories if they don’t exist; it will also copy the required files to the static directory:
$ nautobot-server collectstatic
nautobot@nautobot10:~$ nautobot-server collectstatic

960 static files copied to '/opt/nautobot/static'.
nautobot@nautobot10:~$
NOTE: If you did not specify a
local_requirements.txtfile prior, you can skip to the Check Your Configuration section.
A prior section detailed how to specify optional packages for install within $NAUTOBOT_ROOT/local_requirements.txt. Now it’s time to install those optional packages as the nautobot user.
$ pip3 install -r $NAUTOBOT_ROOT/local_requirements.txt
nautobot@nautobot10:~$ pip3 install -r $NAUTOBOT_ROOT/local_requirements.txt
Collecting napalm
  Downloading napalm-3.2.0-py2.py3-none-any.whl (230 kB)
     |████████████████████████████████| 230 kB 3.1 MB/s
Requirement already satisfied: pyYAML in ./lib/python3.8/site-packages (from napalm->-r /opt/nautobot/local_requirements.txt (line 1)) (5.4.1)
 . . .
< --- snip --- >
 . . .
Successfully installed bcrypt-3.2.0 ciscoconfparse-1.5.30 colorama-0.4.4 dnspython-2.1.0 future-0.18.2 junos-eznc-2.6.0 lxml-4.6.3 napalm-3.2.0 ncclient-0.6.9 netmiko-3.4.0 ntc-templates-2.0.0 paramiko-2.7.2 passlib-1.7.4 pyeapi-0.8.4 pynacl-1.4.0 pyserial-3.5 scp-0.13.3 tenacity-7.0.0 textfsm-1.1.0 transitions-0.8.8 yamlordereddictloader-0.4.0
nautobot@nautobot10:~$
Nautobot uses Django’s native system check framework to validate the configuration, detect common problems, and provide hints for how to fix them.
These checks run automatically when using nautobot-server runserver (which we will get to in a moment), but not when running in production using WSGI. Nevertheless, it’s good to get into the habit of running the checks before deployments!
$ nautobot-server check
nautobot@nautobot10:~$ nautobot-server check<br>System check identified no issues (0 silenced).<br>nautobot@nautobot10:~$ <br>** I really wanted to title this section “Check Yourself Before You Wreck Yourself”; please consider that to be the alternate title.
Now it’s time to see this installation’s Web UI for the first time! Start Nautobot’s development server on port 8000.
$ nautobot-server runserver 0.0.0.0:8000 --insecure
nautobot@nautobot10:~$ nautobot-server runserver 0.0.0.0:8000 --insecure
Performing system checks...

System check identified no issues (0 silenced).
April 28, 2021 - 21:55:50
Django version 3.1.8, using settings 'nautobot_config'
Starting development server at http://0.0.0.0:8000/
Quit the server with CONTROL-C.
[28/Apr/2021 21:56:20] "GET / HTTP/1.1" 200 18684
DANGER: DO NOT USE THIS SERVER IN A PRODUCTION SETTING. The development server is for development and testing purposes only. It is neither performant nor secure enough for production use.
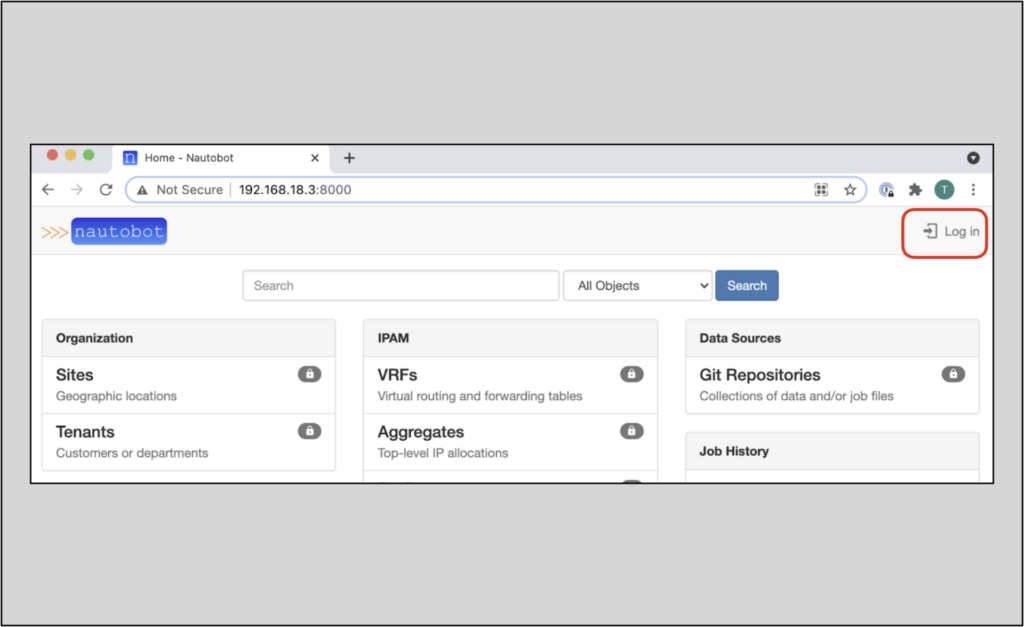
From your local host, connect to the name or IP of the server (as defined in ALLOWED_HOSTS) on port 8000; for example, http://127.0.0.1:8000/.
NOTE: The URL that you use in order to reach the UI must be included in the
ALLOWED_HOSTSlist innautobot_config.py; if not, you will receive aBad Request (400)return.
You can also reach Nautobot from a remote host. The example below shows reaching the development server UI via the remote server’s IP address.
Here is some sample output you’ll see from the development server as you access the Web UI:
[28/Apr/2021 21:56:20] "GET /static/materialdesignicons-5.4.55/css/materialdesignicons.min.css HTTP/1.1" 200 269370
[28/Apr/2021 21:56:20] "GET /static/bootstrap-3.4.1-dist/css/bootstrap.min.css HTTP/1.1" 200 121457
[28/Apr/2021 21:56:20] "GET /static/jquery-ui-1.12.1/jquery-ui.css HTTP/1.1" 200 37326
[28/Apr/2021 21:56:20] "GET /static/select2-4.0.13/dist/css/select2.min.css HTTP/1.1" 200 14966
[28/Apr/2021 21:56:20] "GET /static/flatpickr-4.6.3/themes/light.css HTTP/1.1" 200 18996
[28/Apr/2021 21:56:20] "GET /static/select2-bootstrap-0.1.0-beta.10/select2-bootstrap.min.css HTTP/1.1" 200 16792
[28/Apr/2021 21:56:20] "GET /static/css/base.css?v1.0.0 HTTP/1.1" 200 8528
[28/Apr/2021 21:56:20] "GET /static/jquery/jquery-3.6.0.min.js HTTP/1.1" 200 89501
[28/Apr/2021 21:56:20] "GET /static/jquery-ui-1.12.1/jquery-ui.min.js HTTP/1.1" 200 253669
[28/Apr/2021 21:56:21] "GET /static/bootstrap-3.4.1-dist/js/bootstrap.min.js HTTP/1.1" 200 39680
[28/Apr/2021 21:56:21] "GET /static/clipboard.js/clipboard-2.0.6.min.js HTTP/1.1" 200 10454
[28/Apr/2021 21:56:21] "GET /static/img/nautobot_logo.svg HTTP/1.1" 200 13318
[28/Apr/2021 21:56:21] "GET /static/js/forms.js?v1.0.0 HTTP/1.1" 200 18603
[28/Apr/2021 21:56:21] "GET /static/flatpickr-4.6.3/flatpickr.min.js HTTP/1.1" 200 48518
[28/Apr/2021 21:56:21] "GET /static/select2-4.0.13/dist/js/select2.min.js HTTP/1.1" 200 70891
[28/Apr/2021 21:56:21] "GET /static/materialdesignicons-5.4.55/fonts/materialdesignicons-webfont.woff2?v=5.8.55 HTTP/1.1" 200 319984
[28/Apr/2021 21:56:21] "GET /static/img/favicon.ico HTTP/1.1" 200 15086
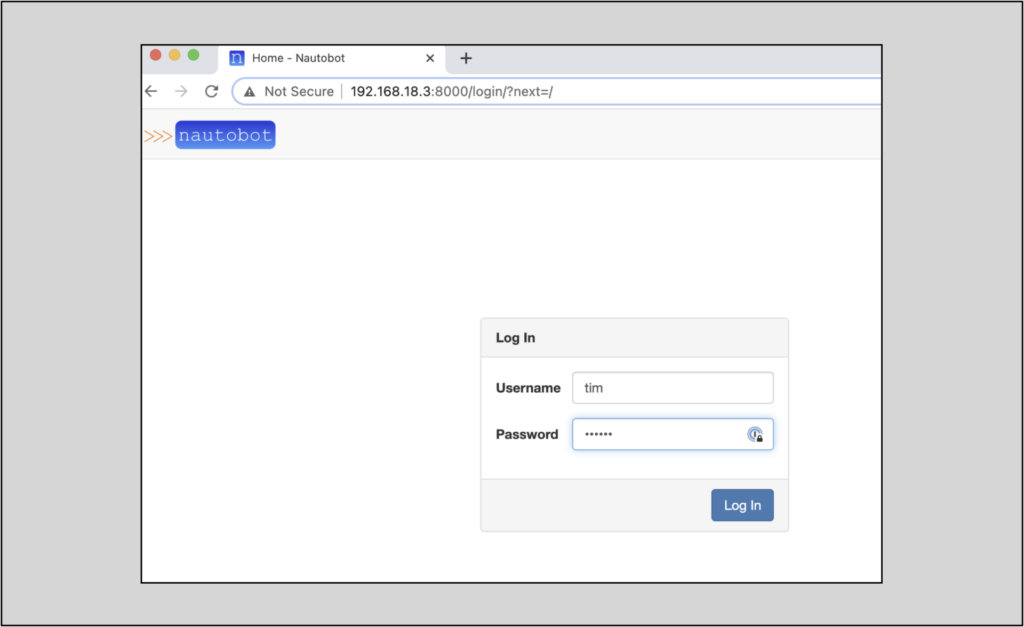
Notice that the UI will be locked down until you authenticate. Click the Log in button on the upper right. You will see the login screen.
Log in with the credentials you created earlier using nautobot-server createsuperuser :
When you authenticate in you’ll see more debug output at the development server’s command line:
[28/Apr/2021 21:58:17] "GET /login/?next=/ HTTP/1.1" 200 8332
[28/Apr/2021 21:58:34] "POST /login/ HTTP/1.1" 302 0
[28/Apr/2021 21:58:34] "GET / HTTP/1.1" 200 58444
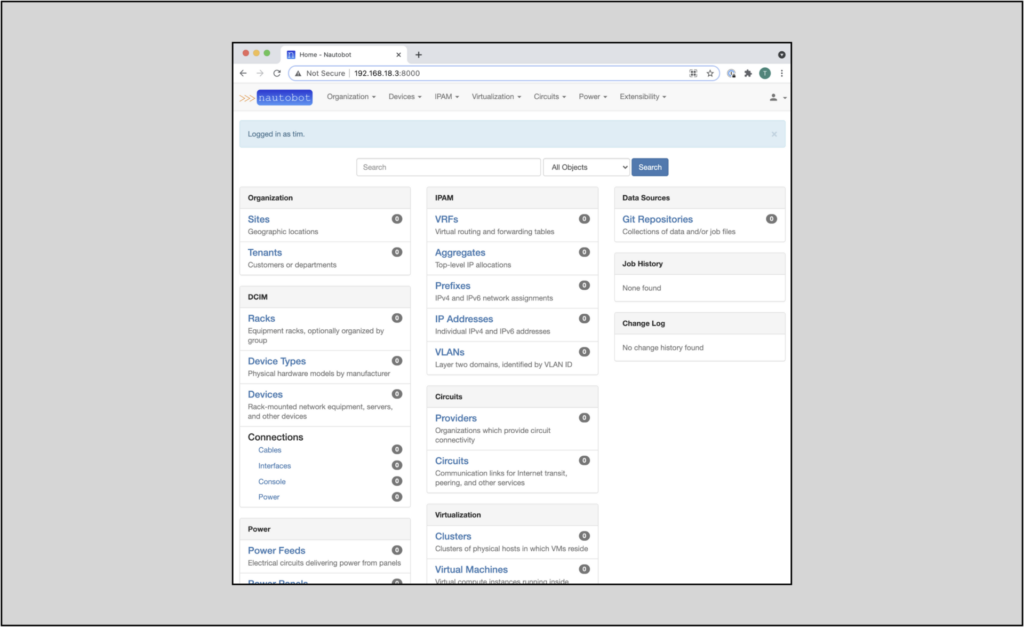
Once you authenticate, you will see an unlocked UI with no data:
Back in your terminal, type Ctrl-C to stop the development server. Now you’re ready to proceed to starting Nautobot as a system service.
Nautobot runs as a Web Server Gateway Interface (WSGI) application behind an HTTP server.
Nautobot comes pre-installed with uWSGI to use as the WSGI server, but other WSGI servers should work equally as well. This demo will use the pre-installed uWSGI server, guiding you through configuring uWSGI and establishing Nautobot to run on system startup.
As the nautobot user, copy and paste the following into $NAUTOBOT_ROOT/uwsgi.ini:
[uwsgi]
; The IP address (typically localhost) and port that the WSGI process should listen on
socket = 127.0.0.1:8001

; Fail to start if any parameter in the configuration file isn’t explicitly understood by uWSGI
strict = true

; Enable master process to gracefully re-spawn and pre-fork workers
master = true

; Allow Python app-generated threads to run
enable-threads = true

;Try to remove all of the generated file/sockets during shutdown
vacuum = true

; Do not use multiple interpreters, allowing only Nautobot to run
single-interpreter = true

; Shutdown when receiving SIGTERM (default is respawn)
die-on-term = true

; Prevents uWSGI from starting if it is unable load Nautobot (usually due to errors)
need-app = true

; By default, uWSGI has rather verbose logging that can be noisy
disable-logging = true

; Assert that critical 4xx and 5xx errors are still logged
log-4xx = true
log-5xx = true

;
; Advanced settings (disabled by default)
; Customize these for your environment if and only if you need them.
; Ref: https://uwsgi-docs.readthedocs.io/en/latest/Options.html
;

; Number of uWSGI workers to spawn. This should typically be 2n+1, where n is the number of CPU cores present.
; processes = 5

; If using subdirectory hosting e.g. example.com/nautobot, you must uncomment this line. Otherwise you'll get double paths e.g. example.com/nautobot/nautobot/.
; See: https://uwsgi-docs.readthedocs.io/en/latest/Changelog-2.0.11.html#fixpathinfo-routing-action
; route-run = fixpathinfo:
This is a basic configuration that should suffice for most initial installations.
The systemd suite will control uWSGI as well as Nautobot’s background worker processes.
With root permissions, copy and paste the following into /etc/systemd/system/nautobot.service:
[Unit]
Description=Nautobot WSGI Service
Documentation=https://nautobot.readthedocs.io/en/stable/
After=network-online.target
Wants=network-online.target

[Service]
Type=simple
Environment="NAUTOBOT_ROOT=/opt/nautobot"

User=nautobot
Group=nautobot
PIDFile=/var/tmp/nautobot.pid
WorkingDirectory=/opt/nautobot

ExecStart=/opt/nautobot/bin/nautobot-server start --pidfile /var/tmp/nautobot.pid --ini /opt/nautobot/uwsgi.ini
ExecStop=/opt/nautobot/bin/nautobot-server start --stop /var/tmp/nautobot.pid
ExecReload=/opt/nautobot/bin/nautobot-server start --reload /var/tmp/nautobot.pid

Restart=on-failure
RestartSec=30
PrivateTmp=true

[Install]
WantedBy=multi-user.target
NOTE: Notice the above configuration leverages the
nautobot-server startmanagement command that directly invokes uWSGI. Thenautobot-servercommand is meant to server as the single entrypoint into the Nautobot application.
To configure the Nautobot Worker, with root permissions, copy and paste the following into /etc/systemd/system/nautobot-worker.service:
[Unit]
Description=Nautobot Request Queue Worker
Documentation=https://nautobot.readthedocs.io/en/stable/
After=network-online.target
Wants=network-online.target

[Service]
Type=simple
Environment="NAUTOBOT_ROOT=/opt/nautobot"

User=nautobot
Group=nautobot
WorkingDirectory=/opt/nautobot

ExecStart=/opt/nautobot/bin/nautobot-server rqworker

Restart=on-failure
RestartSec=30
PrivateTmp=true

[Install]
WantedBy=multi-user.target
systemdand Verify the Nautobot ServiceReload the systemd daemon to pick up the changes in the new services:
$ sudo systemctl daemon-reload
tim@nautobot10:~$ sudo systemctl daemon-reload
tim@nautobot10:~$
Now start the nautobot and nautobot-worker services and enable them to initiate at boot:
$ sudo systemctl enable --now nautobot nautobot-worker
tim@nautobot10:~$ sudo systemctl enable --now nautobot nautobot-worker
Created symlink /etc/systemd/system/multi-user.target.wants/nautobot.service → /etc/systemd/system/nautobot.service.
Created symlink /etc/systemd/system/multi-user.target.wants/nautobot-worker.service → /etc/systemd/system/nautobot-worker.service.
tim@nautobot10:~$
NOTE: The
/etc/systemd/system/multi-user.targetin the output above refers to the Runlevel (0-6) that the machine transits when powering on. Runlevel 0 ispoweroff.target, Runlevel 5 isgraphical.target(full user access with graphical display and networking). The symlinks created above start/etc/systemd/system/nautobot.serviceand/etc/systemd/system/nautobot-worker.serviceas the machine transits Runlevel 2 (multi-user.target).
Now use systemctl status nautobot.service to verify that the Nautobot service is running:
$ systemctl status nautobot.service
tim@nautobot10:~$ systemctl status nautobot.service
● nautobot.service - Nautobot WSGI Service
     Loaded: loaded (/etc/systemd/system/nautobot.service; enabled; vendor preset: enabled)
     Active: active (running) since Wed 2021-04-28 22:39:54 UTC; 1min 3s ago
       Docs: https://nautobot.readthedocs.io/en/stable/
   Main PID: 2234541 (nautobot-server)
      Tasks: 2 (limit: 4585)
     Memory: 91.5M
     CGroup: /system.slice/nautobot.service
             ├─2234541 /opt/nautobot/bin/python3 /opt/nautobot/bin/nautobot-server start --pidfile /var/tmp/nautobot.pid -->
             └─2234793 /opt/nautobot/bin/python3 /opt/nautobot/bin/nautobot-server start --pidfile /var/tmp/nautobot.pid -->

Apr 28 22:39:57 nautobot10 nautobot-server[2234541]: --- Python VM already initialized ---
Apr 28 22:39:57 nautobot10 nautobot-server[2234541]: Python main interpreter initialized at 0x18df740
Apr 28 22:39:57 nautobot10 nautobot-server[2234541]: python threads support enabled
Apr 28 22:39:57 nautobot10 nautobot-server[2234541]: your server socket listen backlog is limited to 100 connections
Apr 28 22:39:57 nautobot10 nautobot-server[2234541]: your mercy for graceful operations on workers is 60 seconds
Apr 28 22:39:57 nautobot10 nautobot-server[2234541]: mapped 145808 bytes (142 KB) for 1 cores
Apr 28 22:39:57 nautobot10 nautobot-server[2234541]: *** Operational MODE: single process ***
Apr 28 22:39:57 nautobot10 nautobot-server[2234541]: WSGI app 0 (mountpoint='') ready in 0 seconds on interpreter 0x18df740>
Apr 28 22:39:57 nautobot10 nautobot-server[2234541]: spawned uWSGI master process (pid: 2234541)
Apr 28 22:39:57 nautobot10 nautobot-server[2234541]: spawned uWSGI worker 1 (pid: 2234793, cores: 1)
Because we like being thorough, let’s also check the Nautobot worker process:
$ systemctl status nautobot-worker.service
tim@nautobot10:~$ systemctl status nautobot-worker.service
● nautobot-worker.service - Nautobot Request Queue Worker
     Loaded: loaded (/etc/systemd/system/nautobot-worker.service; enabled; vendor preset: enabled)
     Active: active (running) since Tue 2021-05-04 22:10:11 UTC; 1min 4s ago
       Docs: https://nautobot.readthedocs.io/en/stable/
   Main PID: 1122 (nautobot-server)
      Tasks: 2 (limit: 4585)
     Memory: 110.6M
     CGroup: /system.slice/nautobot-worker.service
             └─1122 /opt/nautobot/bin/python3 /opt/nautobot/bin/nautobot-server rqworker

May 04 22:10:11 nautobot10 systemd[1]: Started Nautobot Request Queue Worker.
May 04 22:10:31 nautobot10 nautobot-server[1122]: 22:10:31 Worker rq:worker:f24092394e3e4217a7bfafc300ddbac9: started, ver>
May 04 22:10:31 nautobot10 nautobot-server[1122]: 22:10:31 Subscribing to channel rq:pubsub:f24092394e3e4217a7bfafc300ddba>
May 04 22:10:31 nautobot10 nautobot-server[1122]: 22:10:31 *** Listening on default, check_releases, custom_fields, webhoo>
May 04 22:10:31 nautobot10 nautobot-server[1122]: 22:10:31 Cleaning registries for queue: default
May 04 22:10:31 nautobot10 nautobot-server[1122]: 22:10:31 Cleaning registries for queue: check_releases
May 04 22:10:31 nautobot10 nautobot-server[1122]: 22:10:31 Cleaning registries for queue: custom_fields
May 04 22:10:31 nautobot10 nautobot-server[1122]: 22:10:31 Cleaning registries for queue: webhooks
NOTE: The
nautobot.serviceprocess is responsible for managing the WebUI and API; thenautobot-worker.serviceprocess subscribes to Redis Queue (RQ) and manages jobs, consumes tasks, and publishes results to the dababase.
If the Nautobot service fails to start, issue the command journalctl -eu nautobot.service to check for log messages that may indicate the problem.
For further troubleshooting steps, refer to the Nautobot documentation WSGI troubleshooting section.
We are almost there, I promise! This last section covers HTTP server configuration, which is the last step!
To run Nautobot with HTTPS you will need a certificate, preferably one from a trusted commercial provider. To get off the ground, and depending on your organization’s policies, you may be able to use a self-signed certificate for testing and then later implement a trusted certificate.
WARNING: A certificate from a trusted authority is highly recommended for production.
Two files will be needed: the public certificate (nautobot.crt) and the private key (nautobot.key).
This post will initially use a self-signed certificate for testing purposes, and will later cover the results of obtaining a trusted certificate from Let’s Encrypt in an addendum at the end of the article.
The command below will generate a self-signed certificate, used for testing (root permissions required!):
$ sudo openssl req -x509 -nodes -days 365 -newkey rsa:2048 \
  -keyout /etc/ssl/private/nautobot.key \
  -out /etc/ssl/certs/nautobot.crt
NOTE: It is not necessary to answer the questions in the self-signed certificate generation procedure.
tim@nautobot10:~$ sudo openssl req -x509 -nodes -days 365 -newkey rsa:2048 \
>   -keyout /etc/ssl/private/nautobot.key \
>   -out /etc/ssl/certs/nautobot.crt
[sudo] password for tim:
Generating a RSA private key
..........................................................................................+++++
..........+++++
writing new private key to '/etc/ssl/private/nautobot.key'
-----
You are about to be asked to enter information that will be incorporated
into your certificate request.
What you are about to enter is what is called a Distinguished Name or a DN.
There are quite a few fields but you can leave some blank
For some fields there will be a default value,
If you enter '.', the field will be left blank.
-----
Country Name (2 letter code) [AU]:US
State or Province Name (full name) [Some-State]:CO
Locality Name (eg, city) []:
Organization Name (eg, company) [Internet Widgits Pty Ltd]:
Organizational Unit Name (eg, section) []:
Common Name (e.g. server FQDN or YOUR name) []:
Email Address []:
tim@nautobot10:~$
Nautobot will support any HTTP server. Nautobot’s documentation covers setup instructions for NGINX, and this post will reprise those.
First, install NGINX (root permissions required):
$ sudo apt install -y nginx
tim@nautobot10:~$ sudo apt install -y nginx
Reading package lists... Done
Building dependency tree
Reading state information... Done
 . . .
< --- snip --- >
 . . .
Processing triggers for man-db (2.9.1-1) ...
Processing triggers for libc-bin (2.31-0ubuntu9.2) ...
tim@nautobot10:~$
Once NGINX is installed, copy and paste the following NGINX configuration into /etc/nginx/sites-available/nautobot.conf (root permissions required):
server {
    listen 443 ssl http2 default_server;
    listen [::]:443 ssl http2 default_server;

    server_name _;

    ssl_certificate /etc/ssl/certs/nautobot.crt;
    ssl_certificate_key /etc/ssl/private/nautobot.key;

    client_max_body_size 25m;

    location /static/ {
        alias /opt/nautobot/static/;
    }

    # For subdirectory hosting, you'll want to toggle this (e.g. `/nautobot/`).
    # Don't forget to set `FORCE_SCRIPT_NAME` in your `nautobot_config.py` to match.
    # location /nautobot/ {
    location / {
        include uwsgi_params;
        uwsgi_pass  127.0.0.1:8001;
        uwsgi_param Host $host;
        uwsgi_param X-Real-IP $remote_addr;
        uwsgi_param X-Forwarded-For $proxy_add_x_forwarded_for;
        uwsgi_param X-Forwarded-Proto $http_x_forwarded_proto;

        # If you want subdirectory hosting, uncomment this. The path must match
        # the path of this location block (e.g. `/nautobot`). For NGINX the path
        # MUST NOT end with a trailing "/".
        # uwsgi_param SCRIPT_NAME /nautobot;
    }
}

server {
    # Redirect HTTP traffic to HTTPS
    listen 80 default_server;
    listen [::]:80 default_server;
    server_name _;
    return 301 https://$host$request_uri;
}
NOTE: This config redirects HTTP to HTTPS
To enable the Nautobot Web UI, you’ll need to delete /etc/nginx/sites-enabled/default and create a symbolic link in the sites-enabled directory to the configuration file you just created:
As user with root permissions:
$ sudo rm -f /etc/nginx/sites-enabled/default
$ sudo ln -s /etc/nginx/sites-available/nautobot.conf /etc/nginx/sites-enabled/nautobot.conf
tim@nautobot10:~$ sudo rm -f /etc/nginx/sites-enabled/default
tim@nautobot10:~$ sudo ln -s /etc/nginx/sites-available/nautobot.conf /etc/nginx/sites-enabled/nautobot.conf
tim@nautobot10:~$ ls -l /etc/nginx/sites-enabled/
total 0
lrwxrwxrwx 1 root root 40 Apr 29 16:03 nautobot.conf -> /etc/nginx/sites-available/nautobot.conf
tim@nautobot10:~$
Restart NGINX to use the new configuration (in /etc/nginx/ above):
$ sudo systemctl restart nginx
tim@nautobot10:~$ sudo systemctl restart nginx
tim@nautobot10:~$
If the restart fails, you will see some type of notification at the CLI when you run the restart command.
Although we received no error message above, let’s run a check to see NGINX’s status:
tim@nautobot10:~$ systemctl status nginx.service
● nginx.service - A high performance web server and a reverse proxy server
     Loaded: loaded (/lib/systemd/system/nginx.service; enabled; vendor preset: enabled)
     Active: active (running) since Thu 2021-04-29 20:53:49 UTC; 17min ago
       Docs: man:nginx(8)
    Process: 2738959 ExecStartPre=/usr/sbin/nginx -t -q -g daemon on; master_process on; (code=exited, status=0/SUCCESS)
    Process: 2738960 ExecStart=/usr/sbin/nginx -g daemon on; master_process on; (code=exited, status=0/SUCCESS)
   Main PID: 2738961 (nginx)
      Tasks: 3 (limit: 4585)
     Memory: 12.0M
     CGroup: /system.slice/nginx.service
             ├─2738961 nginx: master process /usr/sbin/nginx -g daemon on; master_process on;
             ├─2738962 nginx: worker process
             └─2738963 nginx: worker process

Apr 29 20:53:49 nautobot10 systemd[1]: Starting A high performance web server and a reverse proxy server...
Apr 29 20:53:49 nautobot10 systemd[1]: Started A high performance web server and a reverse proxy server.
tim@nautobot10:~$
In a browser, connect to Nautobot. You should not have to specify a port.
REMEMBER: You must connect using a valid URL from
ALLOWED_HOSTSin$NAUTOBOT_ROOT/nautobot_config.py.
If you used a self-signed certificate, your browser will likely warn you that attempting to connect to the site you just created is very dangerous and will likely result in puppies being harmed if you connect.
Connect anyway, but not because you hate puppies.
NOTE: In Google Chrome, depending upon your settings, you may have to explicitly type ‘thisisunsafe’ into the browser while seeing the warning screen below in order to connect. While doing so, you won’t see your typing anywhere in the browser.
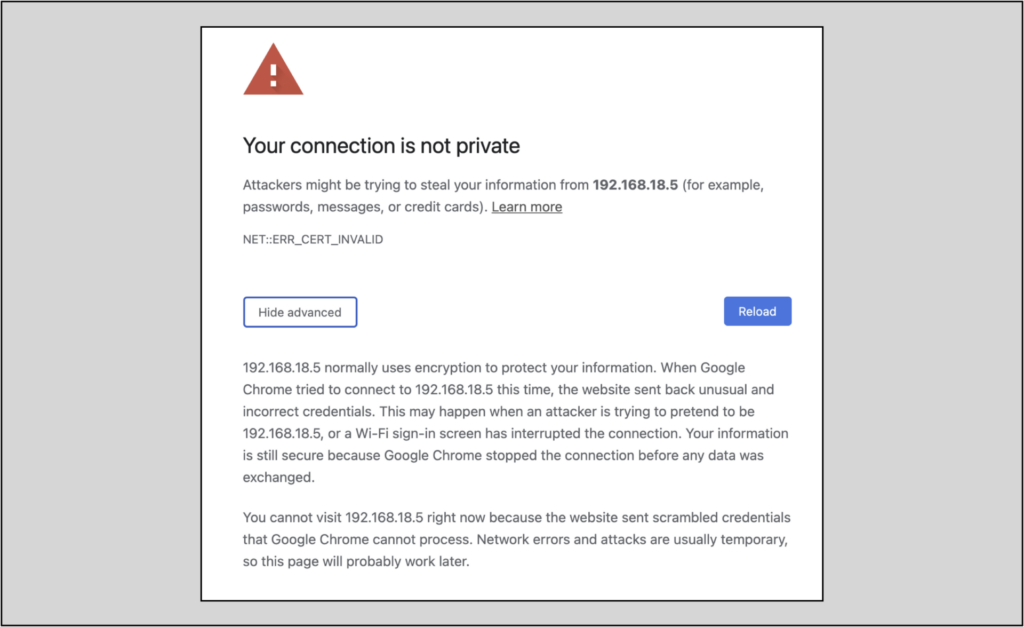
You should now see something like this:
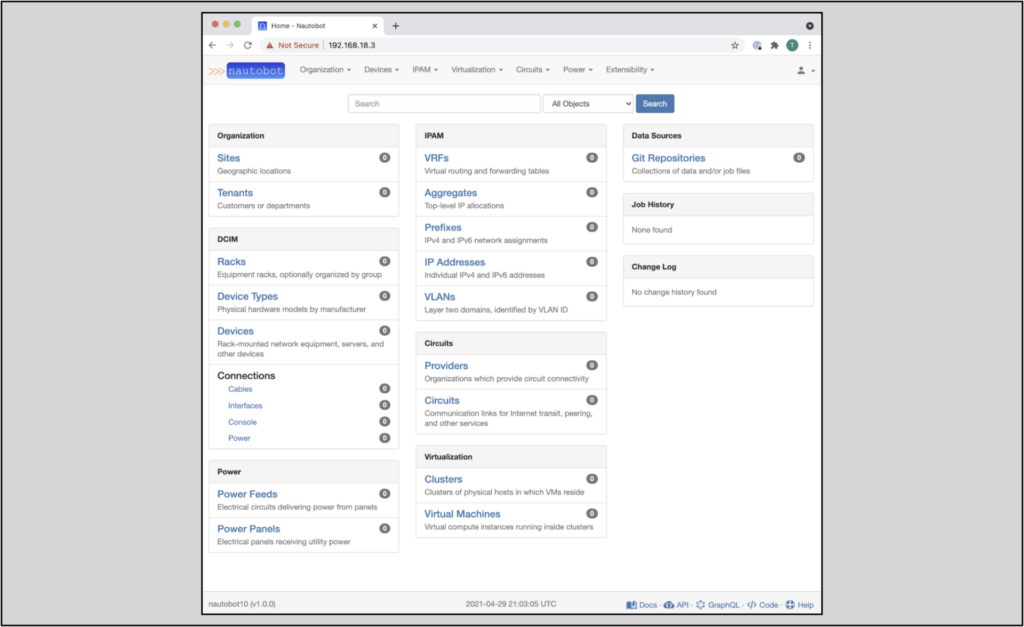
Congratulations! This completes the Nautobot installation on Ubuntu 20.04.2.
If you do not see a successful result, you can find troubleshooting actions here, including actions for a 502 Bad Gateway error.
This blog covered Nautobot installation on a fresh version of Ubuntu 20.04.2. It walked you through a complete installation, providing context for each step and real output from a real installation. I hope this was helpful! If you have any comments on anything that did not work, was not clear, something else that should have been included, or any other feedback please comment below or reach out to me on NtC’s public Slack channel.
Have a great day!
-Tim
If you used a self-signed certificate to get to this point, you may have questions on how to obtain a trusted commercial certificate. In a separate installation, I initially used a self-signed certificate, but went back and used Let’s Encrypt to get a trusted certificate. Although obtaining a trusted certificate is beyond the formal scope of this article, I wanted to briefly detail my experience going through that process. This section will cover the highlights.
NGINX software on Ubuntu 20.04 OS, as in the picture below: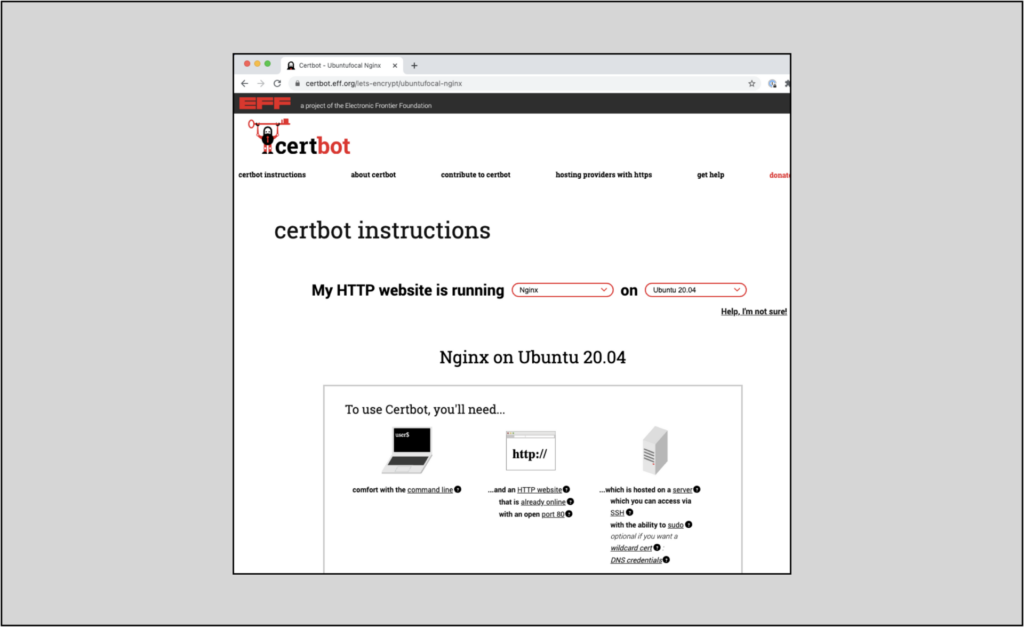
NGINX configuration (/etc/nginx/sites-available/nautobot.conf)
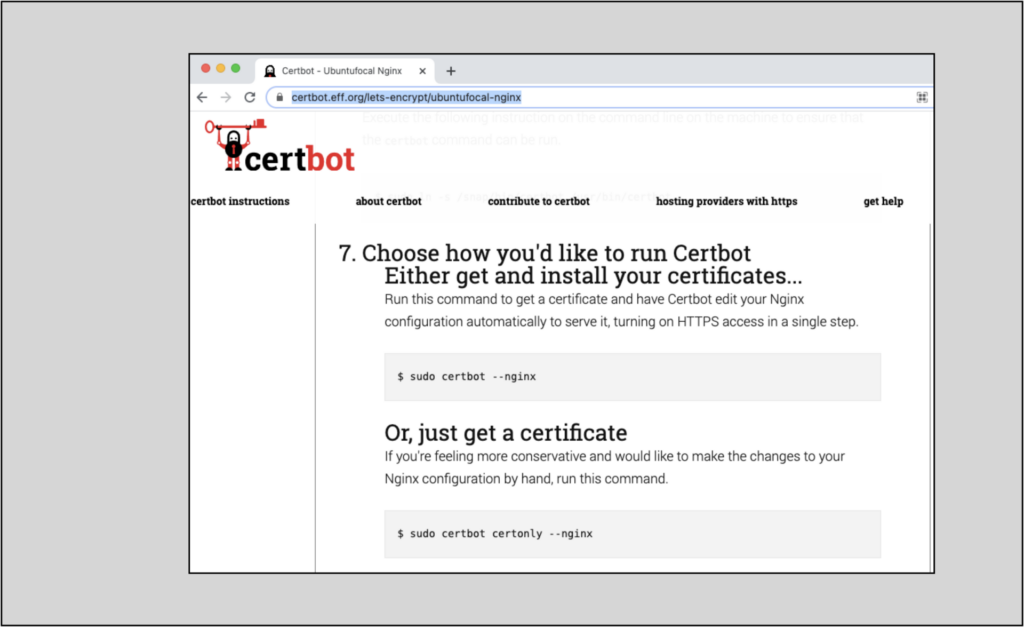
/etc/nginx/sites-available/nautobot.conf/etc/nginx/sites-available/nautobot.conf file looked like after that process:
managed by Certbot# THIS IS MY ORIGINAL SELF-SIGNED CERT INFO I COMMENTED OUT
#server {
# listen 443 ssl http2 default_server;
# listen [::]:443 ssl http2 default_server;
#
# server_name _;
#
# ssl_certificate /etc/ssl/certs/nautobot.crt;
# ssl_certificate_key /etc/ssl/private/nautobot.key;
#
# client_max_body_size 25m;
#
# location /static/ {
# alias /opt/nautobot/static/;
# }
#
# # For subdirectory hosting, you'll want to toggle this (e.g. `/nautobot/`).
# # Don't forget to set `FORCE_SCRIPT_NAME` in your `nautobot_config.py` to match.
# # location /nautobot/ {
# location / {
# include uwsgi_params;
# uwsgi_pass 127.0.0.1:8001;
# uwsgi_param Host $host;
# uwsgi_param X-Real-IP $remote_addr;
# uwsgi_param X-Forwarded-For $proxy_add_x_forwarded_for;
# uwsgi_param X-Forwarded-Proto $http_x_forwarded_proto;
#
# # If you want subdirectory hosting, uncomment this. The path must match
# # the path of this location block (e.g. `/nautobot`). For NGINX the path
# # MUST NOT end with a trailing "/".
# # uwsgi_param SCRIPT_NAME /nautobot;
# }
#
#}
server {
# Redirect HTTP traffic to HTTPS
listen 80 default_server;
listen [::]:80 default_server;
server_name _;
return 301 https://$host$request_uri;
}
server {
listen 443 ssl http2 ;
listen [::]:443 ssl http2 ;
server_name fiola-nautobot.cloud.networktocode.com; # managed by Certbot
ssl_certificate /etc/letsencrypt/live/fiola-nautobot.cloud.networktocode.com/fullchain.pem; # managed by Certbot
ssl_certificate_key /etc/letsencrypt/live/fiola-nautobot.cloud.networktocode.com/privkey.pem; # managed by Certbot
client_max_body_size 25m;
location /static/ {
alias /opt/nautobot/static/;
}
# For subdirectory hosting, you'll want to toggle this (e.g. `/nautobot/`).
Not Secure warning in the URL window is now a lock, indicating a trusted certificate: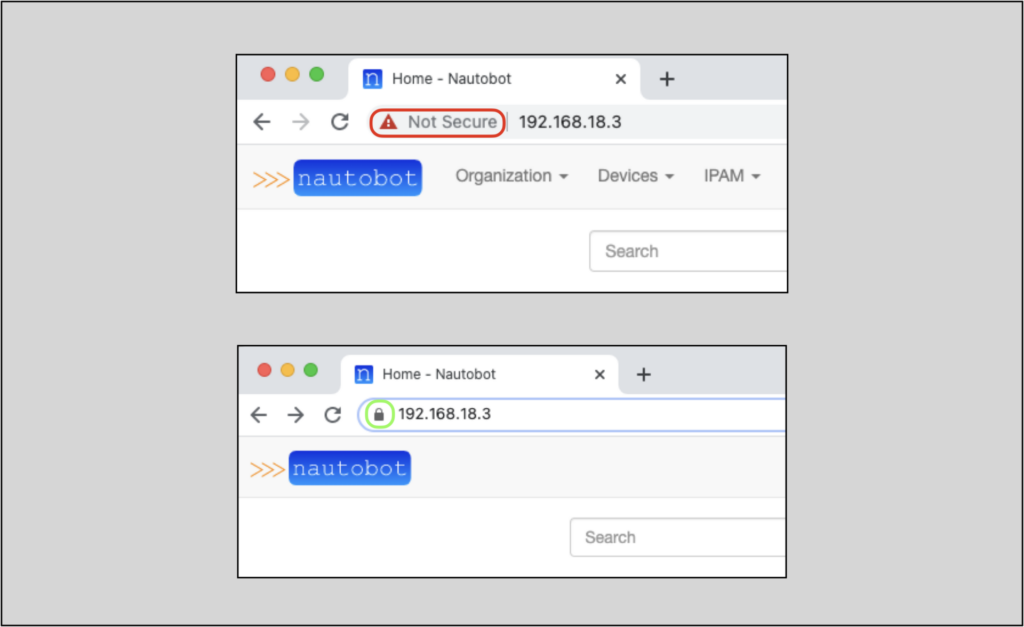
Share details about yourself & someone from our team will reach out to you ASAP!