When engineers are starting their network automation journey, everybody asks where and how they should start. Their immediate thought is coming up with methods of automating changes within their environments. However, doing so can be scary for those who are risk averse about automation making changes. The question then comes about how automation can be used to help solve some of the big problems facing network teams today. One of those problems that we’ve repeatedly heard from our customers and fellow network engineers is around configuration drift. This issue typically occurs for multiple reasons:
Thankfully, this issue can be addressed without making any changes on your devices. You might ask, “How do I do that?” That is where the Golden Configuration plugin for Nautobot comes in. The Golden Configuration plugin is comprised of four components:
Utilizing these components, you can define the Golden Configuration standard for each of your devices and compare their adherence to that standard, otherwise known as their configuration compliance. This post will delve into those various components and how they function to handle your device backups, generate intended configuration utilizing data aggregated from your Source of Truth, and finally, determining compliance of said devices to that intended configuration.
Like all Nautobot plugins, the Golden Configuration plugin can be installed from PyPI by issuing the following:
pip3 install -y nautobot-golden-config
If you want to live on the bleeding edge, you also have the option to install directly from the project GitHub repo:
pip3 install -y git+https://github.com/nautobot/nautobot-plugin-golden-config.git
At this point, pip should install all necessary dependencies for the plugin and install it inside the relevant Python environment. Ensure this is the same environment that Nautobot and the worker are running in for proper functionality. Once that’s been done, you’ll also need to update your nautobot_config.py file to enable and configure the plugin like below:
PLUGINS = ["nautobot_plugin_nornir", "nautobot_golden_config"]

PLUGINS_CONFIG = {
    "nautobot_plugin_nornir": {
        "nornir_settings": {
            "credentials": "nautobot_plugin_nornir.plugins.credentials.env_vars.CredentialsEnvVars",
            "runner": {
                "plugin": "threaded",
                "options": {
                    "num_workers": 20,
                },
            },
        },
    },
    "nautobot_golden_config": {
        "per_feature_bar_width": 0.15,
        "per_feature_width": 13,
        "per_feature_height": 4,
        "enable_backup": True,
        "enable_compliance": True,
        "enable_intended": True,
        "enable_sotagg": True,
        "sot_agg_transposer": None,
        "default_drivers_mapping": None,
    },
}
The environment variable must be accessible on the web service. This often means simply exporting the environment variable will not suffice, but instead requiring users to update the nautobot.service file, however this will ultimately depend on your own setup. See here for more details.
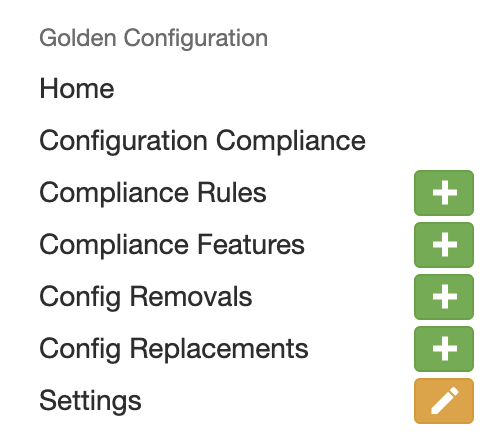
Please note that you will need to ensure that nautobot-plugin-nornir is installed along with nautobot-golden-config, and that both are added to the PLUGINS section to enable them in Nautobot. Next, you will want to append the PLUGINS_CONFIG portion to your existing configuration. Details of the various parameters can be found in the README. Once this is completed, you will be required to restart your Nautobot instance. Once that’s been completed, it should show the Golden Configuration portion in the Plugins section of Nautobot:
With the plugin installed and operational, I’ll now delve into the specific components of the plugin.
When Nautobot was forked from the Netbox project, one of the main features added to the core code was the integration of Git Repositories. The Configuration Backup component of the Golden Config plugin utilizes this feature to retrieve configurations from your devices and store them in a specified Git repository. Besides the obvious benefit of having backups for your devices, using Git as your storage allows you to easily track changes over time.
Prior to starting backups of your devices, you will need to update the Plugin Settings to specify the format of your backup path. This will define the structure of how your backups are stored and is an integral part of the Compliance component that will be detailed later. Here is an example:

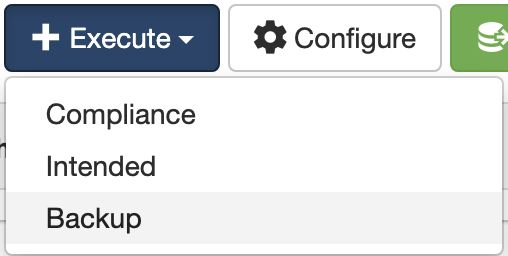
With that setting in place, you can now have Nautobot initiate the configuration backup of your devices. To do so, simply go to Plugins -> Golden Configuration -> Home. Click on the Execute button and then Backup:
You will then be provided a form like below to specify which devices to back up:
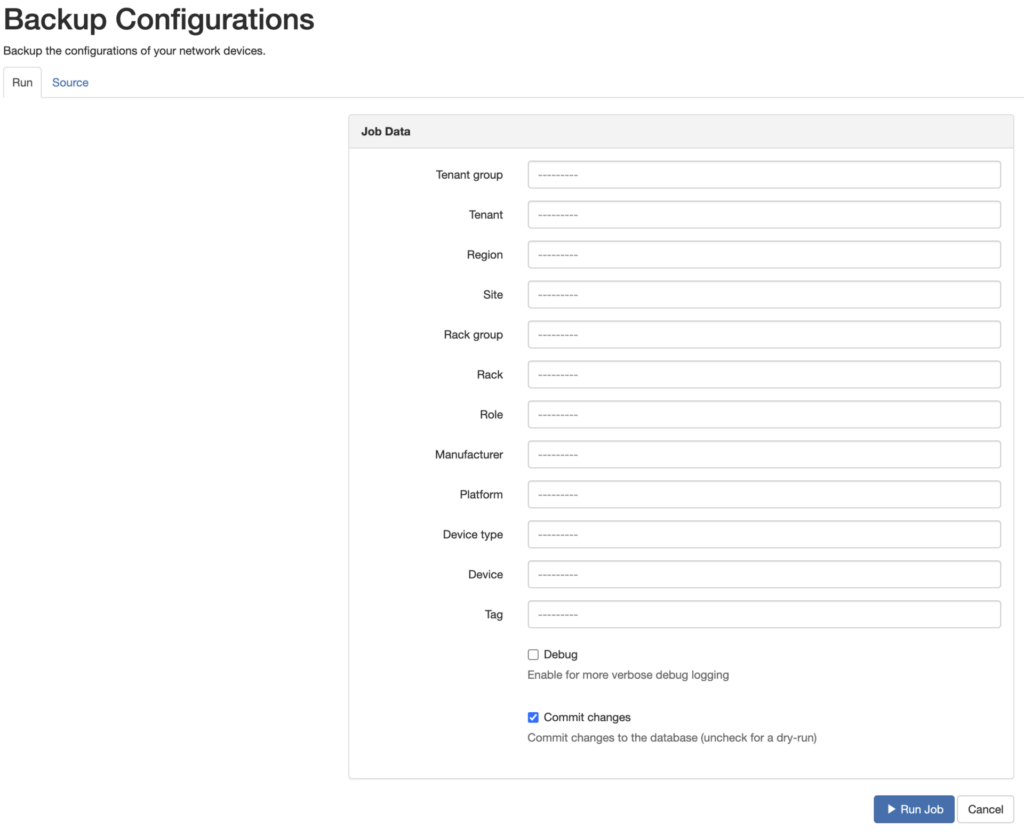
At this point, a job will be executed using Nornir to connect to your devices, retrieve their configurations, and push them to the specified remote Git repo. In each subsequent run, only the changes should then be synchronized to your repository.
Oftentimes your configurations contain information that you’d like to either remove or replace for security considerations or to prevent unnecessary backups due to a timestamp change or the like. These situations can be handled by the Config Replacements and Config Removals feature. The plugin includes a few standard ones, specifically around IOS secrets and stripping unnecessary information from the configuration. Each utilizes a regex pattern to identify the configuration snippet in question.
More details about this component can be found in the Navigating Backup section of the documentation.
Data is the heart of your Source of Truth. An empty Source of Truth is useless, but getting data into and out of that Source of Truth is almost as important as the data residing in it. Being able to quickly and easily get the relevant information and only the relevant information from your Source of Truth is extremely important when it comes to automation. While pulling data via an API is easy, it can also require a lot of intermediary steps and filters to get to the data you truly care about. This causes a lot of unnecessary computational load and delay that can make automation less than desirable. To address this, the Nautobot team decided to add GraphQL support. As our own Tim Fiola has detailed in manyblogposts and YouTubevideos, GraphQL allows the user who is querying data to get only the specific data they desire quickly and efficiently. This can take something that might take twenty API calls and reduce it to one. With a large number of devices this can save you a great deal of time.
Once you’ve populated data in Nautobot, you’ll need to define the data you wish to retrieve for use in generating your configurations. For the Golden Configuration plugin this is done with two settings: the GraphQL Query and the Scope. The GraphQL query defines which datapoints to pull from Nautobot. This is also where aliases are defined:
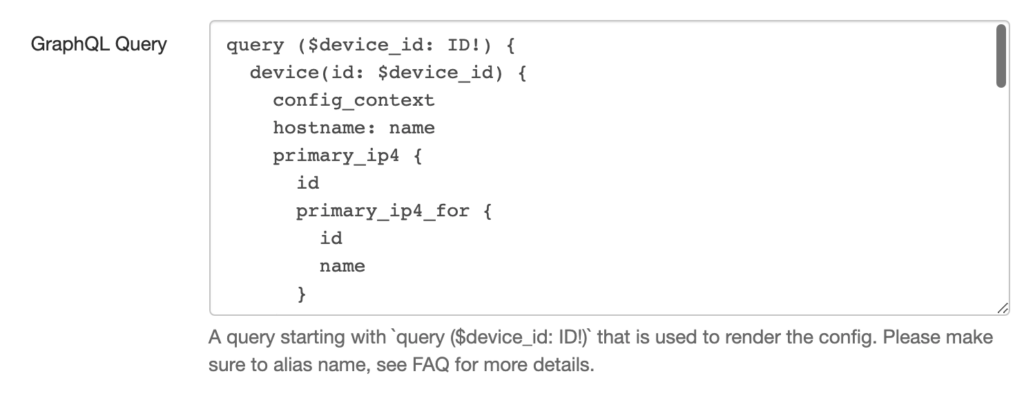
I’ve provided a duplication of the query I used for this guide below:
query ($device_id: ID!) {
  device(id: $device_id) {
    config_context
    hostname: name
    primary_ip4 {
      id
      primary_ip4_for {
        id
        name
      }
    }
    device_role {
      name
    }
    platform {
      name
      slug
    }
    site {
      name
      vlans {
        id
        name
        vid
      }
      slug
    }
    interfaces {
      description
      enabled
      name
      ip_addresses {
        address
      }
      tagged_vlans {
        id
      }
      untagged_vlan {
        id
      }
      tagged_vlans {
        id
      }
    }
  }
}
The Scope setting allows you to restrict the devices that are included in your queries. This specifically aids in removing unnecessary devices such as servers or unmanaged devices. In the example here, it is restricting which platforms will be queried, allowing you to ignore platforms that you don’t care about:

As you can see from the example query, there’s a lot of data that can be pulled from Nautobot. However, sometimes the built-in models and data fields aren’t sufficient and you need to attach additional data to your devices in Nautobot. To do this you can add that data to the config contexts for that device. This is also supported by the Git Repositories feature and gives you the ability to add variables like below to your Git repo and have it automatically pulled and applied to the appropriate devices:
---
bgp:
  asn: 65251
  log-neighbor-changes: true
  neighbors:
  - ip: 10.10.0.6
    remote-asn: 65251
  - ip: 10.10.0.10
    remote-asn: 65251
  - ip: 10.10.11.6
    remote-asn: 65250
  redistribute:
  - connected
  rid: 10.0.10.1
With your data defined, you can have Nautobot generate the Aggregate Data for each of your devices. By simply going to the Home page of the Golden Config plugin you should see a list of all devices that have had any configuration generated or backed up. You may need to perform a dry run of Intended for the Aggregate Data to be created. In the list of devices on the right there is a row of Action icons:

The {…} icon when clicked will display all of the variables relevant to that device that you can use in your templates:
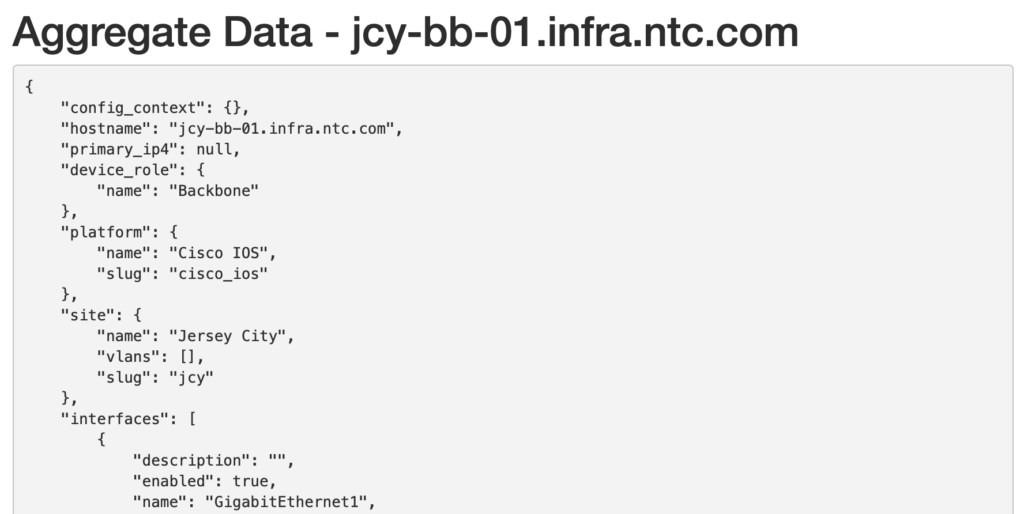
When paired with variables for a device you’re able to quickly and easily create a standardized configuration programmatically. For example, by pulling the hostname of the jcy-bb-01.infra.ntc.com appliance from our demo environment and applying it to the following template:
hostname {{ hostname }}
You’ll get hostname jcy-bb-01.infra.ntc.com when the configuration is generated. As you can see, by changing your variables for each device being created, you can easily generate configuration for an unlimited number of devices. That brings us to the next component, Configuration Intended, where you’ll flesh out your devices’ Golden Configurations further.
With your device configurations being backed up and your interesting device data defined, the next step is to define your Intended Configuration for those devices. This is accomplished with Jinja2 templates paired with the Source of Truth Aggregation component. As was shown in the last section, by defining configuration snippets as templates paired with information pulled from Nautobot you can programmatically generate the intended configurations for each of your devices. A template like below can even be used to configure features like BGP routing:
router bgp {{ config_context["bgp"]["asn"] }}
 bgp router-id {{ config_context["bgp"]["rid"] }}
{% if config_context["bgp"]["log-neighbor-changes"] == true %}
 bgp log-neighbor-changes
{% endif %}
{% if config_context["bgp"]["redistribute"]|length > 0 %}
 redistribute {{ config_context["bgp"]["redistribute"]|join(' ') }}
{% endif %}
{% for neighbor in config_context["bgp"]["neighbors"] %}
 neighbor {{ neighbor["ip"] }} remote-as {{ neighbor["remote-asn"] }}
{% endfor %}
which, when paired with the template above, results in the following configuration being generated:
router bgp 65251
 bgp router-id 10.0.10.1
 bgp log-neighbor-changes
 redistribute connected
 neighbor 10.10.0.6 remote-as 65251
 neighbor 10.10.0.10 remote-as 65251
 neighbor 10.10.11.6 remote-as 65250
Like the rest, configuration of the Intended component is done through the plugin Settings:

The Intended Path setting defines the storage structure of your intended configurations similar to how your backups are structured. The Intended repository is the Git Repository in which the intended configurations are stored. With those defined, you can then utilize the plugin’s Intended Configuration generator to create your Golden Configurations by following similar steps to the backups. Go to the plugin Home page, click Execute and then Intended:
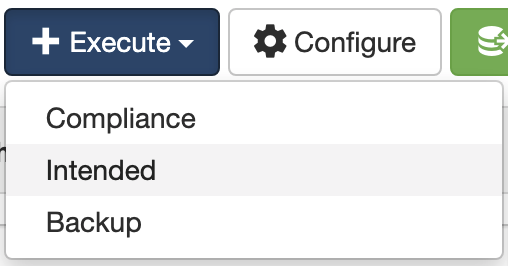
Similar to backups, you’ll be presented a filter form where you define which devices will have configurations generated. This will launch a Nornir job to combine the Aggregate Data of your devices with your Intended Configuration templates to generate configurations and then push them to your Git repository. From there, these configurations can be pushed to your fleet, can be used for zero-touch provisioning (ZTP) of new equipment, or even for determining your fleet’s compliance to your standard, as I’ll detail in the next section.
Now that you have your current device state via backups and have generated your intended configurations, you can compare the two and see where things are out of alignment. This is what we define as Configuration Compliance. With that data, it’s relatively easy to see which corrections need to be made and prevent potential issues.
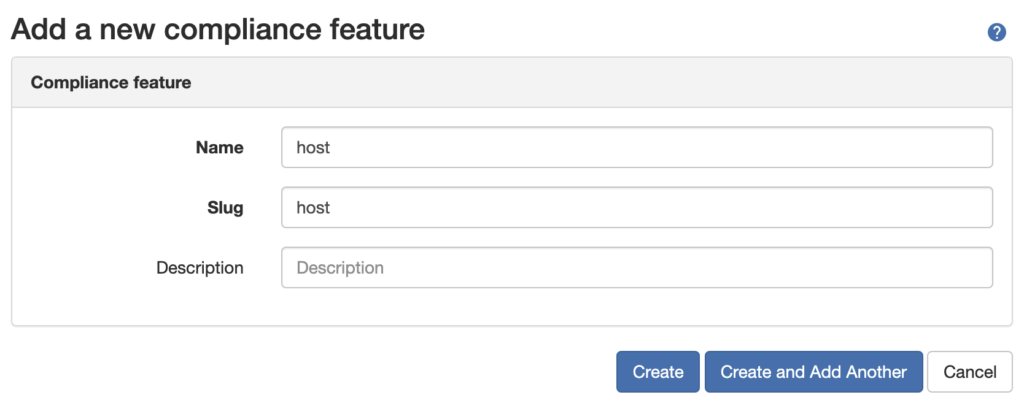
In order to gather this information, you must first define your Compliance Features and then your Compliance Rules. Compliance Features are labels for the configuration snippets that you want compliance resolved on, such as hostname, aaa, dns, etc. These are shared across platforms. You can add them by going to Plugins -> Golden Configuration -> Compliance Features and clicking the + button. You’ll be presented with a screen like below:
After you’ve added all of your Compliance Features that you wish to look at, you’ll next need to define the Compliance Rules for each platform. These are essentially which portions of the configuration are included in the feature to be inspected. Like before, to add Compliance Rules you’ll need to go to Plugins -> Golden Configuration -> Compliance Rules and click the + button. From there you’ll need to define which portion of the configuration to match:

The configuration matches specifically the parent line of configuration segments, so any indented configuration is ignored. This is also where you’ll define whether order of the configuration is required for compliance to be achieved. This is typically important with configuration segments like ACLs where order of the configuration lines is exact and must be in order to be correct. The default setting is to ignore the order of configuration lines for compliance.
With everything defined, you’re now able to run a Compliance job against your fleet to see how everything lines up. Just like backups and intended, this is also kicked off from the Execute button:
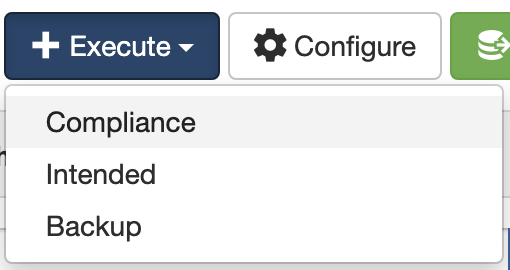
After defining the set of devices to have the Compliance job run against, a Nornir job will run. Utilizing a platform parser from the netutils library and a Nornir play, it will generate a report for each device, site, and an overall compliance report. The most important of these being an individual device’s compliance on specific Compliance Features. You can find this information by going directly to the device in Nautobot where two new sections have been added:
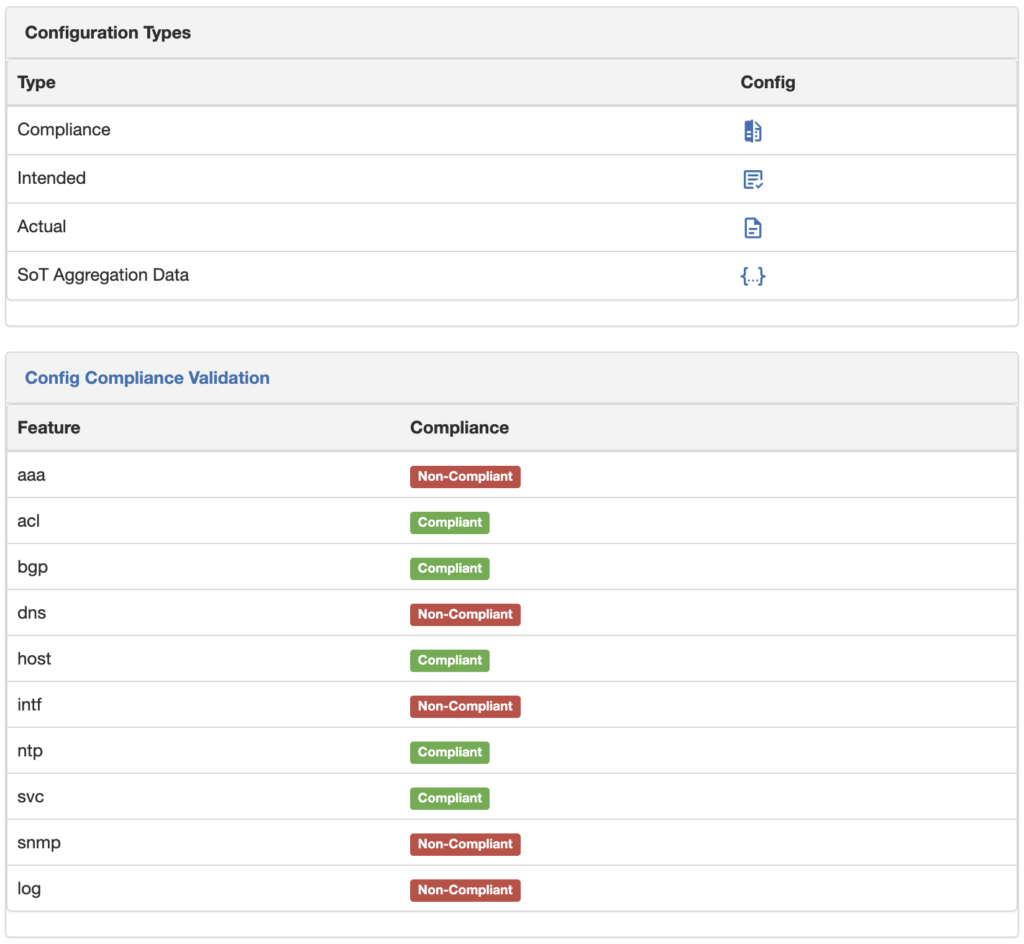
The Configuration Types section links to each of the relevant configurations (actual, intended, and compliance) and the Aggregate Data for the device. The Config Compliance Validation section shows the compliance status for that device relative to each Compliance Feature. When you click on the section header, it will then take you to the compliance details for that device:
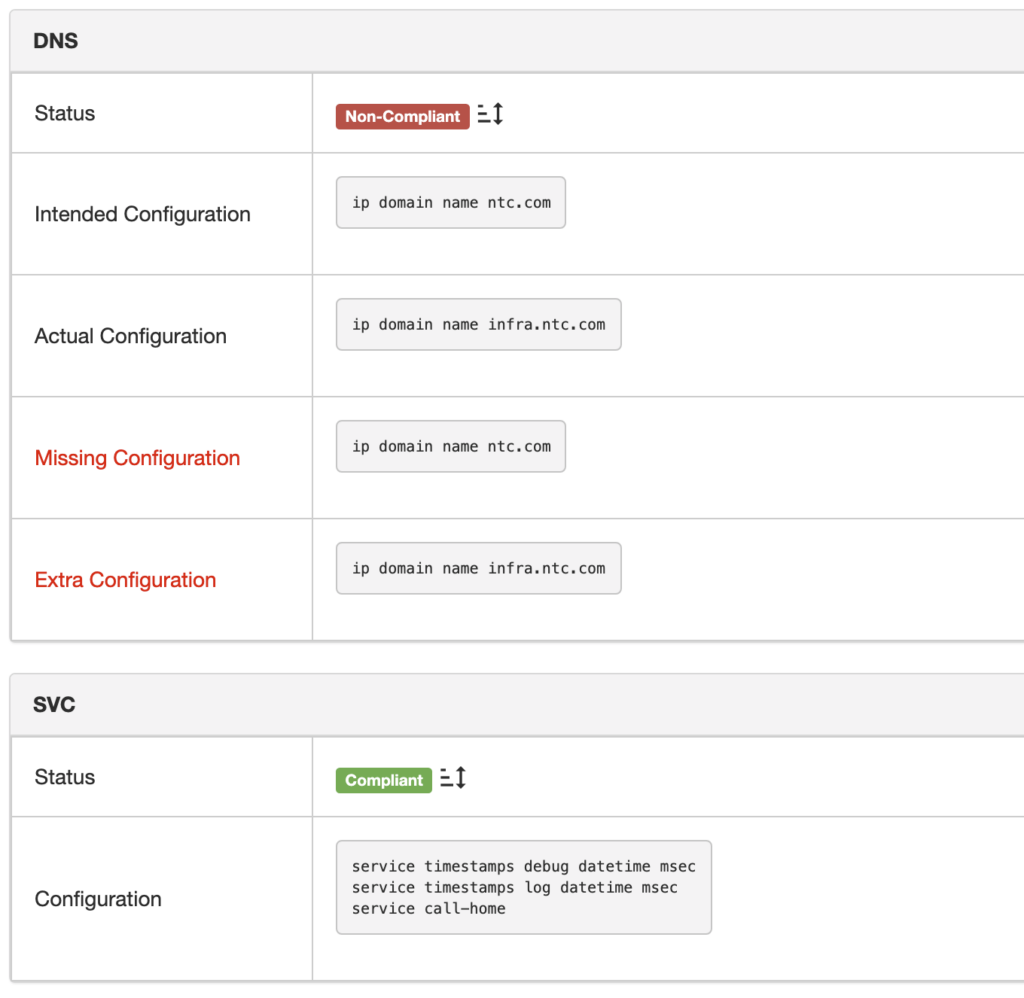
From here you can see which parts of the configuration are missing or extraneous. Also from here, it’s very easy to retrieve this information from the GUI or API and push corrections to the devices in whichever method is preferred. You can also see the compliance of a particular site by going to the site itself in Nautobot where a new section has been added:

Finally, if you wish to see a more wholistic view of your fleet’s compliance status, there are a few options for that. The first is a simple Compliance view for those devices that have been reviewed:

This screen shows a simple green checkmark or red cross to reflect compliance status for that feature on a device. This allows for a quick glance to see the state of your fleet’s compliance on individual Compliance Features. If you prefer more of a graphical representation, there is also an Overview Report that presents it in a more friendly format. You can reach this by going to Plugins -> Golden Configuration -> Configuration Compliance and clicking on the Report button:
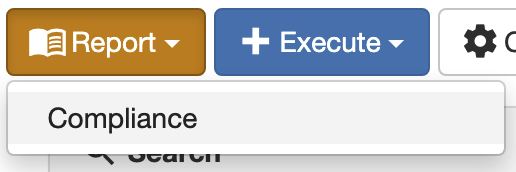
You will then be presented with the view below:

From here you can narrow down the report to any specific tenant, site, region, etc. that you desire.
Today I’ve given you a brief overview of the various components of the Golden Configuration plugin for Nautobot. I hope that it helped show how a bit of automation doesn’t necessarily require pushing changes to make an impact and helps you on your automation journey.
-Justin
Share details about yourself & someone from our team will reach out to you ASAP!