Introduction to Network Emulation and Requirements for Virtual Network Devices

Blog Detail

Network Emulation consists of (re)creating a network in a virtual environment using virtual devices. Network engineers have been using Network Emulation for training and demos for some time now, but some new use cases are emerging around Continuous Integration and Continuous Delivery (CI/CD) of the network itself or the tools around it.

I’ve seen a lot of interest from both big and small companies as Network Emulation aligns well with the introduction of DevOps principles in Networking (NetDevOps). Some of the largest barriers are the quality of the virtual images, which are emulating production network devices, obtained from the network vendors and the lack of proper tools available to create large emulated environments.

This is a vast topic with many different use cases and tools–as a result there are often misunderstandings, which can result in unclear specifications and requirements. However, without clear requirements, the need for better Virtual Network Devices is not clearly communicated back to the vendors and there is no path to get out of the current situation.

In this blog, I’ll cover the most common use cases for Network Emulation and how Network Emulation differs from Network Virtualization or Network Simulation, which are two different technical solutions that are often conflated with Network Emuation. In the second part of the blog will take a deeper look at the Virtual Network Device: what are their main differences with their physical counterpart and what you should look for when evaluating a Virtual Network Device for Network Emulation.

Disclaimer: My background as a network engineer is largely based in Datacenter Switching and I’ve been using Network Emulation for 5 years in different roles and environments. During my time at Juniper, I was part of the team who made the virtual QFX publicly available. Due to my background, when I’m thinking about Network Simulation, I’m thinking first about networks made of Routers and Switches but this write up should be applicable beyond datacenter, switches and routers.

3 Main Use Cases for Network Emulation

I categorized the main use cases for Network Simulation into 3 categories:

  • Network Design, Validation, and Testing: Recreate a network to validate its behavior.
  • Tools development and Validation: Use virtual devices to validate and develop tools that are dependent on network devices.
  • Training and Demo: Create a network for training or to demonstrate a new feature.

Network Design, Validation, and Testing

Ideally, everything going into production should be first thoroughly tested, whether it is a change in the design, a standard configuration change, or a new version of your favorite Network Operating System (NOS). Unfortunately, only a few organizations have the resources to have a lab network mirroring the production environment and it goes without mentioning the challenges inherent in managing such an environment.

The ability to emulate a production network in a virtual environment reduces the barrier to entry so that most organizations can have one virtual lab, and it also makes it possible to simulate networks at very large scale.

For a NetDevOps organization, the goal is to be able to test the network automatically for every change. At some point, it will be common to have an Emulated Network simulating the production network created on-demand by the Continuous Integration server, for every change. 

Tools for development and Validation

All software that interacts with a network device–whether using the CLI or an API–should be tested not only when the software itself changes but also when the network changes (see first use case : Network Validation and Testing). 

Software Testing is a topic on its own with multiple stages (unit, integration, system, etc.) Normally you will start with unit tests by leveraging simulated (mocked) interface but it’s recommended to also have some end-to-end testing with something as close as possible to your final environment. 

Depending on what you are developing, you might want to even test your software against multiple versions of your NOS to make sure that you are covering all cases.

CI/CD is already the norm in software development, in the application world it’s common to recreate a production-like environment on-demand during the testing cycle to do end-to-end testing. With a proper Network Simulation environment it would be possible to introduce networks in the mix as well.

Training and Demonstration

Protocols and architectures in networking are evolving at a very fast pace and it’s often challenging to access a a physical lab with the right devices in order to get familiar with this new technologies.

For this use case, it’s very convenient to be able to use a virtual lab that will let you explore all sorts of topologies and protocols.

This is probably the use case that people are most familiar with. For some time now, CCIE or JNCIE candidates have been practicing on virtual labs built with GNS3 or EVE-Ng.

Network vendors like Cumulus Networks or Big Switch Networks are providing virtual environments available in the cloud so that everyone can get can easily get access to their technology (Cumulus In the CloudBigswitch Labs).

Network Emulation is different than Network Virtualization and Network Simulation

Often people mix up Network EmulationNetwork Virtualization, and Network Simulation. Here are our definitions:

  • Network Virtualization consists of using a virtual device in a production network as a replacement for a physical device.
  • Network Emulation consists of emulating a production device with a virtual equivalent for testing or training, derived from the same software as the production device.
  • Network Simulation consists of simulating a production device with a completely different software. (Batfish, Forward networks …)

Network Virtualization has gained popularity in the last 5 years as it allows for better resource control, scaled out solutions and the ability to deploy as you grow that fit very well with Service Provider or Cloud use cases. The most popular Virtual Network Devices (AKA Virtual Network Function, VNF) are virtual router, firewall and load balancer.  Network Emulation and Network Simulation are close since their goal is to reproduce a production device/network in a controlled environment, but there is an important difference. Network Emulation is based on the same code as the production device, while Network Simulation is based on a third party software attempting to replicate the behavior of the network device. Both have a place and both approaches have their pros and cons in a testing strategy. A mature testing environment will often leverage both.

Differences between Physical Network Device and Virtual Network Device

The main component is the Virtual Network Device (VND) that simulates the behavior and the feature of a production network device. Ideally a VND will be at feature parity with the real device. Unfortunately, this is not true for most devices out there.  The gap between VND and production devices varies a lot from vendor to vendor or even between devices.

So if we don’t have feature parity between a production device and its virtual image, does that mean we can’t do Network Emulation? No, it’s still possible and there are some benefits but we won’t be able to emulate everything and we won’t be able to get the most out of it. For now, we need to be aware of these caveats and their workarounds. Hopefully, as more people are starting on this journey and are defining a clear list of requirements they are expecting from their network vendors and are “voting with their wallets” we should see the gap shrinking.

Nowadays, all routers or switches are making the distinction between the control-plane traffic (all the network protocols :lldp, lacp bgp, etc ..) and the data-plane traffic (real traffic). In most cases, the control plane traffic is handled by the routing engine in software and the dataplane traffic is handled with the a network processor or ASIC in hardware, in order to process Gbps or Tbps of data. The ASIC market is a topic on its own with lots of players and differences but in a nutshell, most vendors out there are not building there own chipset, they are buying them off the shelf. The goal for an VND is to have full feature parity with the physical device it’s emulating, which means that we would need to emulate both the control plane and the dataplane in order to have a complete emulation. Unfortunately, most ASIC manufacturers are not providing a software emulator for their chipset that can be distributed or they are not providing a solution at all. As a result, some VND can only emulate the control plane and are providing a different solution for the dataplane. The available solutions are disparate–some vendors are able to provide a real emulator for both the control-plane and the data-plane, and some are just providing an emulation of the control plane. As a user, it’s important to ask these questions because the architecture of a VND will have a direct impact on its features and ultimately on the level of trust you can place on it regarding some features that are usually executed on the dataplane. Also if the dataplane is not properly emulated using the same code than the production device, you won’t be able to reproduce or identify bugs that are specific to this component. It’s not necessarily a blocker but it’s important to understand the underlying architecture of a VND to understand what is representative of the production environment and what is not.

Network Device Emulation Requirements

Here are 9 points of consideration when evaluating a VND for Network Emulation:

  1. Resource consumption: Some Virtual Network Device or Virtualization solutions are optimized for production and performance instead of testing and may require a lot of resources to work properly, check the CPU usage, the number of CPU core needed and the memory.
  2. Max Number of Interfaces: The maximum number of interfaces supported is usually lower than the real device. This factor is important because it may limit the size of the network you will be able to emulate. If your VND only supports 8 interfaces, you won’t be able to create a datacenter network with more than 8 racks and only few servers per rack.
  3. List of supported features: As discussed previously, it’s very important to understand which which features are–and even more importantly which ones are not–as this will determine what can be emulated. Some vendors are not clearly publishing a list of supported/not supported features for their VND.
  4. Performance: It’s expected for an VND to be able to carry real packets in order to do end-to-end connectivity tests. The performance varies dramatically between solutions, as some VND can only carry few 100s of packets per second while others can carry 100s of Mbps of traffic.
  5. Release cycle: The release cycle is an important point that is often forgotten. Once you have integrated Network Emulation into your process and are relying on it to validate a new configuration or a new code before deploying it in production, it will become mandatory to have access to a VND image for every software release available; major, minor and bug fixes releases. Some vendor are still releasing images only for major releases of their software or for some minor releases but not all.
  6. Ability to bootstrap out-of-the box: Network Emulation benefits are decoupled when you are able to automate the creation and the provisioning of your virtual environment. It opens the door for more use cases, such as easily testing a new version of NOS. In order to automate the creation and the provisioning of your VND, you need to make sure it provide some API or solution to get its configuration at boot time (ZTP, DHCP, cloud-init ..)
  7. License & Support: What conditions need to be met to access a VND image and what is the level of support provided on the VND itself. Some vendors are still not providing official support and are considering their VND as best-effort since they are not charging for it.
  8. Support for main tools and hypervisor: Almost each hypervisor or network Emulation tool has specific requirements, so make sure to ask which one is supported out of the box. 
  9. Hardware requirements: As mentioned some VND are optimized for production and performance instead of testing, and may require some specific hardware or options. Check for Hardware Acceleration, Specific type of NIC or kernel version.

It’s important to differentiate VND designed for Network Virtualization from the one designed for Network Emulation, as the requirements are very different. VND designed for Network Virtualization are usually optimized for performance and this usually leads to bigger resource requirements


Conclusion

I hope that this blog will help increase the level of understanding and awareness on this topic and that collectively we’ll be able to articulate our requirements to our vendors better. I’m looking forward to the day when we’ll be able to truly emulate networks at scale without comprimises and when it will be mainstream to have changes tested automatically in a network emulation as part of the Continuous Integration pipeline.

-Damien (@damgarros)


ntc img
ntc img

Contact Us to Learn More

Share details about yourself & someone from our team will reach out to you ASAP!

NFD21 – Network Automation Journey

Blog Detail

In early October, I had the chance and the opportunity to be part of the team that represented Network to Code at Networking Field Day 21. Participating in Network Field Day is always a challenging exercise as you’re expected to present in front of a group of industry experts that are not shy about asking the hard questions. On top of that they love demos, but only live demos, which adds another level of stress on top of this exercise.

A few weeks ago, while we were brainstorming on what we wanted to demonstrate this time, we decided to try something different. Instead of building the most complex and impressive demo about network automation, we decided to walk the delegates through a journey into network automation. What would it look like to start automating an existing network and step by step turn it into a modern environment? We also wanted to take this opportunity to explain how at Network to Code we are working hand-in-hand with our customers to automate their networks.

Network to Code methodology

When we are engaging with a new customer, the first order of business is usually to do an assessment of the current situation. What are the most important business requirements? What is the current status of the network? Which tools are already in place and which one should stay or be replaced?

Based on this initial assement we build a personalized action plan with each customer, composed of multiple phases. These phases will be different for each customer based on what they already have in place.

As we start implementing these phases and making progress in the network automation journey, we are also working on both formal and informal training to ensure that the team in place is able to follow along what we are doing and feels comfortable with the solution that we are building. It’s very important for the long-term success of the project.

Journey into network automation

For this exercise, we built a virtual topology composed of 5 different Network OS (NOS): NX-OS, IOS XE, IOS XR, Junos and EOS. It’s very common to find a heterogeneous network composed of very different NOS and its part of the challenge in taking an existing network into automation. Automating a brownfield network is hard, but it’s the most common use case.

Phase 1 – Standardization

When we want to automate a network it’s critical to start thinking about standardization. When it comes to standardization make sure you consider at least the following items at the beginning of a project:

  • Network design standardization
  • Naming convention
  • Document workflows
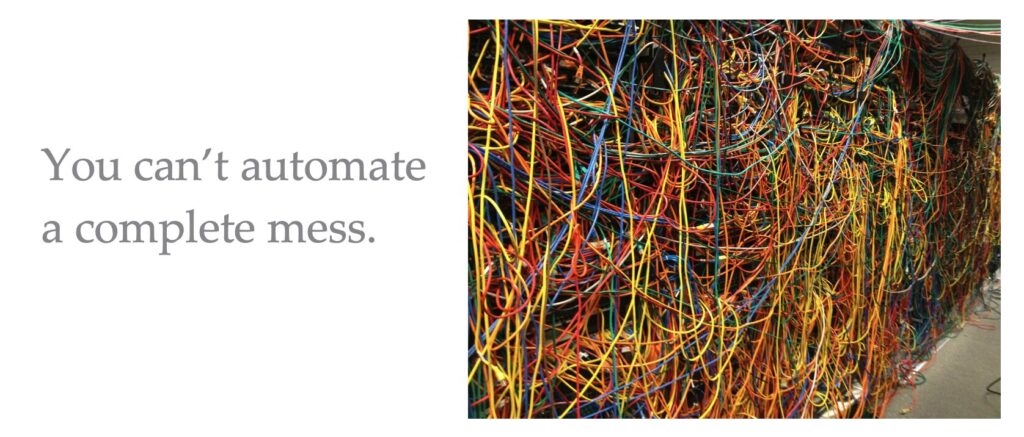
You can't automate a big mess

More is not always merrier when it comes to standardization. Not all standards are automation friendly and it’s usually best to keep it simple. For example, most networks already have a naming convention in place, in most cases, it’s trying to fit as much information as possible into the hostname of the device because it’s the only place we can store information.
It usually works well at first but overtime as the network evolves, these very complex rules tend to get in the way of evolution. In an automated environment, where all devices are inventoried properly, you have the ability to store as much metadata/attribute and additional information per device in a structured way as you want, so it’s not required to put everything in the hostname anymore.

The discussion around workflows is usually very interesting and an eye-opening moment for a lot of our customers. Everyone has workflows but in a lot of cases they are not properly documented. It’s not unusual to hear we don’t have a lot of workflows, maybe 1 or 2 with a few steps” at the beginning of the workshop and by the end of the session we have identified 5 to 10 workflows, with more than 10 steps each.
At the end, automation is all about workflow, so this part is very important in a similar way to the naming convention described previously–not all workflows are automation friendly. It’s important to identify the requirements and the dependencies of your workflows and identify where and how this information is available. If some critical information requires a manual intervention late in the process, it will be hard to fully automate this workflow. In this case, it’s important to redesign the workflow and see what information is really mandatory and what’s optional.

Phase 2 – Build an inventory

To start automating your first workflow, even the simplest, it’s important to have an inventory of your system. It’s not possible to automate without an inventory that contains critical information such as: ip address, platform, role, credentials, etc. An inventory can be as simple as a structured text file (like an ansible inventory) or it can be saved in a database. How you store it is not important as long as you have a proper inventory.

Once you have your inventory, it’s possible to automate the population of all your other tools that maintains their own list of devices. Monitoring tools, DCIM, IPAM etc…

Phase 3 – Quick wins, read only workflows

Once you have an inventory, you are ready to start implementing some read-only workflows that won’t harm the network, the most commons are:

  • Configurations backup, Save all configurations in version control
  • Synchronize Inventory across all tools, monitoring, alerting, etc.
  • Compliance Checks, ACL Verification, Configuration Standard
  • Ops / Chatops, Gather data from the network, assisted troubleshooting

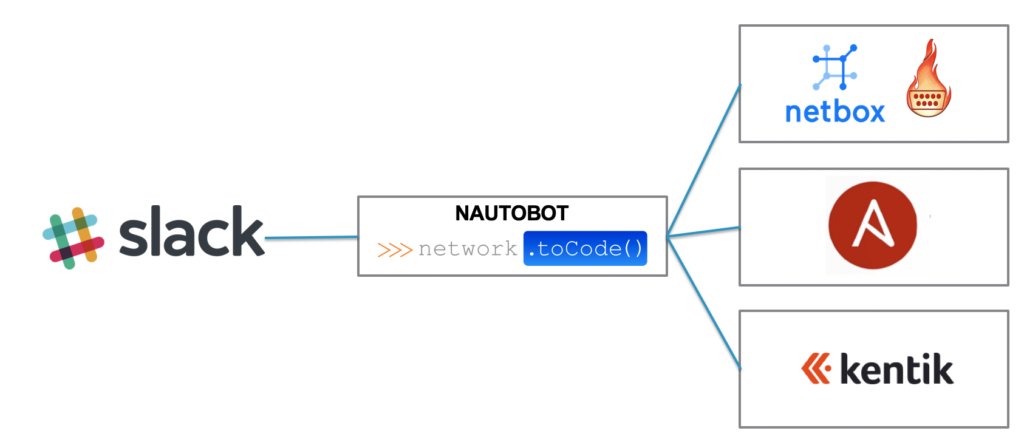
During the NFD presentation I demonstrated how from an inventory file I was able to populate all my devices into an DCIM solution like Netbox, including some information like the rack elevation. Then, using a Chatbot that we developed at Network to Code, I was able to gather information from my network directly within Slack leveraging Netbox and Napalm. In this example, among other things, I showed how to gather the LLDP information from a device using Slack, Netbox and Napalm.

Chatbot

You can watch this part of the demo starting around 8:20min

Phase 4 – Source of Truth

The next step in a network automation journey is to build a Source of Truth (SOT) to capture the intended state of the network. The Source of Truth is a very important component in your automation framework, if not the most important, but surprisingly it’s not often discussed. John Anderson gave a great introduction to SOT during his presentation earlier at NFD21, you can watch it (around 2:56).

One of the goals is to be able to regenerate all your configurations for your network devices from the Source of Truth and your configuration templates. We’ll address this part in the next section. Now to be able to do that, you need to ensure that your Source of Truth has all the right information:

  • If you are working on a greenfield environment, you’ll need some tools to be able to convert your design/your intent and populate all the information required to create this design into your SOT: ip, cabling, device attributes etc.
  • If you are working on a brownfield environment, like we did during the NFD presentation, your running network is currently the Source of Truth so you need to find a way to extract everything from the network and reimport it into your SOT.

You probably don’t want to import everything all the time, because it wouldn’t be defined as a Source Of Truth. But, to get started you need to extract as much information as you can, and then you’ll need to curate the data to ensure that everything is in order. This process can take a lot of time and effort, but the outcome is worth it.

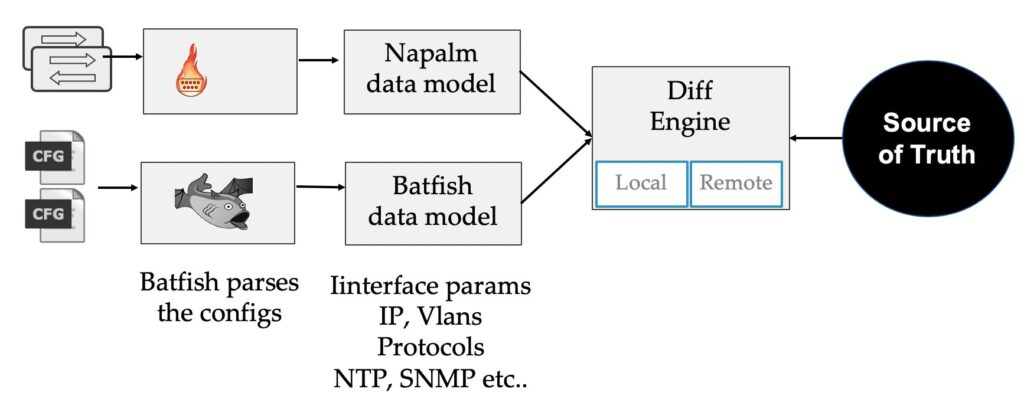
During the NFD presentation, I introduced an new tool that we’ve been working on called the network-importer, the idea of the network-importer is to help you import an existing network into a SOT at the beginning of a project, but it can also help you to analyze the differences between the network and the SOT if you already have one. This can also help identify the drift between the SOT and the network if you are not yet ready to generate and deploy your configurations from your SOT. Internally, the network-importer is leveraging multiple open source libraries to extract the relevant information from the network.

  • Batfish: A network configuration analysis tool that is able to extract and normalize the parameters and the properties of a device based on its configuration.
  • Napalm: A python library that is able to get and normalize various information from the most common Network Operating systems.
Network Importer

Right now, the network-importer only supports Netbox as a SOT but the goal would be to add more SOT in the future. This project is still at its early stage but once it reaches the right level of maturity, we would like to open source it.
If you are interested in helping beta test, please fill this form and we’ll get back to you when it’s ready

You can watch the demo here starting around 14:41

Phase 5 – Generate Configurations

The last part of my presentation was about configurations generation and especially how to generate configurations from the Source of Truth. Generating configurations from a configuration template is a topic that has been covered many times, and if you’re not familiar with Jinja as a templating language I encourage you to read this great blog about Jinja from my colleague Jeremy Stretch.

In my experience there are other challenges before and after the configuration templating that are important to talk about:

  1. Data Gathering and pre-processing What data do you pass to your configuration template? Usually everything you need to build a configuration will be stored in multiple places, and it can be challenging to gather everything and present it in a format that will be easy to consume in Jinja.
  2. Test your generated configurations How do you test the new generated configuration without deploying in production?

Data Gathering and pre-processing

As an example, if you are building the configuration for a Leaf in a spine-leaf design, you’ll need at a minimum this information: hostname, loopback address, asn, all interfaces, all ip addresses, peers ip addresses, peers ASN, vlans information.

In most cases the list is much longer but this list sufficiently highlights the challenges that we need to solve here.

Where you do you get this information and how do you present it in your configuration templates? Usually this information is available in multiple places (multiple Source of Truth) and even if you managed to put everything into a single Source of Truth like we did in step 4, you’ll need to make multiple API calls to get all the information you are looking for. As an example, when working with Netbox, we’ll need to make at least 3 API calls per device:

  • Get interfaces for each device
  • Get all Ips for each device
  • Get all Vlans (to get the vlan names)

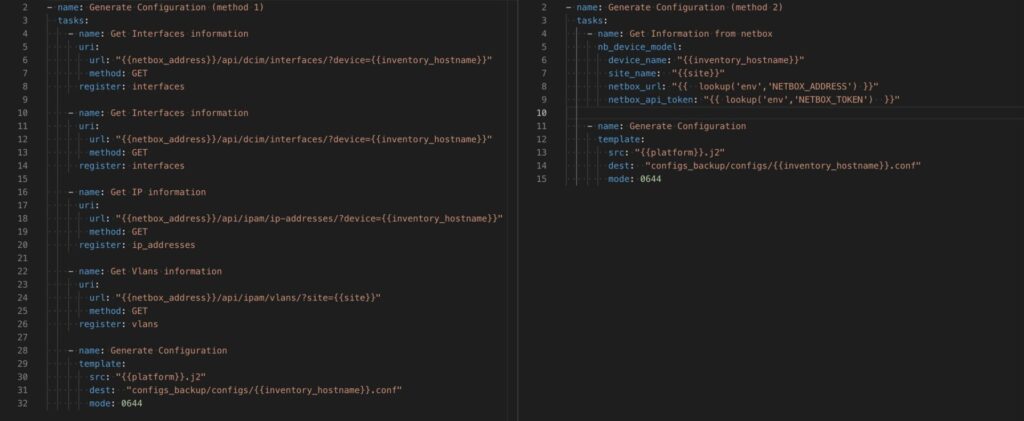
When using Ansible to build your configurations, the first method could be to make each API call a task in your playbook and register the output of each call into a variable that will be passed to your template. This solution will work, but the format of the data you’ll get in your template won’t be easy to work with and you’ll end up with a very complex Jinja.

Another method would be to build a custom Ansible module in charge of gathering all the information you need and pre-processing the data as required. In this second method, you’ll be able to do some pre-processing of the data before presenting it to the configuration template, which will lead to an easier template.

The picture below shows both approaches side by side.

Generate Configurations

The difference of the length of the playbooks is obvious here but it’s usually not a good indicator to compare 2 playbooks. In this case, the data provided to the configuration template on the right will be easier to work with.

How to test your generated configurations

Having a way to test your generated configurations is very important at the beginning of the project of course, but it also helps each time you want to refactor your configuration templates or refactor how you are collecting and gathering your data. Having a robust solution to safely iterate on your automation stack is going to play a big role in your ability to adapt quickly to your environment.

Like in software development, a proper testing strategy should have different level of tests. In software development we called them : unit tests, functional tests, integration tests. The solution that we are exploring in this article would qualify as functional test. We won’t cover the other type of tests in this article.

If you have an example of what your final configuration should look like (the reference), this can be either the current running configuration or a previously generated configuration, you can generate a diff between your newly generated configuration and the reference one. Usually the goal is that both should be identical and the diff should return nothing. If the diff is returning an unexpected change then you know something is not right either in your data or in your configuration template.

Ansible provides an easy solution to generate diff between 2 files when using the option --diff. If you combine that with the dry-run mode (--check), you’ll be able to see the changes that you are about to make without touching your reference file.

Below is an example of a playbook that will generate a new configuration from your template and compare it with the last backup configuration (reference) without changing it. The key here is to use the options check_mode: yes and diff: yes on the second task in the playbook.


- name: Generate and Compare Configuration (do not save it)
  tasks:
    - name: Get Information from netbox
      nb_device_model:
        device_name: "{{ inventory_hostname }}"
        site_name:  "{{ site }}"
        netbox_url: "{{ lookup('env','NETBOX_ADDRESS') }}"
        netbox_api_token: "{{ lookup('env','NETBOX_TOKEN') }}"

    - name: Check Configuration
      template:
        src: "{{ platform }}.j2"
        dest:  "configs_backup/configs/{{ inventory_hostname }}.conf"
        mode: 0644
      check_mode: yes
      diff: yes

Below is an example of what you will get if there is a difference between your new configuration and the reference one. In this case, my new configuration is missing vlan 1001. I need to check my Source of Truth to ensure that it’s properly defined there.

Diff Configurations

Unfortunately, I wasn’t able to present this part because we were running a bit late so no video this time

-Damien (@damgarros)


ntc img
ntc img

Contact Us to Learn More

Share details about yourself & someone from our team will reach out to you ASAP!

Network to Code at AnsibleFest 2019

Blog Detail

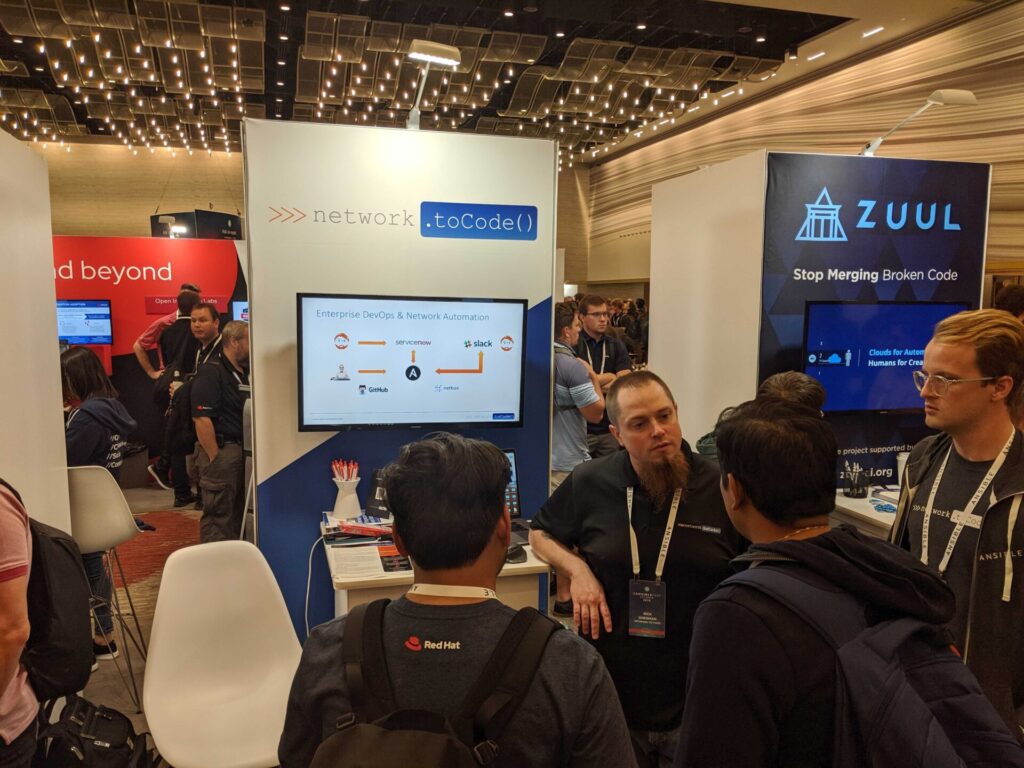
Team Picture 1
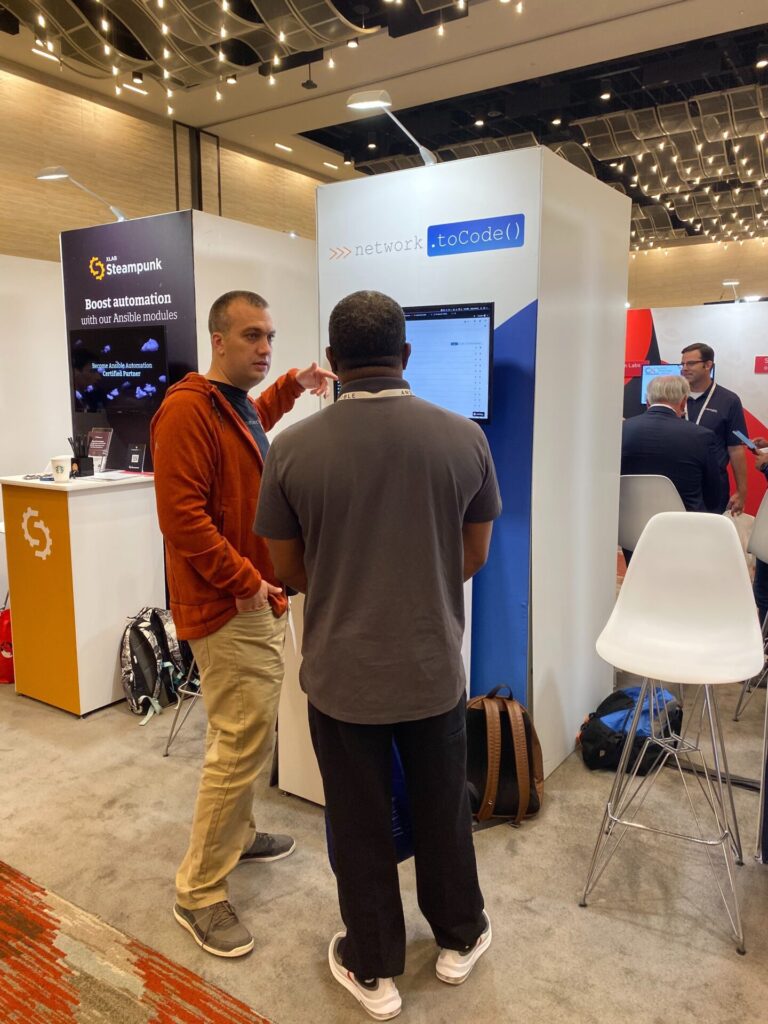
Team Picture 2

Members of the Network to Code team recently made their way down to sunny Atlanta for our third year as AnsibleFest sponsors. As regular users of the platform, we always look forward to hearing what’s next in the world Ansible, and this year’s Fest did not disappoint!

A few key takeaways from our team:

MORE AND MORE NETWORK AUTOMATION

As early adopters, you’ll always find us evangelizing about the importance of embracing network automation. This year, however, we were pleasantly surprised to notice that we weren’t the only ones. Conversations surrounding network automation took serious hold this year. Approximately half of the attendees we talked to were interested in network automation – a big leap from years past. We were also excited (excuse us for tooting our own horn for a moment) to hear that the Network to Code community was a big part of these conversations. As we’ve said before, community is a key component of everything we do here at Network to Code and were proud to foster a community that is leading the charge when it comes to network automation.

CULTURE IS KEY

The NTC team was glad to see that culture was getting some well-deserved attention this year. You can have everything in place you need to automate a network – the right tools, the right talent, the right infrastructure – but, if you don’t have cultural buy-in, your network automation project is going to be an up-hill battle. Thinking not just about how organizations deploy tools and solutions, but also about how they work to change hearts and minds surrounding new technology is something we here at Network to Code give a lot of thought to. We’re glad to see the conversation moving forward!

WHAT’S NEW IN ANSIBLE 2.9

With Ansible 2.9 just around the corner, there was no shortage of conversation surrounding upcoming changes to Ansible. There was a lot of discussion around the new collection system and how the main Ansible project will be reorganized in multiple repositories moving forward. It’s a healthy change for Ansible, and will help create cleaner delineation between the core engine, the core modules and the community modules. Each one will now be able to evolve at its own pace with its own release cycle. The collection introduced in Ansible 2.9 also offers a new packaging system for Ansible role, plugin and module, making it possible to split the main Ansible repository in multiple repositories.

The team at Red Hat is putting a lot of effort into ensuring that the transition will be as transparent as possible for users. While dates and milestones have yet to be defined, it looks like things should be moving forward in the next six months or so. The Ansible core team published a very informative blog explaining the motivation behind this refactoring that we recommend you check out.

The second big topic of conversation at the Network Contributor Summit had to do with the new Resource Modules and the Resource Module Builder. In Ansible 2.9, Ansible has developed 51 new modules called “Resource Modules” that will, overtime, replace some of the existing network modules. For example ios_interface will be replaced by ios_interfaces.

These new modules will take structured data for one or more objects in a structured format. This format will be the same as what you get back from the facts module, allowing you to push and pull configs to/from a device. Last but not least, these modules will support a declarative approach and will be able to override all objects that are not defined.

We look forward to seeing how these updates come to life in the coming months. In the meantime, happy automating!

-Damien


ntc img
ntc img

Contact Us to Learn More

Share details about yourself & someone from our team will reach out to you ASAP!