Updates to ntc-templates

Blog Detail

Over the last several months Jacob McGill and I made a big push to get through the dozens of open issues and PRs on ntc-templates and to incorporate several enhancements to the overall repo such as updating the readme, testing, and file extensions.

Here are some stats from when we first started to today:

  • Starting issues: 19, Today: 10
  • Starting PRs: 35, Today: 7
  • Total commits: 77 commits

On top of those stats, our updates include several new templates, bug fixes for existing templates, and additional fields added for existing templates. You can always check out the changelog for further details.

Some of the most notable changes made:

  • The extension of templates has changed from .template to .textfsm
  • The extension of parsed files has changed from .parsed to .yml

TextFSM File Extension Change

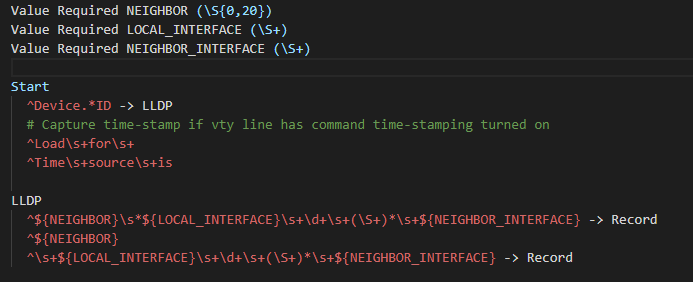
The main decision to rename the templates from .template to .textfsm is to take advantage of creating and editing templates within your chosen IDE with syntax highlighting. Jacob McGill is currently working on a syntax definition for TextFSM files in SublimeText which should be available soon. The image below is of syntax highlighting in VSCode using the TextFSM Template Syntax extension.
Parsed File Extension Change

The decision to change the parsed file’s extension to .yml is to allow us to use YAMLLINT within our testing framework and define how every parsed file should be formatted. Additionally, we’ve created the developer_scripts.py to make the development of new or existing templates easier on contributers. The script will generate the .yml files from the .raw files it finds along wither other options available to the contributor. You can find more information within the README

You can take advantage of the new updates by cloning the ntc-templates repo or installing the latest version from PyPi.

We want to let everyone know that we appreciate all the contributions to not only ntc-templates, but our other open source projects as well and can’t wait for your next contribution!


ntc img
ntc img

Contact Us to Learn More

Share details about yourself & someone from our team will reach out to you ASAP!

Using VSCode Remote Containers & Python Development

Blog Detail

I’ve been using using VSCode for development for a little while and was excited when Microsoft announced they were developing extensions to attach to running containers and allow you to still develop natively within Windows using VSCode.

Let’s go ahead and get started on setting up VSCode with the Remote – Containers and Python extensions.

  1. Launch VSCode and click on the extensions icon
  2. Search for Remote – Containers and click “Install”
  3. Search for Python and click “Install”
Extension Install

One of my use cases is that I have different Python Virtual Environments created in my docker image and I’d like to be able to use those to test code with different packages so i’ll show you how you can add custom paths for VSCode to search for virtual environments in.

  1. Click File > Preferences > Settings within VSCode
  2. Search python.venvpath
  3. Add the path in the container that your virtual environments are located in to the Python: Venv Path setting. Mine are located in /src/.venvs
Extension Install

Now that is complete, you should be able to attach to a running container.

  1. Start your docker container
  2. Click on the >< icon in the bottom left of VSCode
Remote Icon
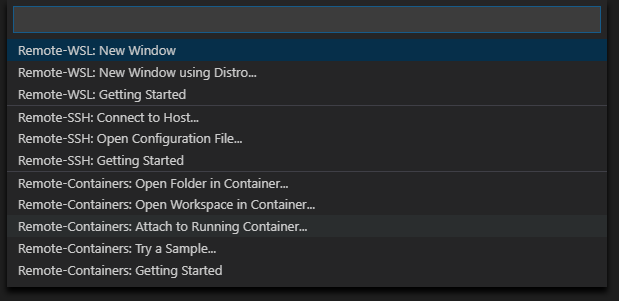
  1. Select Remote-Containers: Attach to Running Container
Attach Container
  1. Select the container you want to attach to
remote container

A new window should have popped up and you should see that you’re attached to the container now.

VSCode Remote Container

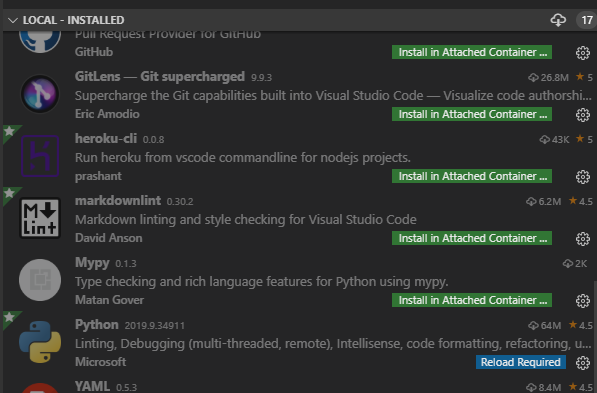
Now that we’re attached to the container within VSCode, we’ll need to install and enable the Python extension within the container.

  1. Click on the extensions icon and find Python
  2. Click Install in Attached Container
  3. Click Reload Required
Remote Python

Once it has been reloaded, you can open a directory.

Open Folder

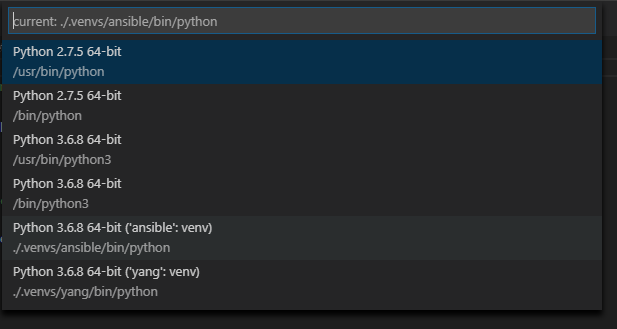
Now if I open a Python file, it will prompt me to select the Python interpeter I want to use. In this case, you’ll see the built-in Python’s that were found within PYTHONPATH and my virtual environments in /src/.venvs/

Python Interpreter

NOTE: If pylint or your selected linter isn’t installed, it will prompt to be installed.

As you can see, we can execute from the built-in terminal in VSCode and it is using my virtual environment.

VSCode Terminal1

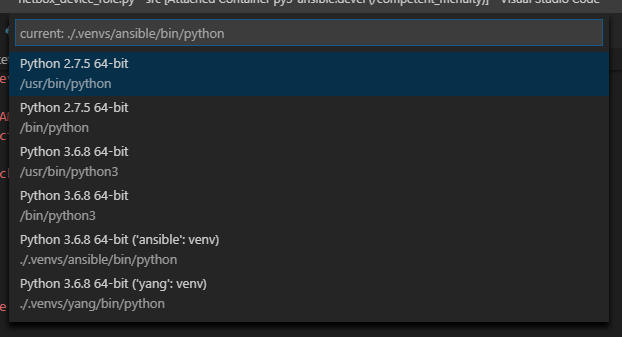
Now that I have tested the code in one virtual environment, let me test it within another. We’ll select the yang virtual environment. Click on the Python portion in the bottom left hand corner of VSCode to select a new Python interpreter

Select Interpreter
New Interpreter

Now let’s check the terminal within VSCode to validate it is using the new virtual environment

Now we can take advantage of developing natively within Windows, the benefits of using the different virtual environments to test code within, and the VSCode Python extension that helps with linting and formatting (if configured).

-Mikhail


ntc img
ntc img

Contact Us to Learn More

Share details about yourself & someone from our team will reach out to you ASAP!