Network Configuration Templating with Ansible – Part 1

Blog Detail

When discussing network automation with our customers, one of the main concerns that come up is the ability to audit their device configurations. This becomes especially important during the last quarter of the year, as many corporations are going through their yearly audit to obtain their required approvals for PCI or other compliance standards. Our solution for that is to use the Golden Configuration application for Nautobot, but it’s also entirely possible to use simple Ansible playbooks to perform the audit. This blog series will go over the essential pieces to understanding network configuration templating using Ansible, but the same process can easily be translated for use with Nautobot.

To start templating your configuration you must identify the feature that you wish to audit. Whether it be your DNS or NTP settings, it’s usually easier to start with small parts of the configuration before moving on to the more complicated parts, such as routing or interfaces. With a feature selected, you can start reviewing the device configurations to create your templates. For this article, we’ll use NTP configuration from an IOS router as the chosen feature:

ntp server 1.1.1.1 prefer
ntp server 1.0.0.1
ntp server 8.8.8.8
clock timezone GMT 0
clock summer-time CET recurring

After you’ve identified the portions of the configuration that you wish to template for the feature, the next step is to review the configuration snippet(s) and identify the variables relevant to the configuration feature. Specifically, you want to extract only the non-platform-specific variables, as the platform-specific syntax should be part of your template with the variables abstracted away for use across platforms. Using the example above, we can extract the following bits of information:

  • three NTP server hosts
    • 1.1.1.1
    • 1.0.0.1
    • 8.8.8.8
  • preferred NTP server
    • 1.1.1.1 is preferred
  • time zone and offset
    • GMT
    • 0
  • daylight saving timezone
    • CET

With these variables identified, the next step is to define a schema for these variables to be stored in. For Ansible this is typically in a YAML file as host or group vars. As YAML is limited in the types of data it can document, lists and key/value pairs typically, it’s best to design the structure around that limitation. With the example above, we’d want to have a list of the NTP servers as one item with a key noting which is preferred, the timezone with offset, and the daylight saving timezone. One potential schema would be like the below:

---
# file: group_vars/all.yml
ntp:
  servers:
    - ip: "1.1.1.1"
      prefer: true
    - ip: "1.0.0.1"
      prefer: false
    - ip: "8.8.8.8"
      prefer: false
  timezone:
    zone: "GMT"
    offset: 0
    dst: "CET"

Defining this structure is important as it will need to be flexible enough to cover data for all platforms while also being simple enough that your templates don’t become complicated. You’ll want to ensure that all other variables that are for this feature are of the same structure to ensure compatibility with the Jinja2 templates you’ll be creating in future parts of this series. It’s possible to utilize something like the Schema Enforcer framework to enable enforcement of your schemas against newly added data. This allows you a level of trust that the data provided to the templates are of the right format.

The next step, once the variables have been defined and you’ve determined a structure for them, is to understand where they belong within your network configuration hierarchy. This means that you need to understand in which circumstances these values are considered valid. Are they globally applicable to all devices or only to a particular region? This will define whether you place the variables in a device-specific variable or a group-specific one, and if in a group which group. This is especially important, as where you place the variables will define which devices inherit them and will use them when it comes time to generate configurations. For this article, we’ll assume that these are global variables and would be placed in the all group vars file. With this in mind, you’ll want to start building your inventory with those variable files. Following the Ansible Best Practices, it’s recommended to have a directory layout like so:

inventory.yml
group_vars/
    all.yml
    routers.yml
    switches.yml
host_vars/
    jcy-rtr-01.infra.ntc.com.yml
    jcy-rtr-02.infra.ntc.com.yml

This should allow for clear and quick understanding of where the variables are in relation to your network fleet. This will become increasingly important as you build out more templates and adding variables. With your inventory structure built out, you can validate that the variables are assigned to your devices as expected with the ansible-invenotry -i inventory.yml --list which will return the variables assigned to each device like so:

{
    "_meta": {
        "hostvars": {
            "jcy-rtr-01.infra.ntc.com": {
                "ntp": {
                    "servers": [
                        {
                            "ip": "1.1.1.1",
                            "prefer": true
                        },
                        {
                            "ip": "1.0.0.1",
                            "prefer": false
                        },
                        {
                            "ip": "8.8.8.8",
                            "prefer": false
                        }
                    ],
                    "timezone": {
                        "dst": "CET",
                        "offset": 0,
                        "zone": "GMT"
                    }
                }
            },
            "jcy-rtr-02.infra.ntc.com": {
                "ntp": {
                    "servers": [
                        {
                            "ip": "1.1.1.1",
                            "prefer": true
                        },
                        {
                            "ip": "1.0.0.1",
                            "prefer": false
                        },
                        {
                            "ip": "8.8.8.8",
                            "prefer": false
                        }
                    ],
                    "timezone": {
                        "dst": "CET",
                        "offset": 0,
                        "zone": "GMT"
                    }
                }
            }
        }
    },
    "all": {
        "children": [
            "routers",
            "ungrouped"
        ]
    },
    "routers": {
        "hosts": [
            "jcy-rtr-01.infra.ntc.com",
            "jcy-rtr-02.infra.ntc.com"
        ]
    }
}

Conclusion

This allows you to validate and ensure that the variables you’ve created are being assigned where you expect. In the next part of this series we’ll dive into how to craft a configuration template using the Jinja2 templating engine.

-Justin


ntc img
ntc img

Contact Us to Learn More

Share details about yourself & someone from our team will reach out to you ASAP!

Introduction to Structured Data – Part 4

Blog Detail

Through this series of blogs (123) on structured data, we’ve talked about what it is, how you’re probably using it today (possibly without realizing it), and how it can be used in automation. Today, we’ll talk about storing that data in a Source of Truth, instead of using spreadsheets.

You can easily follow along with the examples in this blog by using demo.nautobot.com or by using Nautobot Lab.

Historically, network engineers have kept records about their network in spreadsheets. This has worked well, as long as the networks were simple and small. As networks grow and the data requirements grow, spreadsheets can quickly become cumbersome to maintain. This is where a source of truth comes in. A source of truth is a database that maintains the records that you require. For instance, in the first structured data blog, David gave an example of a small network in a spreadsheet. It’s small and simple to maintain, but as soon as he wanted more relational information, that spreadsheet would be difficult to maintain. What if David wanted to keep information about interface configuration, cross-connects, circuits, providers, vlans, network prefixes, access lists, route policies, advertised networks? Some of those individual items would be easy to keep on the existing spreadsheet, but all of that information together would become a burdensome task. A source of truth simplifies the relationships of this data and its maintenance.

To demonstrate this, I’ve set up the same data from the first blog into Nautobot.

Example spreadsheet from first structured data blog. 

Structured Data Spreadsheet Example

Within Nautobot, I created a region called “North Carolina”. Then I created three sites: Headquarters, Police Department (North), and Police Department (South).

sites

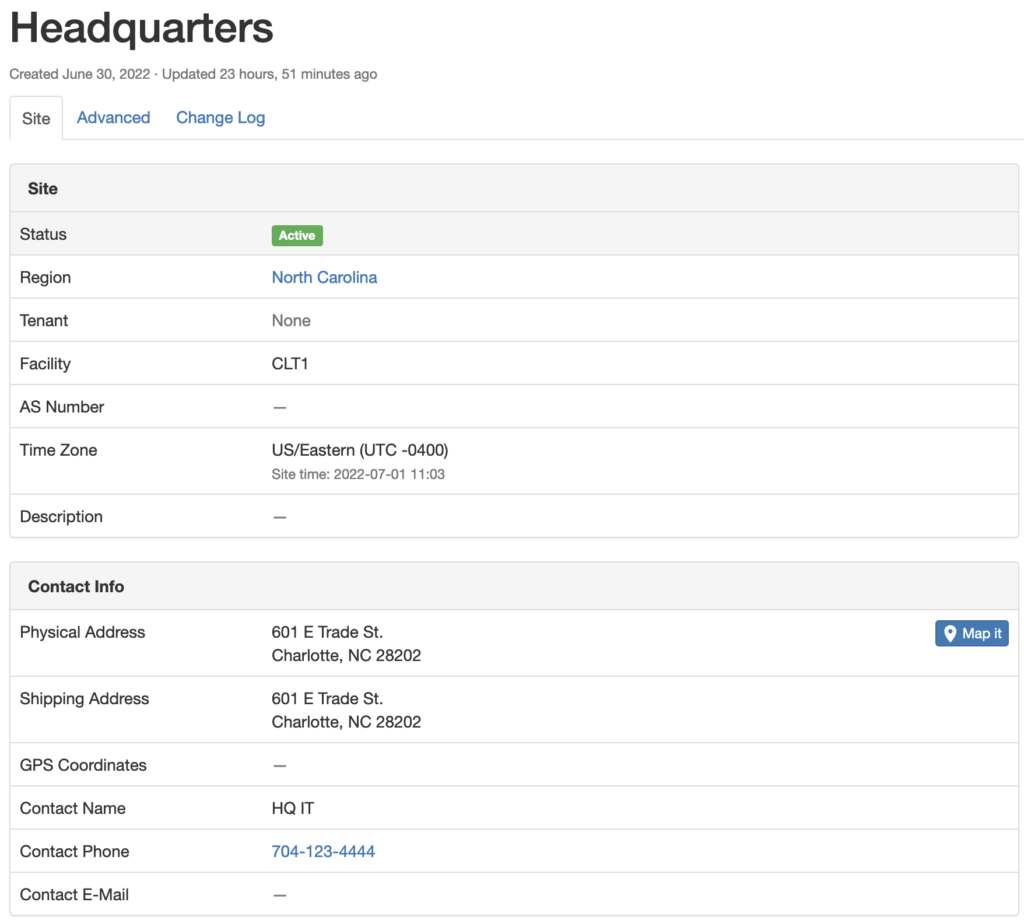
Each site has the address and contact information that was listed in the spreadsheet.

headquarters

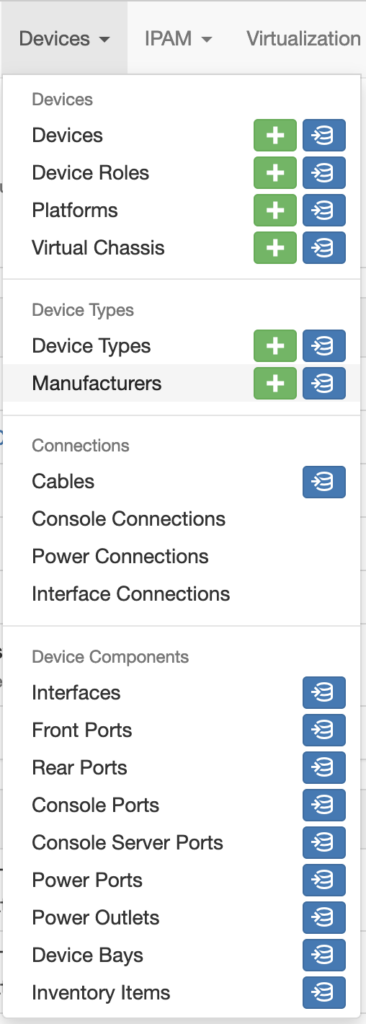
Once the sites were created, I created a manufacturer object, the device types, and the device roles.

device types
device types

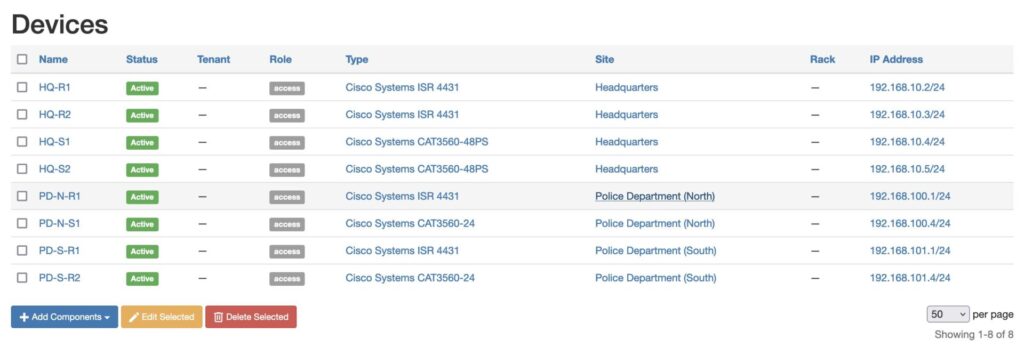
Now that all of that is entered, we’re ready to create the devices. Instead of creating the devices individually, I opted to do a bulk import by modifying the CSV file to match the fields that Nautobot would be looking for.

name,manufacturer,device_type,serial,site,device_role,status
HQ-R1,Cisco Systems,ISR 4431,KRG645782,Headquarters,access,active
HQ-R2,Cisco Systems,ISR 4431,KRG557862,Headquarters,access,active
HQ-S1,Cisco Systems,CAT3560-48PS,GRN883274,Headquarters,access,active
HQ-S2,Cisco Systems,CAT3560-48PS,GRN894532,Headquarters,access,active
PD-N-R1,Cisco Systems,ISR 4431,FOM123124,Police Department (North),access,active
PD-N-S1,Cisco Systems,CAT3560-24,GRN334213,Police Department (North),access,active
PD-S-R1,Cisco Systems,ISR 4431,FOM654231,Police Department (South),access,active
PD-S-R2,Cisco Systems,CAT3560-24,GRN888931,Police Department (South),access,active
import

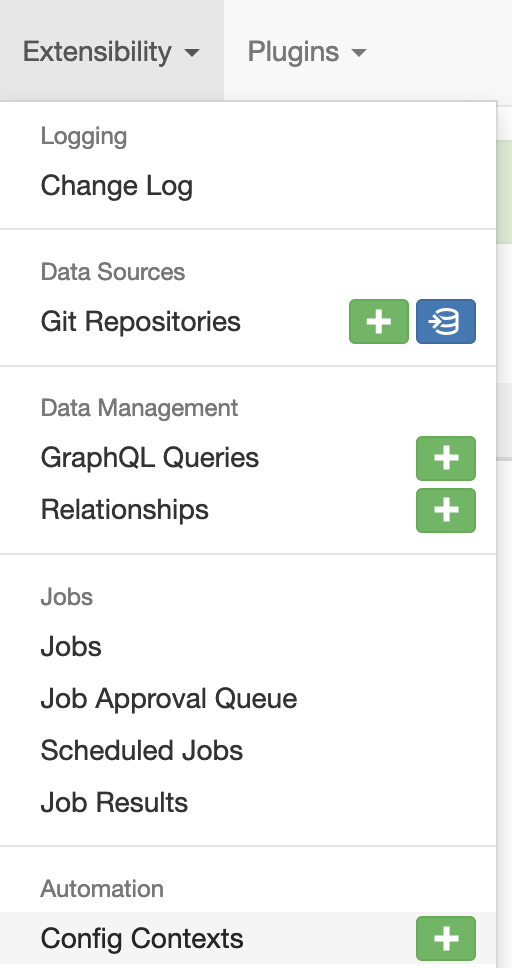
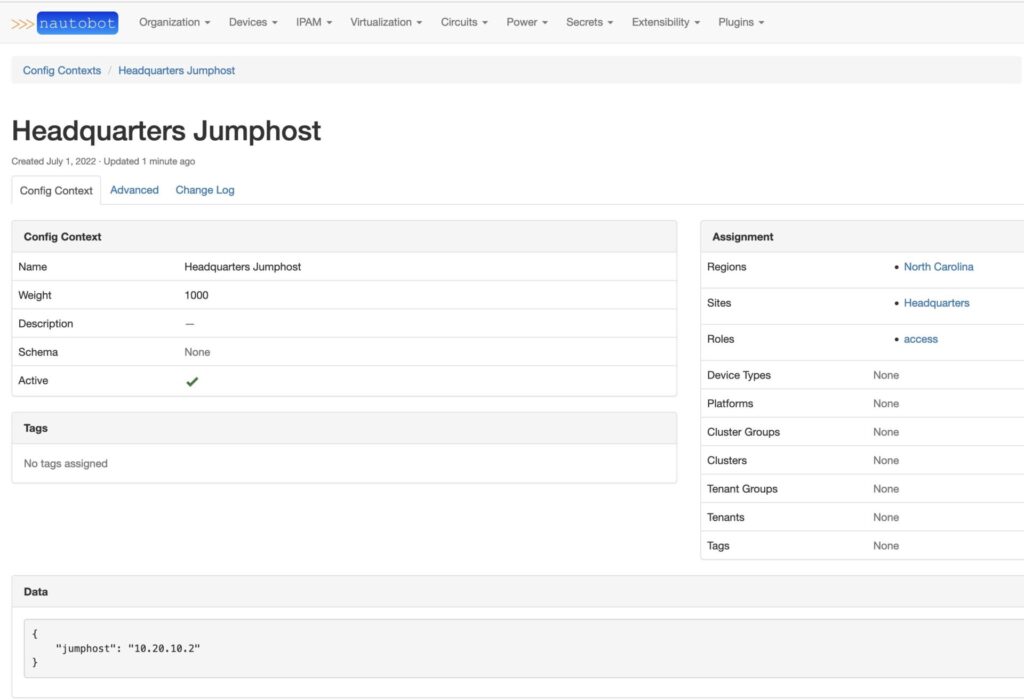
With the devices imported, the only two attributes left from the spreadsheet are the jumphost and management ip address. The jumphost attributes can be achieved by creating a config context. From the extensibility menu, select the + button next to config context.

extensibility

Within the “Add a new config context” menu, we can create config contexts that will be automatically assigned to devices that match the attributes that we assign. For example, we can assign the Regions to “North Carolina”, the Sites to “Headquarters”, and the Roles to “access”. Give the config context a name, such as “Headquarters jumphost”. The Data field accepts JSON-formatted data. Add the jumphost for the Headquarters site in the Data field.

{"jumphost": "10.20.10.2"}

Then press the “Create and Add Another” button. From here, you can add the jumphosts for the remaining sites following the same steps.

jumphosts

At this point, the config context for jumphosts will automatically be assigned to the devices. This can be checked by pulling up a device and selecting the “Config Context” tab.

Config Context

To abstract the final attribute, we also need to create interfaces to associate with the management ip address. To do this, go to a device, drop down the “+ Add Components” menu, and select interfaces.

Components

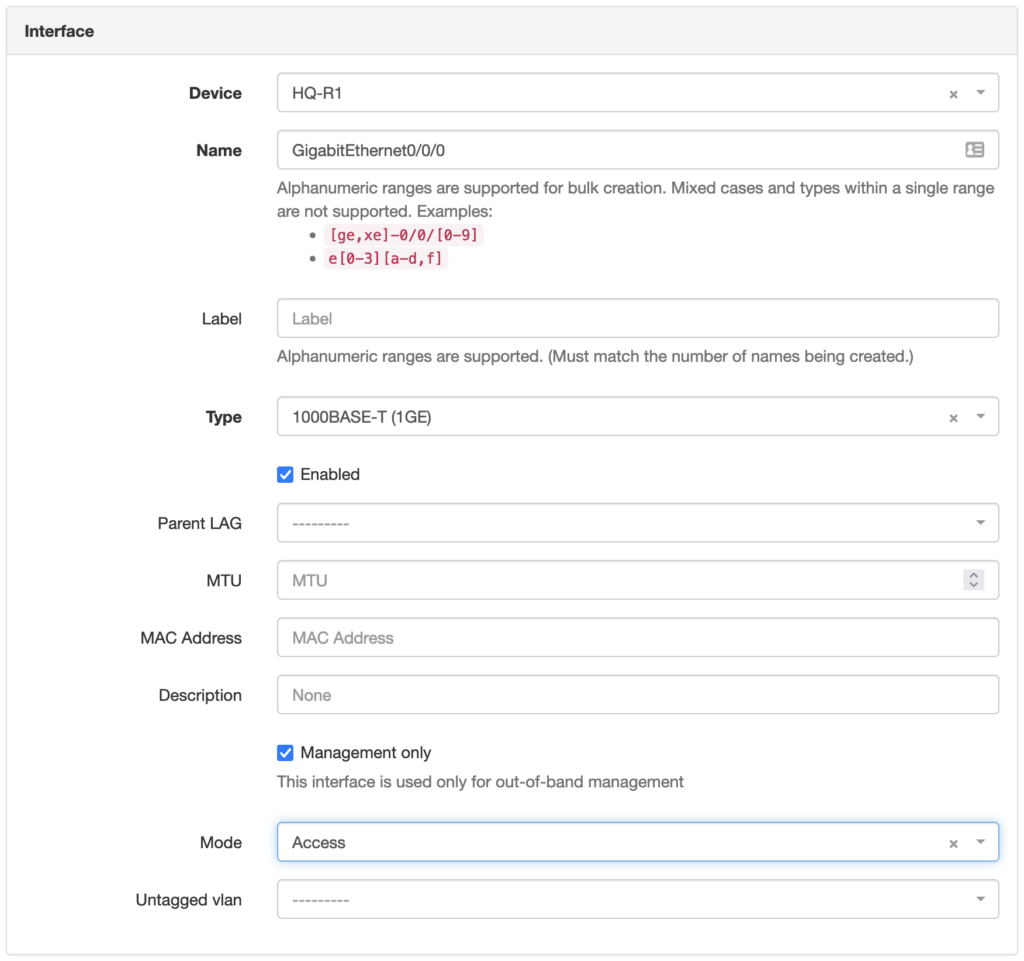
Add the name of the interface, drop down the menu and select the interface type, select the “enabled” and “management only” check boxes, select an interface mode, and press the “Create” button.

interface

At this point, you will be taken to the interfaces tab of the device page. The newly created interface will be in the list of interfaces. At this point, you can assign a management ip address to the interface by pressing the “+” button.

management

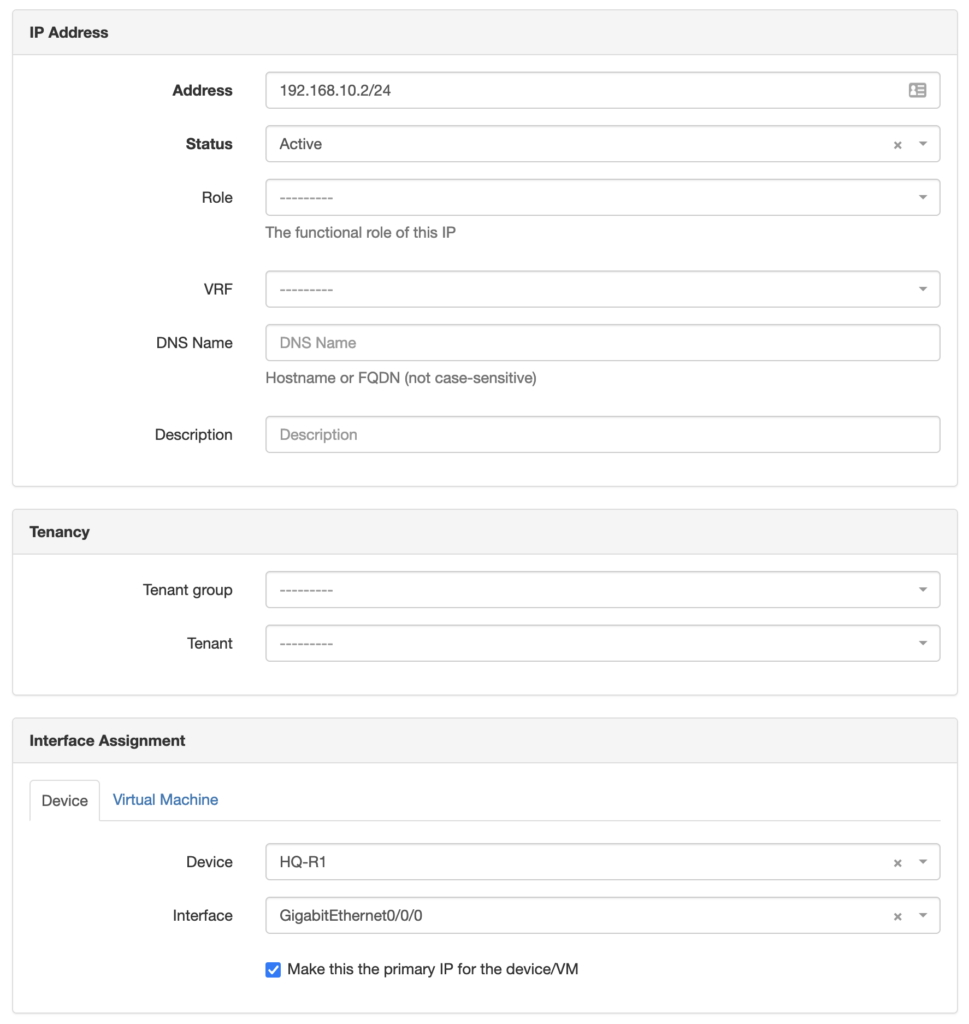
From the “Add IP Address” page, give the device a management ip address, select the status, check the “Make this the primary IP for the device/VM” checkbox, and press the “Create” button.

primary IP for the device

With that, every bit of data from the first blog spreadsheet has been captured in the source of truth. We’ve even added an extra data point by associating the management ip address with a specific interface on each device.

specific interface

With this data loaded into Nautobot, it becomes much easier to start associating other data with devices and networks. Data attributes related to routing, interfaces, access lists, route policies, and so forth can all be incorporated. Having all this data at your fingertips also creates the foundation for network automation.

network automation

Conclusion

Building and deploying networks is a data-intensive job. Using a source of truth platform, such as Nautobot, enables network engineers to define network architectures that are cohesive, consistent, and that enable automation. If you have any questions, feel free to reach out on the Network to Code Slack.

-James


ntc img
ntc img

Contact Us to Learn More

Share details about yourself & someone from our team will reach out to you ASAP!

Introduction to Structured Data – Part 3

Blog Detail

Throughout this blog series, we have been discussing the use of structured data in network automation. Part 1 began outlining the role of structured data and our working use case. Part 2 explored different dictionaries and methods used to interact with this structured data.

In this post, we’ll build from the previous two blogs by utilizing the original SNMP use case from part 1 and the CSV library in part 2. We’ll create an SNMP configuration for each device within the inventory to prep for deployment. To do so, we’ll utilize common open-source functionalities of Python and Jinja2. Let’s first explore the rationale of using these functionalities.

Jinja2 is a templating engine with consistency and layering to provide a cookie cutter approach, thereby making us not only faster and more efficient but also greatly reducing our chances for human error, such as mistyping or fat-fingering, as well as system problems such as buffer limitations, etc. This means we can now start to move away from impacting highly critical production changes to more of a “rinse-and-repeat” feel.

Jinja2 templates have been used for many years in web and application development. We’ll employ the solution to our networking use case to render SNMP device configurations. The idea behind a Jinja template is to retain the static or “unchanged” parts of the SNMP configuration and then use certain fields from our structured data to layer in details.

Step1 – Create SNMP Template

Our first step is to identify the information and the format that are needed for our SNMP configurations. In the first blog, we identified the following commands:

snmp-server location {data}
snmp-server contact {data}
snmp-server chassis-id {data}
snmp-server community {data} RO
snmp-server community {data} RW

We’ll keep the static SNMP command text required for the system we are configuring, and replace the {data} sections in each command with variable names.

This can be seen in the Jinja2 example below:

# hostname {{ DeviceName }}
snmp-server location {{ SiteName }} {{ Address}} {{ City }}, {{ State }} {{ Zip }}
snmp-server contact {{ Support }}
snmp-server chassis-id {{ SerialNumber }}
snmp-server community public RO
snmp-server community private RW

One thing to note is that the last two lines have “public” and “private” entered as static values rather than variables. For this example, we are making a decision to use a static value across all devices in our inventory rather than specifying a variable for them. It is definitely an option to replace those static values with variables if you use different SNMP strings in different parts of your network.

Step 2 – Review Device Inventory Data

We now need to consider the following questions to ensure that our structured data meets our requirements:

  1. What is our input data type? In this use case we are using CSV, though we could have used Microsoft .xls, JSON, or YAML, as Jinja is flexible.
  2. Do we have all the required fields? We need to ensure our data file contains all of the field values needed within our template. In our example, the data file meets these requirements. However, if it didn’t, we’d potentially need to add additional data files.
#Device Name,Manufacturer,Model,Serial Number,Site Name,Address,City,State,Zip,Country,Mgmt IP,Network Domain,Jump Host,Support
HQ-R1,Cisco,ISR 4431,KRG645782,Headquarters,601 E Trade St,Charlotte,NC,28202,USA,192.168.10.2,Access,10.20.5.5,HQ IT 704-123-4444
HQ-R2,Cisco,ISR 4431,KRG557862,Headquarters,601 E Trade St,Charlotte,NC,28202,USA,192.168.10.3,Access,10.20.5.5,HQ IT 704-123-4444
HQ-S1,Cisco,CAT3560-48PS,GRN883274,Headquarters,601 E Trade St,Charlotte,NC,28202,USA,192.168.10.4,Access,10.20.5.5,HQ IT 704-123-4444
HQ-S2,Cisco,CAT3560-48PS,GRN894532,Headquarters,601 E Trade St,Charlotte,NC,28202,USA,192.168.10.5,Access,10.20.5.5,HQ IT 704-123-4444
PD-N-R1,Cisco,ISR 4431,FOM123124,Police Dept (North),10430 Harris Oaks Blvd,Charlotte,NC,28269,USA,192.168.100.1,Access,10.100.5.5,N IT 704-555-1234

Because we are using a CSV file, we’ll also need to review format handling. CSVs use delimiters to help separate the different fields within your file. If not for the delimiter, we’d have one very long flat file.

Typically, a delimiter in a CSV file would be a comma, though spaces, semicolons, tabs, or pipes () could also be used. Our .csv has multiple fields that have spaces within them, such as Model, Site Name, Address, and Support. Therefore, we’ll need to employ a delimiter other than a space. For our example, a comma (,) is defined within our Python code.
print("Start")
with open(sys.argv[1], 'r') as f:
    reader = csv.reader(f, delimiter =',')
    for row in reader:
        if not row[0][0] == '#':
            templateVars = { "DeviceName" : row[0],
                "Manufacturer": row[1],
                "Model": row[2],
                "SerialNumber": row[3],
                "SiteName": row[4],
                "Address": row[5],
                "City": row[6] }

Step 3 – Pulling It All Together with Python

The Python script we’ll use will utilize standard Python libraries in addition to the Jinja2 library. The Jinja2 library will need to be installed in your environment prior to running the script. To do this you’ll need to use pip install:

pip install jinja2

Then import the following into our Python script:

import jinja2
import csv
import sys
import os

The script will be the glue between our jinja2 template containing our SNMP commands and the csv file with our device data. It will read in a line from the device inventory csv and render the data in that row against our template. Once the data is joined, we’ll create a new directory per device to place our configuration in the output. At the end, the base directory will contain a folder for each device in our inventory and the SNMP deployment script for that device.

def main():
    templateLoader = jinja2.FileSystemLoader(searchpath="./")
    templateEnv = jinja2.Environment(loader=templateLoader)
    TEMPLATE_FILE = sys.argv[2]
    template = templateEnv.get_template(TEMPLATE_FILE)
  
    dir = sys.argv[3]
    if not os.path.exists(dir):
        os.mkdir(dir)
  
    print("Start")
    with open(sys.argv[1], 'r') as f:
        reader = csv.reader(f, delimiter =',')
        for row in reader:
            if not row[0][0] == '#':
                templateVars = { "DeviceName" : row[0],
                  "Manufacturer": row[1],
                  "Model": row[2],
                  "SerialNumber": row[3],
                  "SiteName": row[4],
                  "Address": row[5],
                  "City": row[6],
                  "State": row[7],
                  "Zip": row[8],
                  "Country": row[9],
                  "MgmtIP": row[10],
                  "NetworkDomain": row[11],
                  "JumpHost": row[12],
                  "Support": row[13]
                }
                outputText = template.render(templateVars)
                filename = dir+"\\"+row[0]
                file = open(filename,'w')
                file.write(outputText)
                file.close()
                print("Create Config for: " + str(row[0]))
    print("Finish")

if len(sys.argv) < 3:
    print("missing command line syntax")
else:
    main()

Step 4 – Rendering Our SNMP Configurations

To invoke our SNMP configuration, we’ll use the following command line format with our main.py Python script, the snmp.csv device inventory data, our Jinja2 snmp-template.j2, and our base directory named configs/.

~/Python-Jinja-Blog$ 
~/Python-Jinja-Blog$ python main.py snmp.csv snmp-template.j2 configs/

When we run this command, we see statements returned from the Python script showing us the script started, created a configuration for each device in our inventory, and then completed.

~/Python-Jinja-Blog$ 
~/Python-Jinja-Blog$ python main.py snmp.csv snmp-template.j2 configs/
Start
Create Config for: HQ-R1
Create Config for: HQ-R2
Create Config for: HQ-S1
Create Config for: HQ-S2
Create Config for: PD-N-R1
Create Config for: PD-N-S1
Create Config for: PD-S-R1
Create Config for: PD-S-R2
Finish
~/Python-Jinja-Blog$ 
~/Python-Jinja-Blog$ cd configs/
~/Python-Jinja-Blog/configs$ ls
'\HQ-R1'  '\HQ-S1'  '\PD-N-R1'  '\PD-S-R1'
'\HQ-R2'  '\HQ-S2'  '\PD-N-S1'  '\PD-S-R2'
~/Python-Jinja-Blog/configs$ 

And if we then dig into the \PD-N-R1 directory and open up the configuration file, we see that the necessary data from our device inventory file was added to our Jinja2 template during the Python script run to render our SNMP configuration template for this specific device:

# hostname PD-N-R1
snmp-server location Police Dept (North) 10430 Harris Oaks Blvd Charlotte, NC 28269
snmp-server contact N IT 704-555-1234
snmp-server chassis-id FOM123124
snmp-server community public RO
snmp-server community private RW

With these output files, we can now apply commands to our device manually, or through an automated process to collect and deploy the configurations from the system.


Conclusion

To recap, using our device inventory and data formatting concepts from the previous blogs, we incorporated the Jinja2 templating engine along with Python to quickly and consistently create SNMP configurations for all 8 of our inventory devices.

Structured-Data-Jinja-Example

In our final blog for this series, we’ll continue to expand on the use case by using Nautobot as a data platform. In the meantime, feel free to reach out to us in our Slack community. We look forward to hearing from you!

-Kyle


ntc img
ntc img

Contact Us to Learn More

Share details about yourself & someone from our team will reach out to you ASAP!