Visual Studio Code (VS Code) is a free cross-platform code editor that has risen in popularity in recent years. There is a large community surrounding VS Code and contributions to it continue to increase. In this blog post, I will showcase some of the tips, tricks, settings, and extensions that can enhance VS Code. These take VS Code beyond being just a simple code editor to being a very powerful automation tool. Whether you have never heard of VS Code or if you already use it on a regular basis, I am hoping you will take something away from this post to help you become a more efficient developer. All of the extensions that I highlight are free and all of the settings can be reverted, so there is no harm in giving them a try.
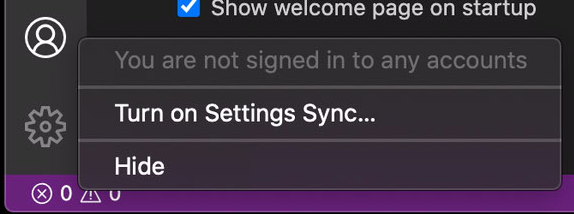
Before we start modifying settings or installing extensions, we want to enable Settings Sync so that all of our changes are automatically backed up to the cloud. This also makes it easier to have the same experience across multiple development machines. The easiest way is to click on the silhouette icon in the bottom left and choose Turn on Settings Sync…. You will need a new or existing GitHub or Microsoft account to enable this option.
Many projects these days have formatting requirements for contributing—and rightly so. When developers are first starting out, they can get frustrated when they open that first pull request only for the CI/CD pipeline to flag their code because it doesn’t meet the formatting guidelines. This situation can lead to numerous small commits to try to squash every warning or error that pops up. Keep your sanity intact by using these auto formatting tools to have VS Code format your code every time you save your file!
Go to Settings > Text Editor > Formatting and enable Format On Save. Each time you save your file it will attempt to run the code formatter for the language you are writing in. You can go one step further and have your files save automatically when you change focus or window. To enable this, go to Settings > Text Editor > Files and change Auto Save from off to the desired version. VS Code has a few default formatters, but you can install extensions for missing languages or to use a more powerful formatter.

As soon as you open any Python file in VS Code, it will suggest installing the Python extension. If you do not have the Python extension installed already, you will need to install it in order to enable auto formatting for Python files. Once you have the Python extension installed, it will attempt to format your code with autopep8 by default. If you want to use a different formatter you can select a different one by changing Settings > Extensions > Python > Formatting: Provider.

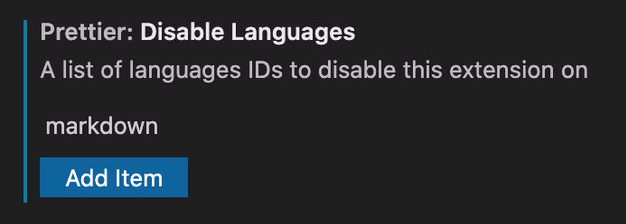
Prettier is—by their own admission—opinionated, therefore after installing this extension it will enable code formatting for many languages. I only really use Prettier specifically for JSON and YAML files, as I do not really want it mucking with my Markdown files. Luckily, it is easy to disable languages that you don’t want Prettier to change. You can control these via the settings at Settings > Extensions > Prettier > Disable Languages.
Typically when you want to work on code, you would clone down a repository to a local directory, make and commit changes, and push those changes up. The reality is that there are many reasons why you can’t always develop locally, such as:
With VS Code’s suite of Remote Development extensions you can overcome most of these challenges. We have already covered how you can use the Remote – Containers Extension previously, but here we will cover two additional Remote Development extensions briefly.
If you are on a Windows machine that is running the Windows Subsystem for Linux, and just need to change your development environment from Windows to Linux, this extension is for you. After I installed it, the extension was able to quickly find my WSL installation and let me browse to a folder to start working.
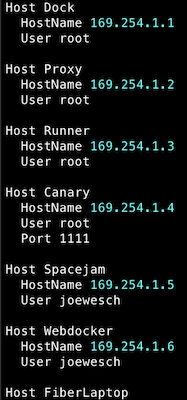
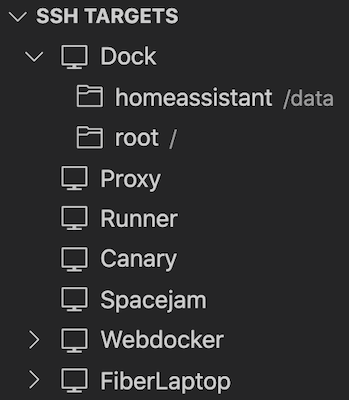
Do you have a remote machine that has all the access and dependencies you need, but all you have is SSH access? This extension is for you. This extension creates an SSH tunnel between your VS Code and your remote environment, so you can have your cake and eat it too. If you already have an SSH config file configured in the default location on your system, this extension will automatically detect that file and use it to present you a list of hosts you can connect to:
Note: Using this extension requires OpenSSH
Next I want to detail a few keyboard shortcuts, as well as some settings to change, that will hopefully help you feel more like a power user.
I have used a few IDEs and text editors, and these operations are not exclusive to VS Code, but I thought I would list a few things that you can do with VS Code that you may not have been aware of before:
(e.g., ( { [ " ')Speaking of selecting words…
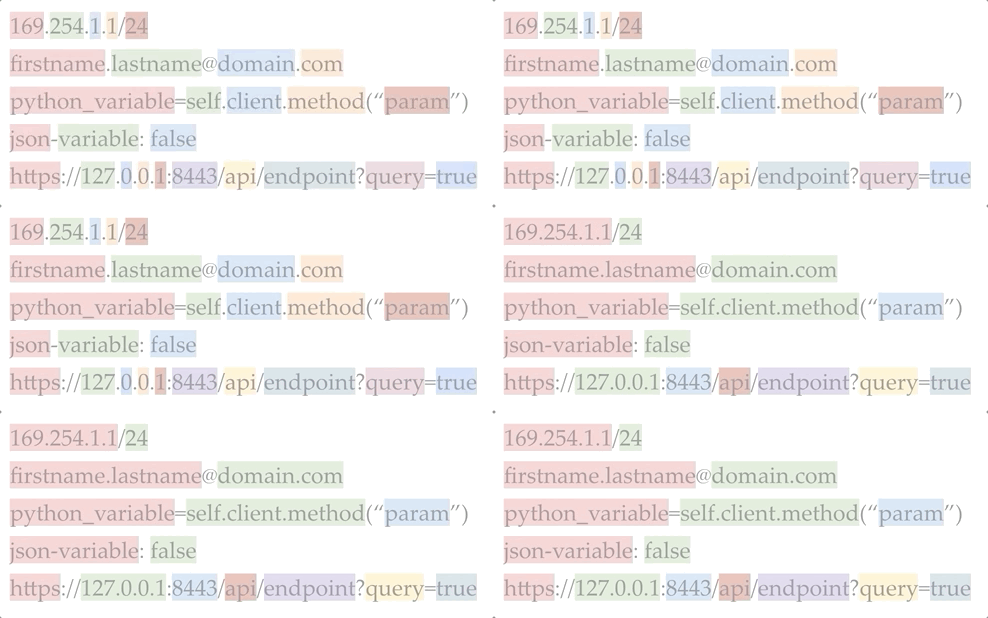
Coding languages, unlike typical spoken and written languages, use certain characters as notation, operators, or replacements. For example, you can’t have a space in a variable or function name, so you typically use underscores or camelcase names in place of a space. In networking, we use the period in IPv4 addresses; in Python a period is used to signify a method on a class; and periods are used to separate domain names into Top Level Domains (TLDs) and sub-domains. In order to be efficient at navigating my way around code, I tend to double-click to select names and words. So, I have found it is helpful to change the default word separator list in VS Code to remove the period and the hyphen. You can see the current list of characters and change it with Settings > Text Editor > Word Separators.
I don’t know about you, but I tend to keep way too many VS Code windows open with all of the separate projects I’ve worked on recently. When I wanted to switch windows, I either constantly cycled through the open windows with Cmd+` (Alt+Esc on Windows) or I went to the Window menu and looked for the project I wanted to switch to. By default VS Code titles the windows filename - project_name, which causes the list of open windows to reorder themselves constantly as I open different files in each project. Finding the right window was like finding a needle in a haystack sometimes. Thankfully, this issue can be solved as well in the settings. I went to Settings > Window > Title and changed it from ${activeEditorShort}${separator}${rootName} to ${rootName}${separator}${activeEditorShort}. There are plenty of additional variables to choose from if you want to customize the titles even further.
| Before | After |
|---|---|
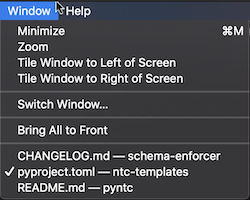 | 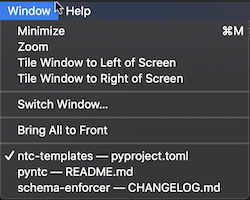 |
Next I want to show you some extensions that augment and enhance coding with certain file types. These can help you find and deal with syntax issues.
I already covered the standard Python extension above, but there are additional extensions that go even further to help you with coding in Python.
This extension uses machine learning to add context-sensitive suggestions to your code as you type. For example, it will detect that you are typing a variable that was just defined, and suggest it for auto completion when you start typing it again. It can also detect when you use the period to signify a class method, and bring up the methods for that class (as long as it can find the reference). It can also display context-sensitive docstring information as you are adding parameters into a call.
This extension adds a few helpful items like syntax highlighting, type checking, and parameter suggestions, to name a few. It is also compatible with the previously mentioned IntelliCode.
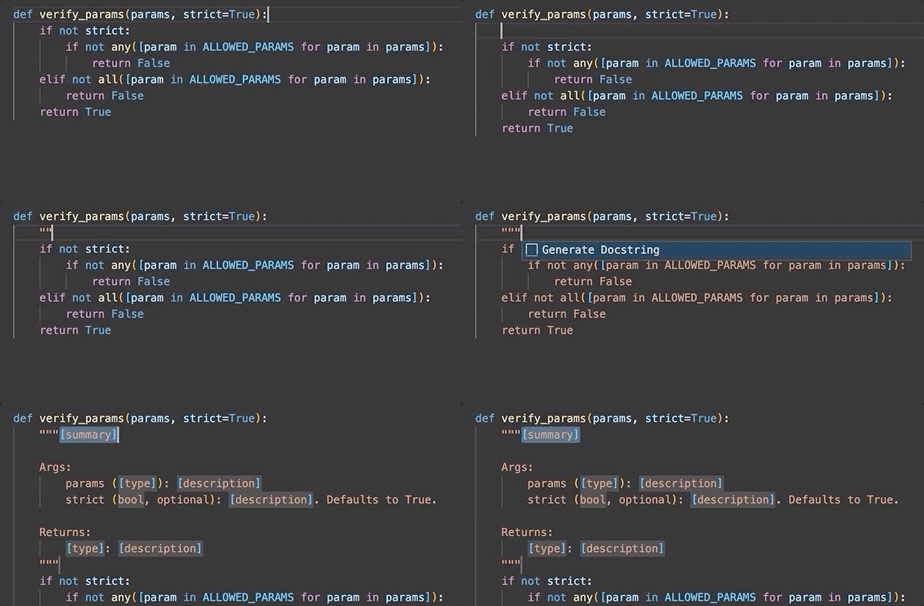
This handy extension takes your parameters and the return value from your code, and creates a template for you automatically after you type the triple quote to start your docstring. Once the template is created, the first item to edit will be selected and you can start typing. After that, you can use the Tab and Shift+Tab keys to navigate around the remaining sections to edit.
This is another extension that will be automatically suggested by VS Code to install if you open either a Dockerfile or a docker-compose.yml file. It has many features for interacting with Docker and containers, but I definitely recommend this extension for the autocomplete and context-sensitive help for both file types at the very least.
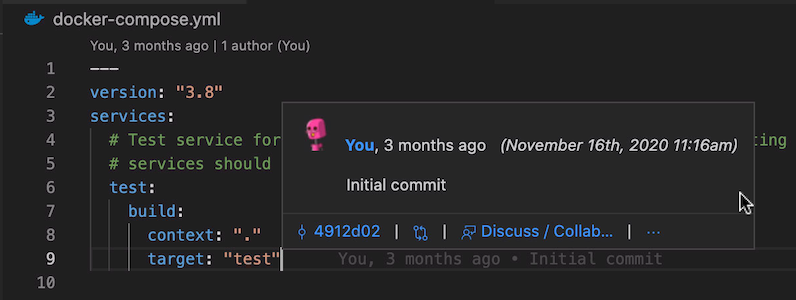
VS Code already works with git repositories by default, but this extension adds additional visual information. It can help show you the details of when a line was last changed—like git blame in-line or more details via a “hover” popup—as well as let you walk backwards through commits of a file. I found that using it with the Remote – SSH extension above caused the information pop up to lag a bit, but thankfully this extension has integrated many of its options into the VS Code settings interface, so they were easy to disable.
This last section will be dedicated to extensions that help the entity between the keyboard and the chair (hint, that’s you!). Now that you have become an expert at VS Code, you are starting to realize how much everything starts running together, and many things look the same. These extensions hopefully can help you visually find errors in your code before you make them.
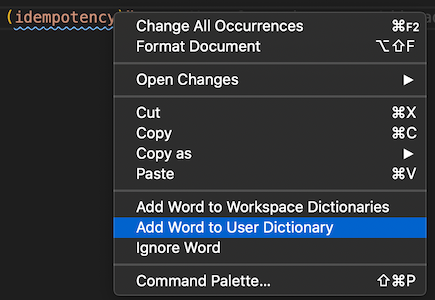
I can’t live without spell check on text, emails, or even blog posts, so why would I live without it when I code? For anything that is not auto-corrected or auto-completed by an extension you’ve installed, it can be handy to get a visual indication that a word might be misspelled. Words can be easily added to the dictionary via the right-click context menu, as well as removed via the settings. This extension keeps two separate dictionaries for new words—one for your user settings and another just for the current workspace—so you can choose the extent certain words are ignored.
This is just a simple extension that color coordinates your parentheses and brackets for a visual indication of which opening bracket matches up with which closing bracket.

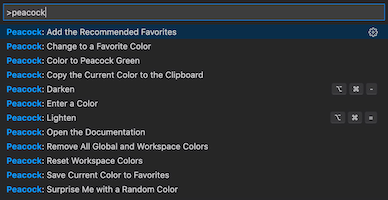
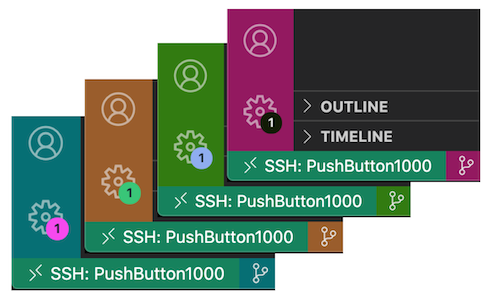
In addition to changing the Window Title as I showed you before, this extension changes the colors on the left and bottom edge of your window to help you quickly identify which window you are looking at. After installing the extension, you can bring up the menu with Cmd+Shift+P (Ctrl+Shift+P on Windows) and searching for “peacock”. From there, you can either select the option to choose a color or just have it randomly pick a color. Once you find a color you like, you can lighten or darken it depending on your visual style, as well as save it to your favorites to use again in the future.
I hope I’ve given you some helpful tools to get you started with using and extending VS Code. I feel like I have barely scratched the surface, and there are definitely a lot more extensions you can explore and install. Is there an extension that you just can’t live without and tell everyone they have to try? If so, let us know in the comments.
-Joe
Share details about yourself & someone from our team will reach out to you ASAP!